


About
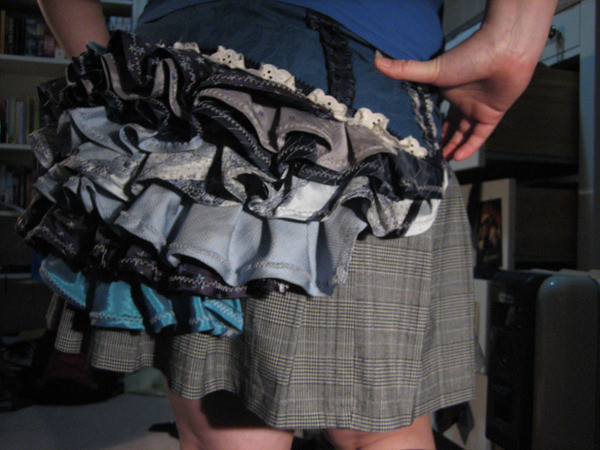
Burlesque Cabaret Ruffles
The idea and design is heavily based on Wandlung's ruffle bustles: http://www.etsy.com/shop.php?user_id=5868512
This version is mostly unlined and actually asymmeterical because I stuffed up the placement of the band with the ruffles, but it looks fine if you don't inspect it too closely. It also contains a not-so-hidden bum bag pocket.
Tags
-
 rhiannonfaun favorited Ruffle Bustle
02 Dec 16:10
rhiannonfaun favorited Ruffle Bustle
02 Dec 16:10
-
 LadyBreyWolf favorited Ruffle Bustle
21 Jul 22:17
LadyBreyWolf favorited Ruffle Bustle
21 Jul 22:17
-
 KiyoeLunet favorited Ruffle Bustle
05 Jun 06:03
KiyoeLunet favorited Ruffle Bustle
05 Jun 06:03
-
 Amara Ann favorited Ruffle Bustle
30 Apr 19:35
Amara Ann favorited Ruffle Bustle
30 Apr 19:35
-
 Melanie P. favorited Ruffle Bustle
13 Mar 00:18
Melanie P. favorited Ruffle Bustle
13 Mar 00:18
-
 FrankieStein favorited Ruffle Bustle
28 Oct 20:45
FrankieStein favorited Ruffle Bustle
28 Oct 20:45
-
 clarisse.cramer favorited Ruffle Bustle
02 Oct 01:56
clarisse.cramer favorited Ruffle Bustle
02 Oct 01:56
-
 Laura P. favorited Ruffle Bustle
13 Apr 05:42
Laura P. favorited Ruffle Bustle
13 Apr 05:42
-
 jessica.cresswell.71 added Ruffle Bustle to Fashionista
28 Mar 00:30
jessica.cresswell.71 added Ruffle Bustle to Fashionista
28 Mar 00:30
-
 elarablair favorited Ruffle Bustle
23 Feb 21:47
elarablair favorited Ruffle Bustle
23 Feb 21:47
You Will Need
-
Step 1
Draw approx pattern on newspaper (fold it in half to make sure it's symmetrical). Cut it out, measure it against your body, alter it as needed. Cut out three different pieces - the final product, the semi circle for the ruffles and the waist band.
-
Step 2
Buy a couple of ties. Unpick them for the material and iron. Hem or serge seams. Pleat, ruffle, sew.
-
Step 3
Cut out semi-circle and pin on ruffles to figure out placement.
(3.5 Optional step: cut out a second semi-circle, sew it together with the first semi-circle inside out - but on the round edge. Cut out a rectangle and add a zip/button or nothing for a pocket :) )
-
Step 4
Sew on ruffles. I started from the bottom because I thought it'd be easier.
(4.5 Sew close the top of the two semi-circles.)
-
Step 5
Cut out band. Pin and measure against ruffles to ensure that it covers seams and the shape is actually how you want. Alter if needed.
-
Step 6
Add ruffles, ribbons and whatever you want to the band.
-
Step 7
Hem or serge edges.
-
Step 8
Pin and attach band to semi-circle, covering with ribbon as you go to cover up the fact you attached ruffles onto the middle part before you hemmed and now the edge looks really messy.
-
Step 9
Puzzle over how to make a closure at the front. Get lazy and just use the leftover ribbon to tie.
(EDIT - I eventually sewed some eye and hook closures over the front)
-
Step 10
Be the envy of your friends!
Comments

