About
This is a great cold-connection technique for joining materials together.
This is a great cold-connection technique for joining materials together. The piece here shows the method being applied to sea plastic, but it is equally effective used on metal, wood, plastic and all sorts of found materials in a decorative, edgy kind of way. It helps to create a great look for quirky brooches, focal pieces for cuffs and statement necklaces like the one shown here.
-
 Sandy B. added Riveting to jewelry Creations
28 Jun 03:56
Sandy B. added Riveting to jewelry Creations
28 Jun 03:56
-
Sandy B. favorited Riveting
28 Jun 03:55
-
 gareth m. favorited Riveting
28 Apr 20:44
gareth m. favorited Riveting
28 Apr 20:44
-
 Lotusburger favorited Riveting
04 Jan 14:49
Lotusburger favorited Riveting
04 Jan 14:49
-
 Casey C. favorited Riveting
23 Aug 20:36
Casey C. favorited Riveting
23 Aug 20:36
-
 Franchesca Angelou d. favorited Riveting
29 Jul 06:29
Franchesca Angelou d. favorited Riveting
29 Jul 06:29
-
 Jaybird favorited Riveting
28 Jul 18:20
Jaybird favorited Riveting
28 Jul 18:20
-
 Meaghan N. favorited Riveting
27 Jul 03:33
Meaghan N. favorited Riveting
27 Jul 03:33
-
Alissa B. favorited Riveting
26 Jul 19:56
-
 Step 1
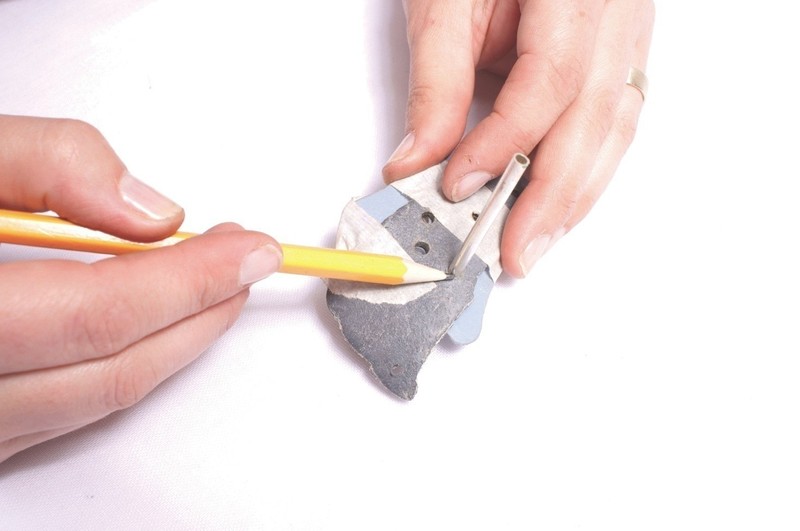
Tape two or more pieces of plastic together using masking tape, and use a pencil to mark a number of riveting points. Carefully drill through all layers of the taped plastic, using the same diameter drill bit as your tubing.
-
 Step 2
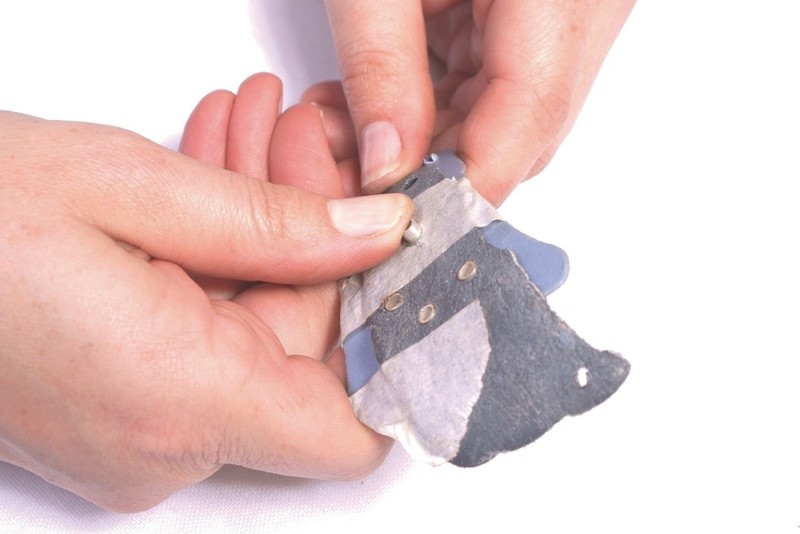
Slot the silver tubing into one of the drilled holes, so that it goes right through from front to back. Use the pencil to measure the point on the tubing, at which you need to saw it. ?This mark needs to sit a little bit higher than the surface of the plastic.
-
 Step 3
Carefully cut the tubing to this length using a hacksaw. Measure the tubing for subsequent holes in the same way, or transfer the measurement from the first piece using a ruler. Insert one piece of cut tubing into each of the holes.
-
 Step 4
Make sure that each piece of tubing goes through all the layers of taped plastic. They may slot into place easily by hand. If not, place the taped plastic on to a metal plate and use a hammer to tap the tubing gently.
-
 Step 5
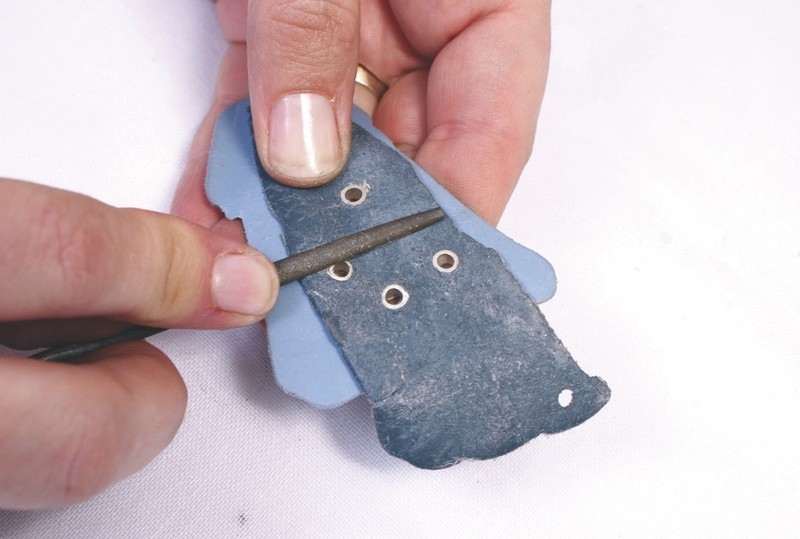
Slot the large nail into a piece of silver tubing (the nail should be only slightly larger than the tubing in diameter). Tap the nail very gently with the hammer, so that the edges of the tubing splay out a little.
-
 Step 6
Repeat this process for all the tubing, then turn the whole piece of plastic over, keeping it on the metal plate. Continue to tap each piece of silver tubing gently. You want to flatten the tubing out slightly so that it doesn’t move about in the hole.
-
 Step 7
Don’t rush the hammering process or apply too much pressure, as the plastic can be brittle and might easily split or crack. Once the hammering is complete, use a needle file to file the metal tubing on both sides of the plastic for a smooth finish.
-
 Step 8
For a more ‘punk’ look, you can thread lengths of fine silver chain in and out of the rivets in a haphazard fashion. To secure the ends of the chain lengths, dab the back of the riveted sea plastic with a little blob of superglue. Allow to dry thoroughly.