About
Journal, Ornament, Doctor Who
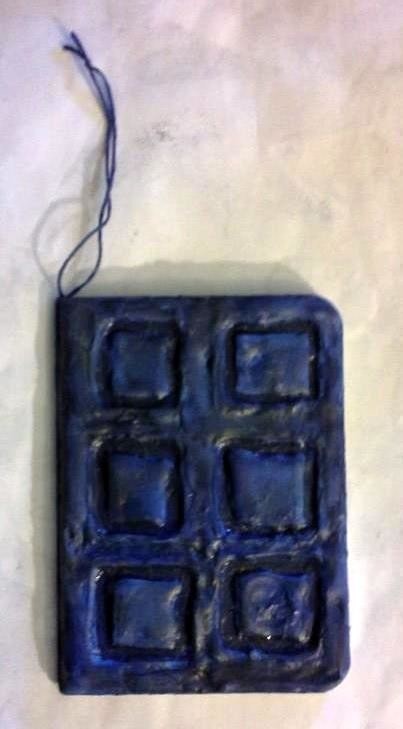
I made River Songs Journal using a Mini Composition but this project could easily be done on a larger scale.
Tags
-
 Jennifer R. favorited River's Journal Ornament
15 Mar 22:19
Jennifer R. favorited River's Journal Ornament
15 Mar 22:19
-
 Vienna A. added River's Journal Ornament to Craft ideas....
23 Feb 21:14
Vienna A. added River's Journal Ornament to Craft ideas....
23 Feb 21:14
-
Vienna A. favorited River's Journal Ornament
23 Feb 21:14
-
 Penny F. added River's Journal Ornament to TO MAKE!
12 Feb 01:00
Penny F. added River's Journal Ornament to TO MAKE!
12 Feb 01:00
-
 Crafterella featured River's Journal Ornament
26 Jan 13:09
Crafterella featured River's Journal Ornament
26 Jan 13:09
-
 Tilda favorited River's Journal Ornament
07 Jan 07:34
Tilda favorited River's Journal Ornament
07 Jan 07:34
-
 dippydiscoball favorited River's Journal Ornament
06 Jan 05:40
dippydiscoball favorited River's Journal Ornament
06 Jan 05:40
-
 niny512 published her project River's Journal Ornament
03 Jan 20:23
niny512 published her project River's Journal Ornament
03 Jan 20:23
-
 Step 1
I started this project by sealing all the pages together with Mod Podge so that when the project is finished it will be a closed book, do not glue the covers to the pages just yet. After the Mod Podge dried I painting the Mini Comp Book a light blue color. After the paint dried I used a hot glue gun to make six squares on the front cover.
-
 Step 2
I added a coat of blue paint (a slightly lighter shade then the first coat) then I used a towel to wipe off some of the excess letting the color below show through.
-
 Step 3
I used my glue gun again to fill in the rest of the front cover, I made smaller squares (filled in) inside the squares I had already made making sure to leave a gap between the squares. I also filled in everything else around the larger squares. Make sure it's cooled before you touch the glue.
-
 Step 4
I decided that I wanted the page to not be so smooth and I also wanted to mask the shininess that the hot glue left. I applied a layer of Mod Podge to the cover.
-
 Step 5
I applied some white tissue paper and made sure it wasn't not smooth. I made wrinkles in the paper and removed bits of the paper as well.
-
 Step 6
I also covered the back of the journal with tissue paper because I really liked the imperfect look. Make sure you really let the Mod Podge dry.
-
 Step 7
After the piece was good and dry I painted it with a light blue.
-
 Step 8
I then applied a layer of a darker blue and wiped away some of the paint so that the lighter paint shows through in areas.
-
 Step 9
I tied a piece of embroidery floss around the whole journal then made a loop on top so I can hang it in the tree. Next I glued the covers to the pages so that the book stays closed.
-
 Step 10
I decided to add some really dark blue (almost black) and gold as well. I wiped off a lot of these two colors so that they aren't taking over the other colors. This is just to add some age to it.
-
 Step 11
After all the paint dried I hung it in my tree. The project is a bit time consuming but it is worth it. And if you want to make this an actual journal you only need to skip three steps...
1) Don't glue the pages together.
2) Don't add the embroidery floss.
3) Don't glue the covers to the pages.
You will probably want to paint the insides of the covers as well.