


About
Swallow your doubt- turn it inside out!
I searched for months for the best corset design, and this was the best for me. i adapted the historical design from Elizabethan Costume where you can actually enter your dimensions and a corset pattern will be generated for your size! However, I want the corset for costume and comfort (I have been in a few and if a corset is ill fitting it can mean back pain, and breast pain all day), and i have made some alterations. Also, as great as the generater site is, I like to see pictures of it in action :)
there are a lot of steps here- I was really breaking down all the parts for simple understanding-
Tags
-
 Luv2Crossdress added Reversible Corset to Panties, Lingerie, Bathing Suits
27 May 15:31
Luv2Crossdress added Reversible Corset to Panties, Lingerie, Bathing Suits
27 May 15:31
-
Luv2Crossdress favorited Reversible Corset
27 May 15:31
-
Victoria L. favorited Reversible Corset
01 Jan 09:12
-
 jaisa.riley favorited Reversible Corset
18 Aug 19:00
jaisa.riley favorited Reversible Corset
18 Aug 19:00
-
 Markee R. added Reversible Corset to Bettie Page
18 Jun 12:25
Markee R. added Reversible Corset to Bettie Page
18 Jun 12:25
-
 pandanomz added Reversible Corset to my list
08 Sep 19:58
pandanomz added Reversible Corset to my list
08 Sep 19:58
-
 Crafterella added Reversible Corset to Dita Von Teese
22 Jun 13:31
Crafterella added Reversible Corset to Dita Von Teese
22 Jun 13:31
-
Crafterella added Reversible Corset to Catwoman
19 May 11:49
-
 mountainlove added Reversible Corset to corset projects
06 Feb 19:07
mountainlove added Reversible Corset to corset projects
06 Feb 19:07
-
 TARA R. added Reversible Corset to dresses and more
06 Jan 01:47
TARA R. added Reversible Corset to dresses and more
06 Jan 01:47
-
 Step 1
here is the pattern i drew on newsprint from design on Elizabethan Costume. You can see where I extended the side panels for a longer corset. draw the boning grooves wherever you wish, I was following her pattern to create that flattened bossum look :)
-
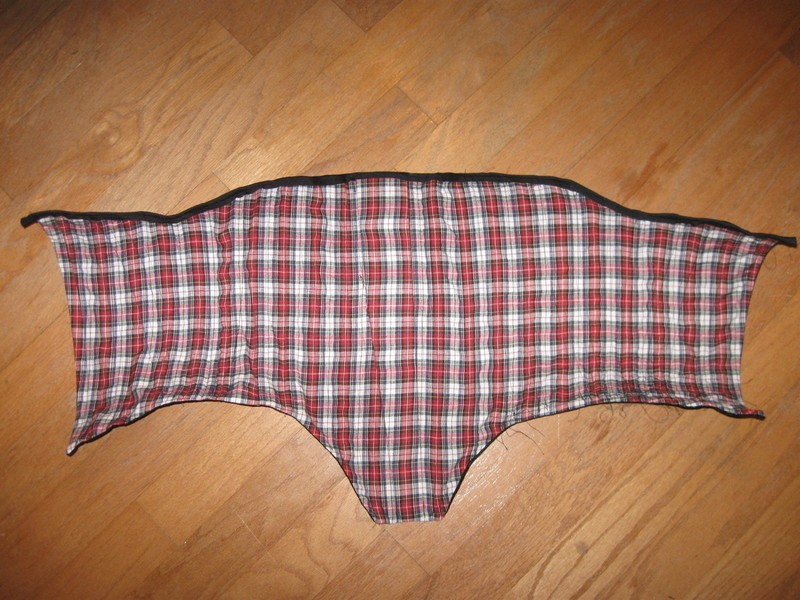
 Step 2
cutting fabric....ok the plaid was just left over from another project, the black is faux lizard skin- i do not wear leather but wanted the leather look for renfaire ect. this is way less than a yard, so i was thinking of making it a fuller body corset, or using that little left over curved part as a funny tool belt. scraps can really bring out creativity!
-
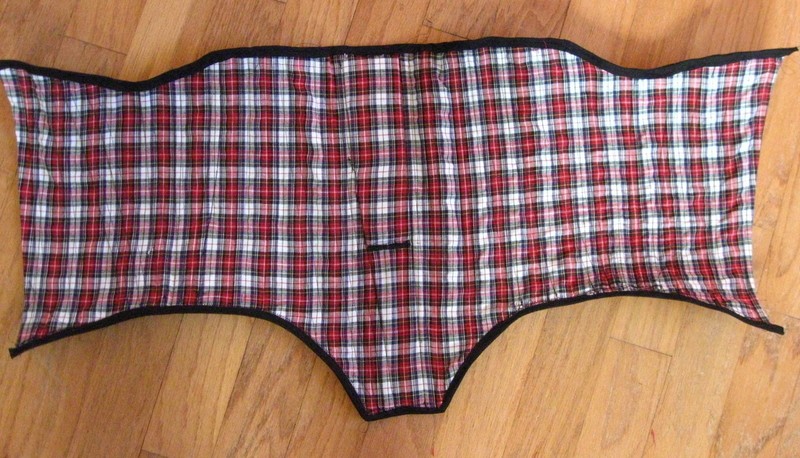
 Step 3
stitch right sides together....it gets more interesting really soon. leave yourself a lil hole to pull it through and press it flat, so the seams are even and neat.
-
 Step 4
ok break open the first pack of boning, and grab your chalk
-
 Step 5
mark where the channels will be for boning, a few at a time. it will rub off so just about 3 at a time i'd say. now you can go ahead and sew the channels to slip the boning into. i find its never as easy as slippinng it in lol, even after careful measurement. i just sew one side and then fit the cut boning into the garmet, between the two 'pockets' of fabric, and sew up the other side. like the linked site says, sew all channels from top to bottom or vice versa...one direction. and because the boning is wrapped in fabric you can sew through the fabric. you can even sew through boning- you will when you bind off edges later. i feel like this locks it in place well. its poly plastic, wont hurt machine, but you will need a new needle before starting another project!
-
 Step 6
one side done. cool looks like batwings
-
 Step 7
pin down the bias. i used single fold, whatever you like. i straight stitched one side (plaid is least important to me but both should look neat when finished) then flip it and zig zag other side
-
 Step 8
and got this. add bias to bottom edge. you can sew over boning.
-
 Step 9
realized i didnt like the longer busk, didnt allow cinch at the waist, so i took it out and cut it. for the busk- the center larger boning- i used chip board. when i sewed its channel, i left a sort of pocket so i can take it in and out ect for washing. you could find a lot of stuff to use for a busk, or purchase one, i like to use what i have. this could be a fantastic example of my dedication to the enviorment and recycling, or a testimony to my excitement to finish a project, start before i have everything and realization i am waaay to lazy to run out and get it later.
a bigger busk creates a more flattened bust line. some corsets have no busk...i like them for bust support, i am just in the "b" range, but i find the support relieves pressure on my back. -
 Step 10
Finished bias, with a zig zag to hold up new shorter busk pocket
-
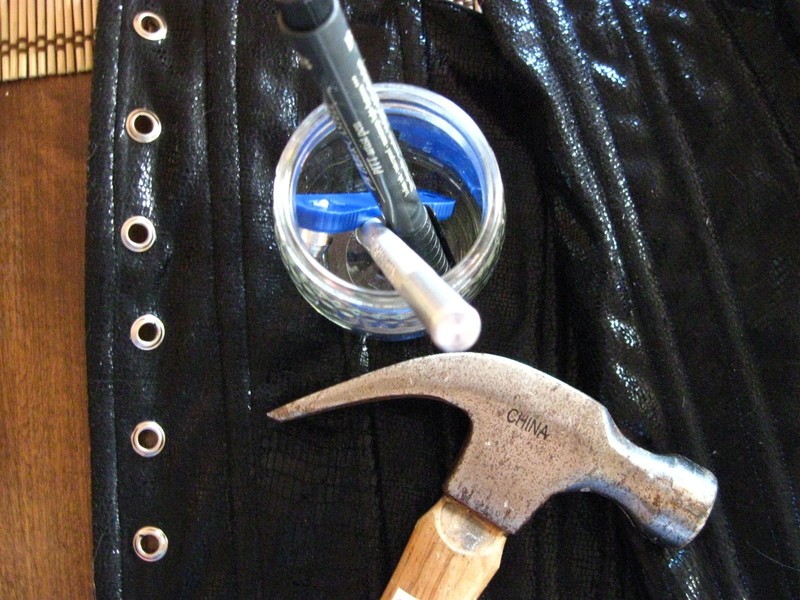
 Step 11
Grommets for lacing. Hammer out your feelings, not too hard or you will misphape the grommet- full grommet directions are on the pack. You can have a lot of fun with fancy grommets from the scrapbooking areas- be sure they have a large enough eye and can handle the stress of lacing- some of them are just for pretty papers :)
-
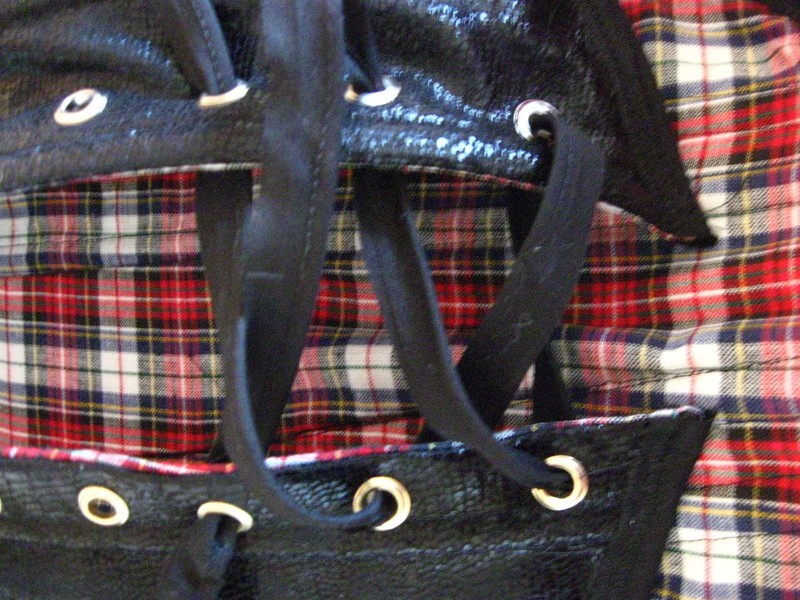
 Step 12
lace it uo! you may need help...i lace it loose, pull it on and then after tightening i twist it around. i always feel like 'are you there God, its me Margret' when i do this lol
of course many just lace in front under the bust, over or under your clothes!
i love corsets- they are cool and fashionable, and really really supportive! I know women who complain about the days when the 'were forced' to wear them ectect. I dont see it as bondage, but as support. I really hate todays brasseries lol- I am not that large, and yet I am bulging out of them in weird lumpy spots and despite being fitted at a fancy bra shop, have never found a cup I like that was combined with the right straps. I dislike straps as well. I think that corsets have gotten a bad rap :) There is a really full explanation about why on the Elizabethan site that I liked as well.
-
 Step 13
This will not happen to you! lol-todays materials are very different that once they were :)
Also this pattern is not a huge waist cincher...if you go by the measurements from the Elizabethan site which are your CORRECT measurement. To get that extreme cinch at the waist your going to have to subtract your measurements


Comments


