


About
achieve a retro/mod look with these easy-to-make earrings from scrap materials!
These earrings are really cheap and easy. With the liberty to choose any patterns or image for your earrings, you can make various styles of earrings!
Choose geometric patterns for mod earrings and even cartoons for cute earrings!
Tags
-
 Linda R. favorited Retro/Mod Earrings
25 Feb 19:50
Linda R. favorited Retro/Mod Earrings
25 Feb 19:50
-
 Xfluffy_unitatoX favorited Retro/Mod Earrings
17 Nov 03:21
Xfluffy_unitatoX favorited Retro/Mod Earrings
17 Nov 03:21
-
 Antonia F. favorited Retro/Mod Earrings
15 Apr 13:10
Antonia F. favorited Retro/Mod Earrings
15 Apr 13:10
-
 Jacqulene C. favorited Retro/Mod Earrings
05 Aug 18:06
Jacqulene C. favorited Retro/Mod Earrings
05 Aug 18:06
-
 Charlotte H. favorited Retro/Mod Earrings
29 Jun 11:20
Charlotte H. favorited Retro/Mod Earrings
29 Jun 11:20
-
 Anna V. added Retro/Mod Earrings to Wire
07 Jun 00:12
Anna V. added Retro/Mod Earrings to Wire
07 Jun 00:12
-
 njsnyder62 favorited Retro/Mod Earrings
13 Feb 10:43
njsnyder62 favorited Retro/Mod Earrings
13 Feb 10:43
-
 jessica.boulanger.10 favorited Retro/Mod Earrings
07 Feb 02:32
jessica.boulanger.10 favorited Retro/Mod Earrings
07 Feb 02:32
-
 cristinakilljoyway favorited Retro/Mod Earrings
31 Dec 15:03
cristinakilljoyway favorited Retro/Mod Earrings
31 Dec 15:03
-
kathleen c. favorited Retro/Mod Earrings
22 Aug 01:01
-
 Step 1
Cut the 2 edges of the postcard to get 2 identical scalene triangle. (I felt that scalene triangles will look more chic as earrings compared to isosceles and equilateral triangles.)
-
 Step 2
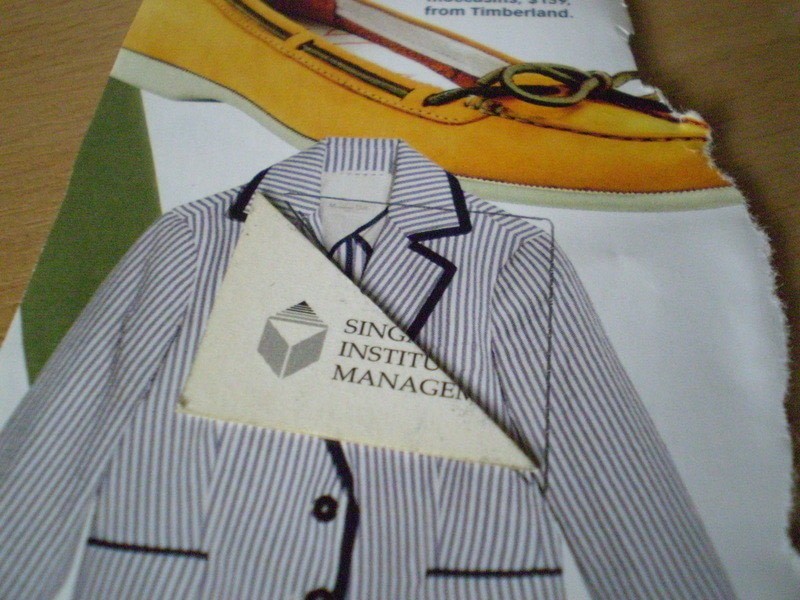
Choose a picture from the magazine that will work great as a graphic for your mod earrings. Geometric patterns and neon colours work best.
-
 Step 3
Place your triangle over the design and trace using a pencil.
-
 Step 4
Flip the triangle over. This step is very important. If you use the same side of the triangle to trace the design, you will find that the pieces you cut from the magazine cannot fit one of the sides of your triangle!
-
 Step 5
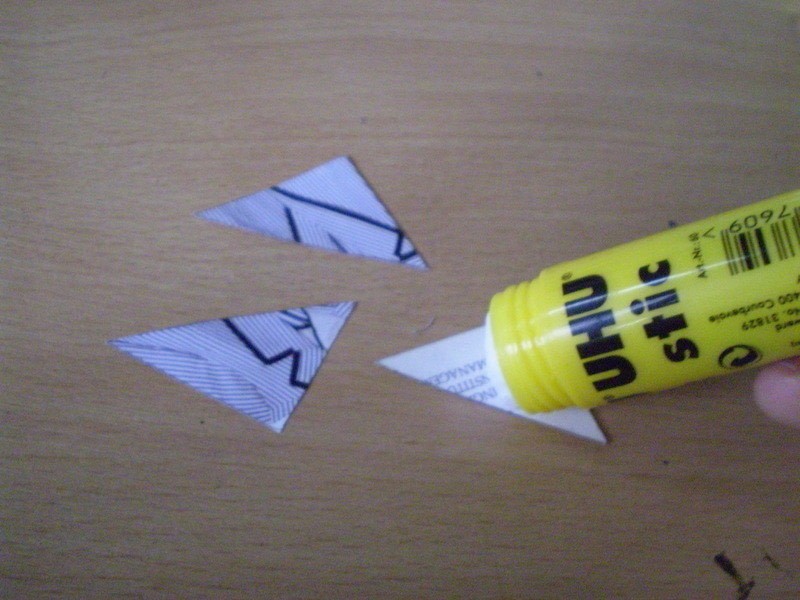
Cut along the lines that you have traced, then glue the pieces onto the respective sides of the postcard triangle.
Do the same for your other postcard triangle.
-
 Step 6
Apply clear nail varnish evenly on both sides of the triangles.
-
 Step 7
When the nail varnish has fully dried, snip a little from one of the corners of the triangle. This creates a flat end for the triangles to hang freely from.
You can choose any corner to snip from. Do try snipping the different corners as they all yield different looks!
-
 Step 8
With the help of a push pin, poke a hole near the snipped edge.
Do choose a larger push pin to ensure that your round rings can go through the hole created.
The hole should not be too near the end of the triangle.
-
 Step 9
When the push pin is pushed through, give the pins a good twist for a more prominent hole.
-
 Step 10
Attach the round rings and the .
Make sure that the round part of the hook is aligned to the same side as the right angle of the triangle.
This ensures that the longest side of the triangle faces your cheek.
This part will be different if you have chosen to pierce a hole through a different edge.
-
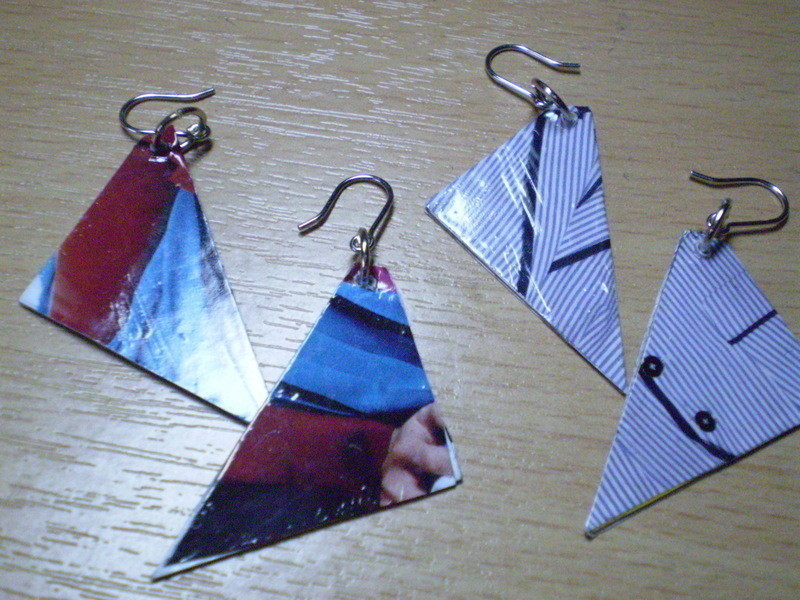
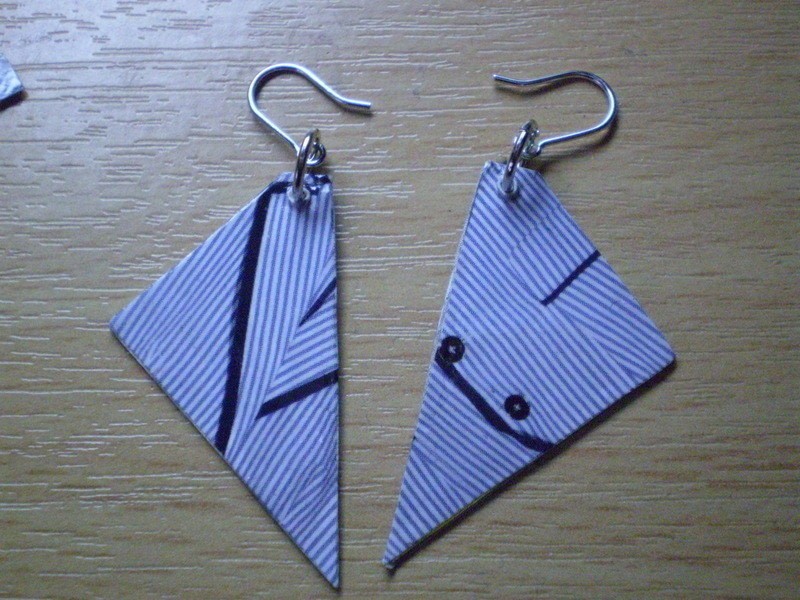
 Step 11
This is how it should looks like in the end.
-
 Step 12
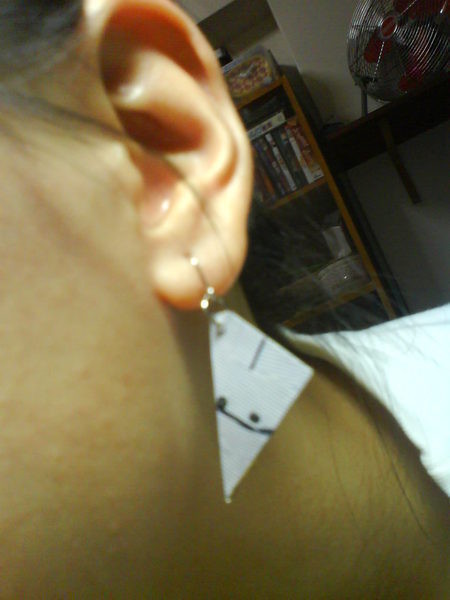
Try it on!
-
 Step 13
Experiment with different patterns, colours and shapes!
I'm gonna make a diamond one soon! :)


Versions


Comments


