

About
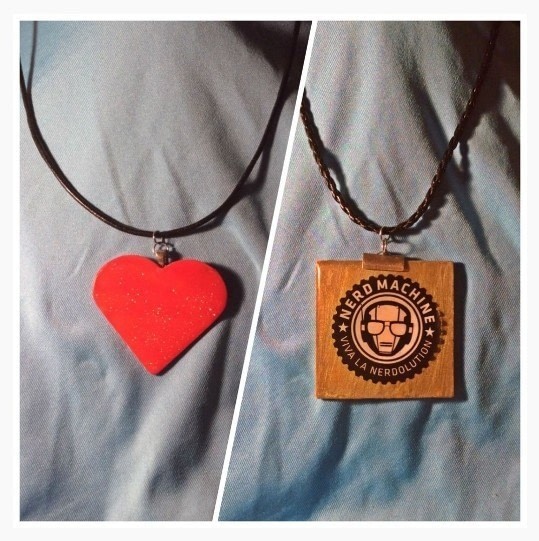
A new way to create pendants!
Woodsie shapes are flat wood pieces that give a wide variety of crafting when it comes to projects.
For this project, I decided to go with the resin method. This is also great for if you ever wanted to preserve an old photo or flowers. Make sure to flatten them before you apply though!
-
 Barbara M. favorited Resin Woodsie Necklaces!
19 Jan 16:10
Barbara M. favorited Resin Woodsie Necklaces!
19 Jan 16:10
-
 RandomActsOfCraftyness entered her project Resin Woodsie Necklaces! to Harmonees Creations
06 Jan 10:13
RandomActsOfCraftyness entered her project Resin Woodsie Necklaces! to Harmonees Creations
06 Jan 10:13
-
RandomActsOfCraftyness published her project Resin Woodsie Necklaces!
23 Sep 10:13
-
 Step 1
First pour and mix your resin and hardener together until it's completely mixed making sure that it is clear of bubbles then set it aside . I'm using ice resin for this project.
-
 Step 2
While you wait for all the extra bubbles to pop in your resin mixture, take your paint with colors of your choice and and paint one side of the woodsie. I am using just regular nail polish but other paints should work too. Just be sure to use a primer beforehand.
And after your paint dries, maybe you want to put stickers or glitter. That is fine too. As long as the woodsie is completely dry, you can put any sticking or glitter you want. -
 Step 3
Adding a small layer of resin will help protect the paint and stickers from being damaged and also give it a nice shiny finish to your pieces as well.
Add enough resin to cover the top but be careful not to put too much or it will over flow. You'll want to cover the entire top until you're at the very end of the corners.
Then carefully lay them down on a flat surface to let the resin cure. Wait for about 12-24 hours or depending on how long the resin brand you have tells you. They should be all the way solid and shiny once they've cured. -
 Step 4
If you are using pinch bails for the square woodsie then add some glue under the bail and then slide the woodsie between the opening and seal it with your pliers.
-
 Step 5
If you are using glue on bails just add your jewelry glue on the front of the bail then apply it to the back of the woodsie making sure to add pressure for making it more secure. This one is ideal for more rounded corners such as a circle, a heart and most star shapes.
-
 Step 6
At this point, it's up to you to decide what you want to do with your pendants. I added my woodsies to necklace cords with my pliers and a few jump rings but you could also make them into key chains! Thanks for reading and I hope you enjoyed this tutorial. Show pics also if you have done this project!


