Resin Floats
Extract from Photo Craft • By Susan Tuttle and Christy Hydeck • Published by David & Charles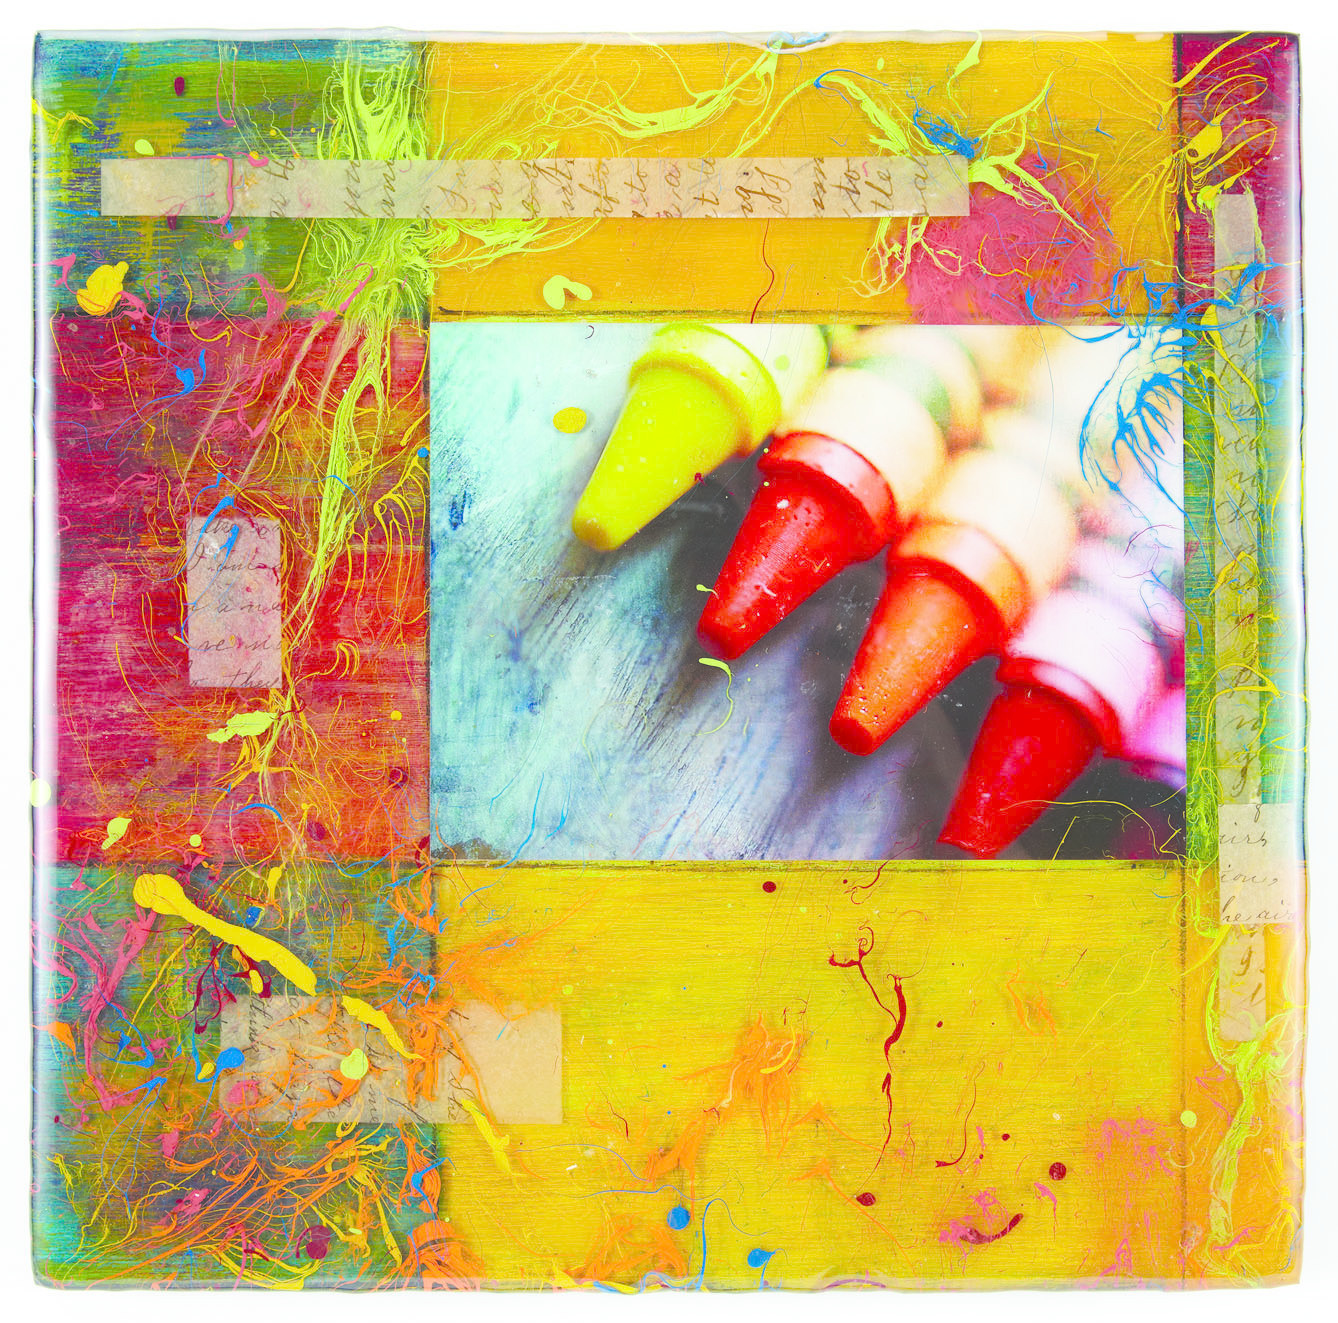

About
Photo Craft
-
 Sarah Sylvia S. favorited Resin Floats
20 Jul 05:44
Sarah Sylvia S. favorited Resin Floats
20 Jul 05:44
-
 Thatsquare favorited Resin Floats
18 Jan 13:32
Thatsquare favorited Resin Floats
18 Jan 13:32
-
 lilcalcb@gmail.com added Resin Floats to furniture redo's
25 Aug 19:02
lilcalcb@gmail.com added Resin Floats to furniture redo's
25 Aug 19:02
-
 tricia m. favorited Resin Floats
06 Aug 13:23
tricia m. favorited Resin Floats
06 Aug 13:23
-
 Laura favorited Resin Floats
05 Aug 19:25
Laura favorited Resin Floats
05 Aug 19:25
-
 J. Pario favorited Resin Floats
05 Aug 15:40
J. Pario favorited Resin Floats
05 Aug 15:40
You Will Need
-
 Step 1
Prep surface and draw grid.
Cover your work surface with plastic tarp. Then use a pencil and ruler to design your grid. Make at least one of the rectangles roughly the size of your photo print. Paint the sides of your wood black (or any colour you desire) with a foam brush. -
 Step 2
Paint the grid.
Letting the colours in your photo guide you, choose a colour palette that either directly matches or complements the picture. Paint the first colour into one of the rectangles. Brush off the excess paint randomly in the other squares. Repeat the process with each of your chosen colours. -
 Step 3
Glaze randomly.
For each colour used, mix a few drops of glazing medium with a drop of paint. Brush on the tinted glazes randomly over the piece, blending the colours together for a cohesive, balanced look. -
 Step 4
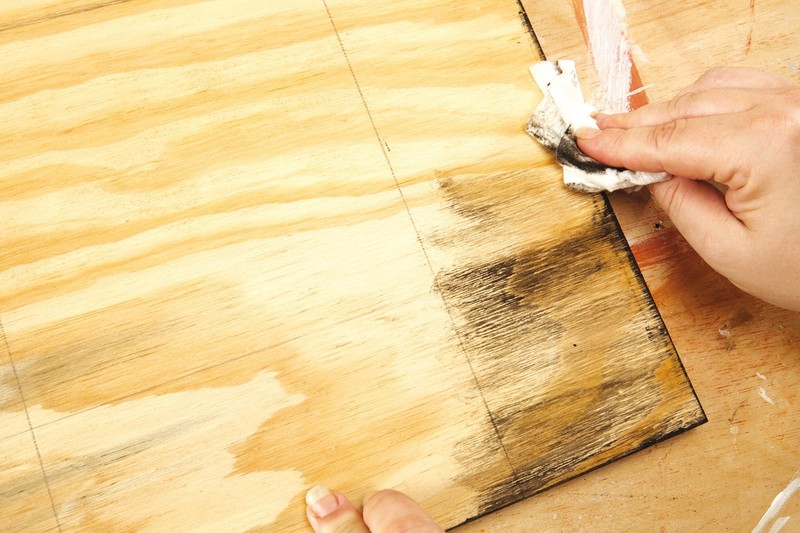
Redraw with charcoal.
Redraw each of the lines with charcoal, using a ruler as a guide to keep the lines clean and neat. -
 Step 5
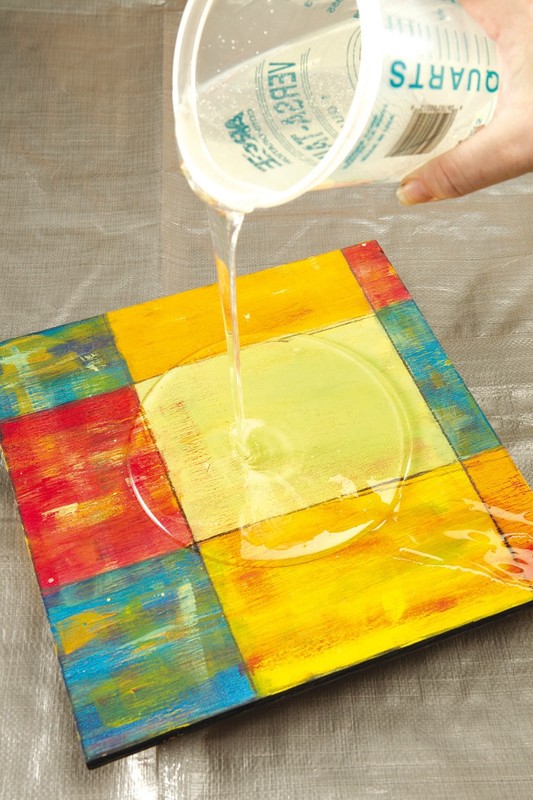
Pour resin.
Prop up your piece on blocks or some sort of riser. Mix your resin according to the manufacturer’s instructions. Slowly pour the resin into the centre of the board and allow it to spread. A wooden spoon or spatula can help you spread it to the places that may not be perfectly level. Hurry into the next step so you can work while the resin is fluid and wet. -
 Step 6
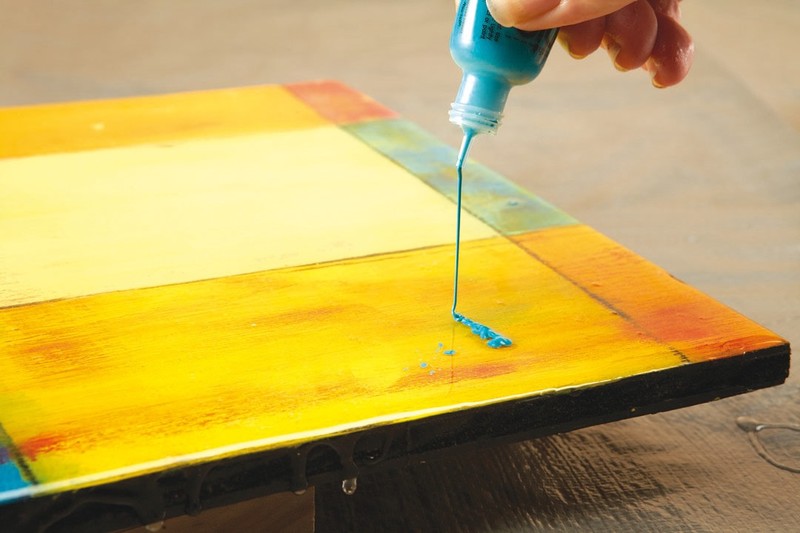
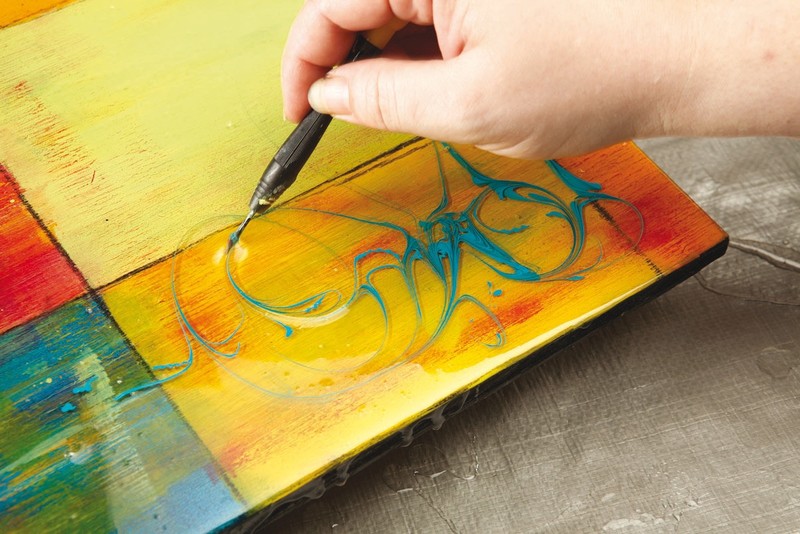
Add paint to wet resin.
Squeeze drops and thin lines of paint directly into the wet resin. Swirl the paint and fan out some designs by dipping a pointed object into the wet resin and spreading it with the tip. As the resin dries, it will slowly move and drizzle off of the sides. The paint will move with the resin, so expect your painted designs to change a bit. Repeat with additional colours of paint, if desired. -
 Step 7
Wait patiently, remove bubbles, wait some more.
Wait 5–7 minutes, then check back. If bubbles have developed in the resin, follow the manufacturer’s recommendations for removing them. Next, patience. The piece must dry completely. Chances are, it will take at least a day. -
 Step 8
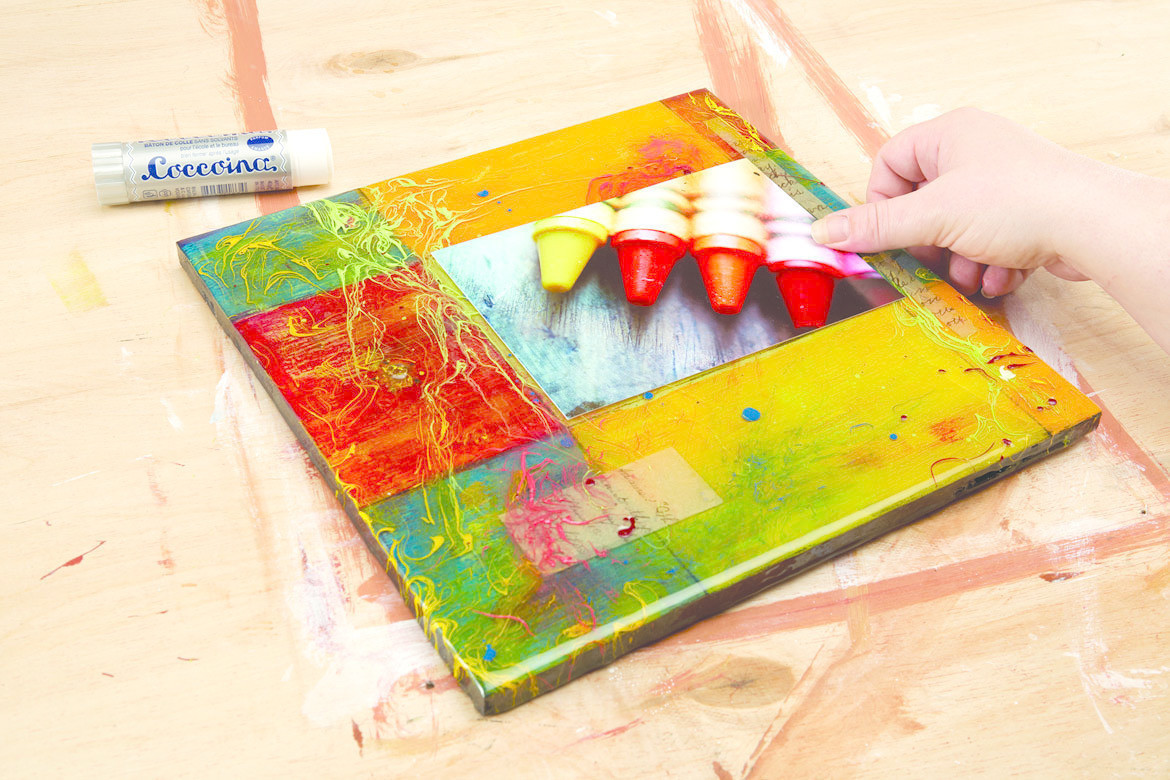
Add ephemera and finish.
After the piece has dried, adhere ephemera with a glue stick. Repeat steps 7 and 8. Use a glue stick to adhere the photo print. Keep adding resin, paint and ephemera (steps 7–9). Let the resin dry between layers so that each finished layer will fl oat at different heights. My finished piece had eight layers in all. Once you’re happy with the depth, add just one final coat of clear resin to seal the deal and accentuate the depth.