


About
Valentine’s day headband tutorial
This Valentine’s Day headband was inspired by a bowl of fabric scraps I have on my desk–pieces too pretty to throw away, but too small to do a lot with. (That’s a great way to get project ideas–”What can I do with this?”) This is also an easy project to put your own spin on, depending on what supplies you have on hand, and I really enjoyed the fabric braiding technique and plan to use it more often!
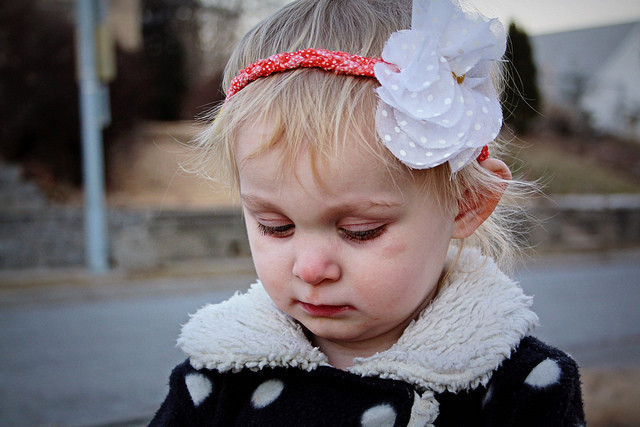
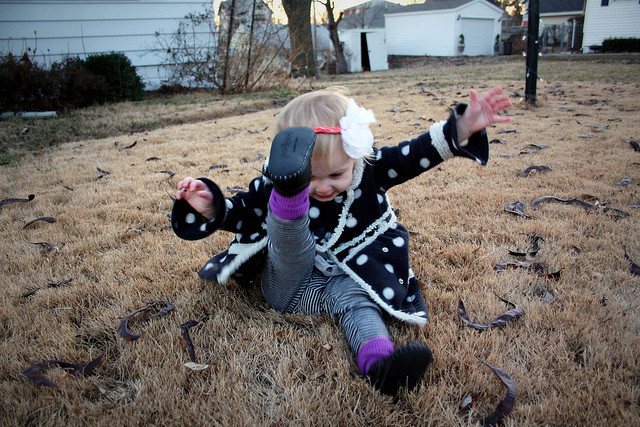
Alice, who hates wearing anything in on her head (or having anything touching her body), played with this headband for a while before crowning herself with it proudly. So I feel like it was a success! I meant to make it in my size, but I didn’t have enough fabric and it was a bit small. Another accessory for the Alice Drawer. The following tutorial is for an adult-sized headband. It’s easy to make adjustments as you go along, but I erred on the “large” side.
-
 Stephanie K. added Red And White Headband to Girly Girl
19 Oct 10:40
Stephanie K. added Red And White Headband to Girly Girl
19 Oct 10:40
-
 bunyacraft favorited Red And White Headband
25 Jul 13:37
bunyacraft favorited Red And White Headband
25 Jul 13:37
-
 Amber N. favorited Red And White Headband
15 Jul 04:29
Amber N. favorited Red And White Headband
15 Jul 04:29
-
 Step 1
Layer three fabric strips on top of each other. Fold the edges together and stitch to secure. Repeat with the remaining three strips of fabric.
-
 Step 2
Braid the strips of fabric together.
-
 Step 3
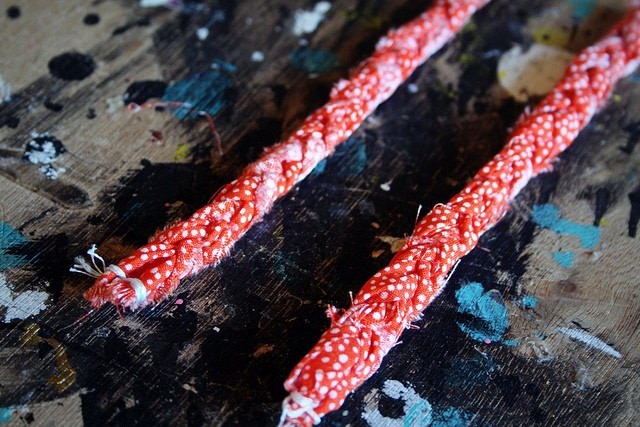
You end up with two lengths of braided fabric rope.
-
 Step 4
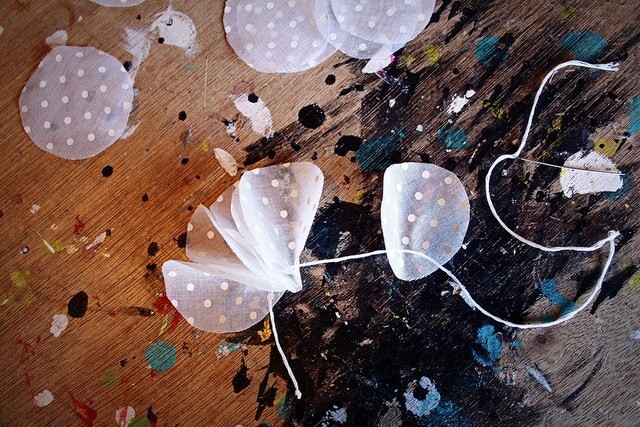
Sew a running stitch along the bottom of each circle, gathering them on your thread as you go.
-
 Step 5
When you’re finished gathering each circle onto your thread,
-
 Step 6
tie the ends of the thread together.
-
 Step 7
Fluff out the petals so you have a nice, full flower shape.
-
 Step 8
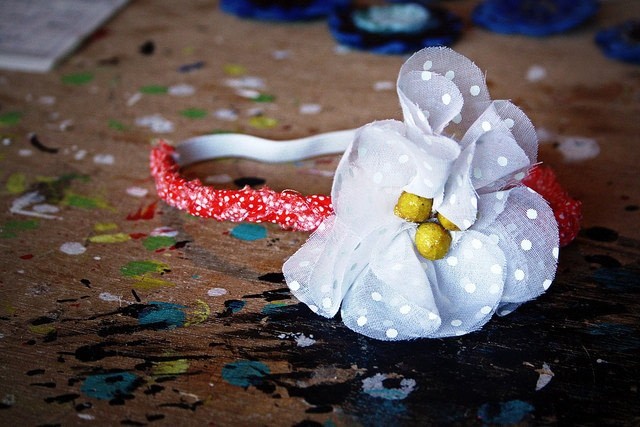
Insert the wires of three millinery stems into the center of the flower. Twist and fold underneath to secure.
-
 Step 9
Stitch each fabric braid to the underside of the flower. Should be lookin’ like a headband at this point.
-
 Step 10
Stitch the elastic to the ends of the fabric braids to close the headband up and make it stretchy to go around your head! During this step, it helps to hold it up to your head and measure so you have the right amount of elastic.
-
 Step 11
Look cool and festive, and be proud that you found a use for those scraps you have laying around!
Tips and other suggestions:
? I always have millinery stems on hand because I buy them compulsively at vintage stores. If you don’t have any in your craft stash, try using a button or even a smaller version of the same flower.
? The “look” of this headband can vary a lot depending on the materials you use. Try braiding leather, lace, felt strips, etc…there are zillions of possibilities.
? Pre-assemble the materials and package them in tiny take-out boxes for a February birthday party craft.
? Try making the headband out of braided elastic cord and make a smaller flower (or not!) to replace your boring gym headband.
? I finished Alice’s headband with some yellow yarn wrapped around the joints where the elastic and fabric attach. I just thought it looked a little cleaner–something for you to try if you want.
? Take a picture of yourself in your handmade headband and post it in my Make it Pretty group on Flickr!