


About
a cute anklet/braclet made from the inside of security envelopes
i have been experimenting with security envelopes because of their great patterns, and best of all its all recycled.
Stay tuned for my other security envelope tutorials
for this anklet i made all of the beads from the envelope, added a few other beads some string
and hay presto!
This only took me 10 minutes max, and i didn't have to buy anything, this project would be a great gift, ect. PLEASE COMMENT and tell me if you like it ect and don't forget to ADD TO YOUR FAVES if you do
i guarantee that anybody could make this if i can at my age so have a go.
enjoy love miss cookie
xxxx
-
 AD Graphics Hub commented on Recycled Envelope Anklet
21 Jun 15:27
AD Graphics Hub commented on Recycled Envelope Anklet
21 Jun 15:27
-
 Sarah Sylvia S. favorited Recycled Envelope Anklet
24 Jul 00:28
Sarah Sylvia S. favorited Recycled Envelope Anklet
24 Jul 00:28
-
 Packing Supply commented on Recycled Envelope Anklet
19 May 04:16
Packing Supply commented on Recycled Envelope Anklet
19 May 04:16
-
 Ichigo M. favorited Recycled Envelope Anklet
21 Dec 04:46
Ichigo M. favorited Recycled Envelope Anklet
21 Dec 04:46
-
 miss cookie entered her project Recycled Envelope Anklet to Beads Unlimited Contest
20 Dec 02:34
miss cookie entered her project Recycled Envelope Anklet to Beads Unlimited Contest
20 Dec 02:34
-
 Step 1
BEADS
Gather your supplies
*Glue( Craft glue works better than a glue stick but work with what you have)
*a tooth pick (rubbed with vaseline, or paw paw ect)this step is very important because it prevents the beads from getting stuck to the toothpick.
* security envelope pattern paper (or if your not recycling your prefered paper) -
 Step 2
cut your paper into a triangle strip like shown theen cut of the pointy tip
turn over and cover in glue
-
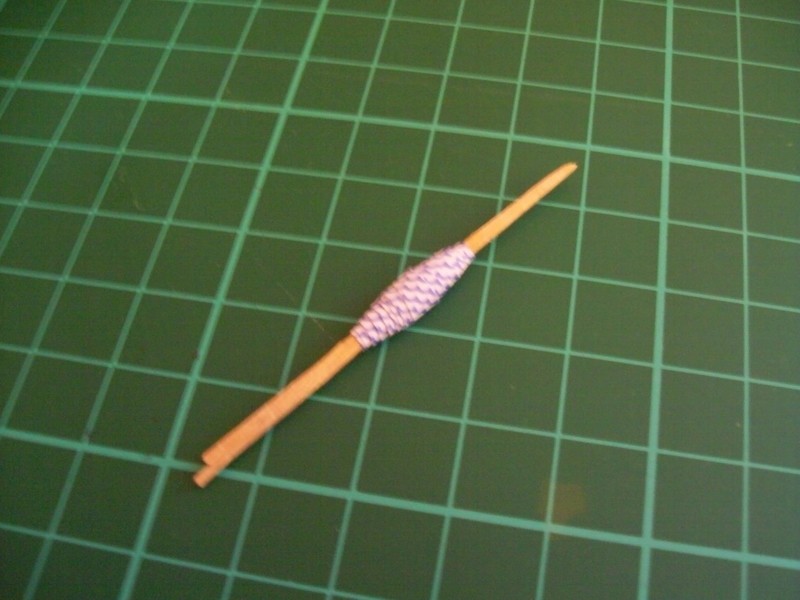
 Step 3
this is the tricky bit starting with the wide end wrap the paper around the toothpick (make sure its got the vaseline on it)
This is hard it took me a few trys to get the hang of it.
because of the vaseline it won't want to wrap around, but once you get it around a few times it should be fine. -
 Step 4
congratulations you have made a bead, the hard part is over
now while its still freshly made if the bead is a bit out of shape just fix it now
once the bead is semi dry, carefully take it off the stick
and set it aside to dry -
 Step 5
now all thats left to do is to use the beads as you would normal ones,
i threaded the paper beads and seed beads onto a pice of elastic cord then i used wool for the rest of it.
-
 Step 6
and there you have it a bill turned into a stunning piece of handmade jewlery
I hope you enjoy this as much as i do enjoy
love miss cookie xxxand PLEASE POST COMMENTS tell me whether you like it or not ect.
thankyou merry christmas


Comments


