

About
Make a receiving blanket for a new baby - quick and easy or heirloom quality.
A receiving blanket is a baby staple – a lightweight blanket perfect for swaddling, for warmth or shade, for impromptu diaper changes, for a nursing cover-up – you can’t have too many. Luckily, they’re really easy to whip up.
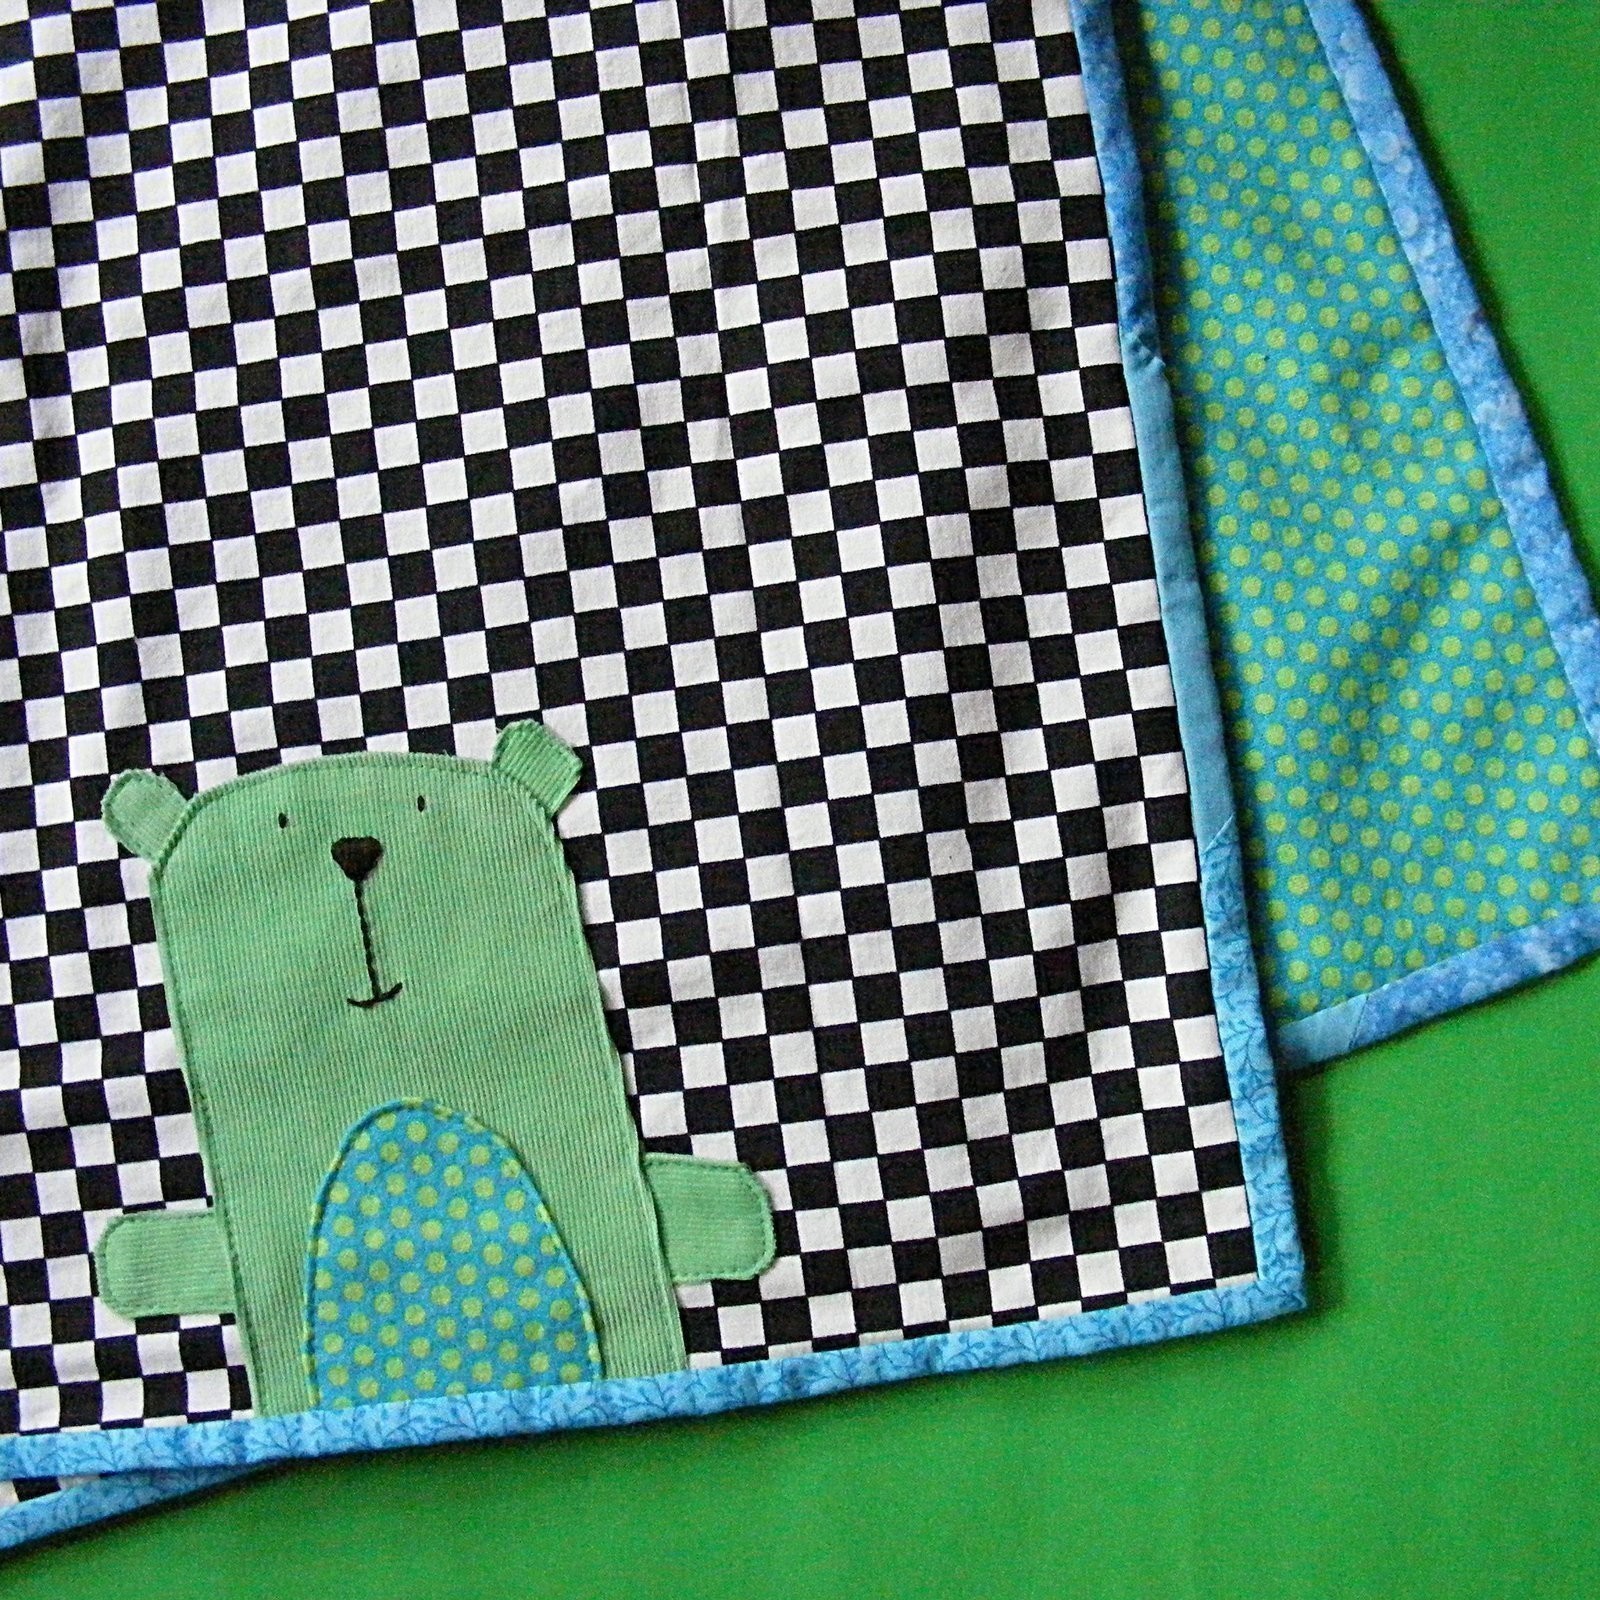
On my sample I decided to add an appliqued bear - my Anywhere Bear applique pattern, enlarged just a bit.
In the pattern I give instructions for three finishing techniques – one quick and easy technique for making a stack of utilitarian blankets, one slightly fancier, and one heirloom-quality. You decide how much time you want to invest.
Materials you'll need:
• 1 yard each of two fabrics
• 13 feet of purchased double-fold binding (optional)
• 1/4 yard of fabric to make double-fold binding (optional) • materials for embellishing (optional)
• sewing machine, thread, basic sewing tools
Skills you'll need:
• sewing straight lines
• cutting strips (optional)
• making bias tape (optional)
• how to bind a quilt (optional) • how to ladder stitch (optional) • using the iron
Time it will take:
• an hour or less at the fastest - more if you opt to add some embellishment or use a nicer finishing technique
-
 Missi M. added Receiving Blanket to Baby blankets
17 Dec 19:41
Missi M. added Receiving Blanket to Baby blankets
17 Dec 19:41
-
 silentband favorited Receiving Blanket
05 Feb 03:08
silentband favorited Receiving Blanket
05 Feb 03:08
-
 kyrabiddinger k. favorited Receiving Blanket
23 Jan 07:09
kyrabiddinger k. favorited Receiving Blanket
23 Jan 07:09
-
 Kathy Gregson added Receiving Blanket to Baby
07 Dec 22:28
Kathy Gregson added Receiving Blanket to Baby
07 Dec 22:28
-
Kathy Gregson favorited Receiving Blanket
07 Dec 22:28
-
 ale_corason favorited Receiving Blanket
30 Oct 07:48
ale_corason favorited Receiving Blanket
30 Oct 07:48
-
 St.Ephanie ^^ added Receiving Blanket to Presents
29 Oct 21:51
St.Ephanie ^^ added Receiving Blanket to Presents
29 Oct 21:51
-
St.Ephanie ^^ favorited Receiving Blanket
29 Oct 21:51
-
St.Ephanie ^^ commented on Receiving Blanket
29 Oct 21:51
-
 Ali favorited Receiving Blanket
29 Oct 21:32
Ali favorited Receiving Blanket
29 Oct 21:32
You Will Need
-
 Step 1
Cur the main fabric and the backing fabric into 1 yard squares.
If you want to add embroidery, applique or some other decoration to the front of the blanket, now is the time to do it. I enlarged the Anywhere Bear applique pattern and stitched him to the bottom corner of the front of the blanket.
On a different blanket I let the super-soft furry fabric stand on its own with no extra embellishment. -
 Step 2
Decide on your finishing technique. You have three options. . .
Quick and Easy
Place the two squares with the right sides facing each other. Stitch almost all the way around the edge - leaving about 4 inches open. Turn the blanket right side out. Press all the edges. Topstitch all the way around the edge, closing your turning opening in the process. This is basically a giant Fancy Schmancy Cloth Napkin - you can download the free pattern for more detailed instructions.
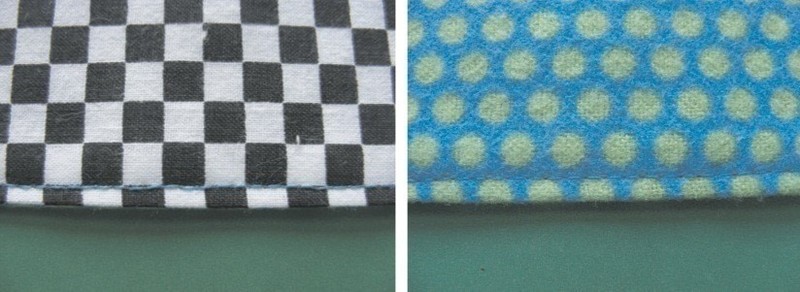
This is what your finished edges will look like, front and back. Very easy, very fast, and perfectly neat - but you lose the design possibilities of choosing a fun, contrasting binding. -
 Step 3
A Little Bit Fancier
Purchase or make 13 feet of double-fold bias tape. Place your two squares of fabric wrong sides together. Wrap the raw edges with the bias tape and topstitch it in place.
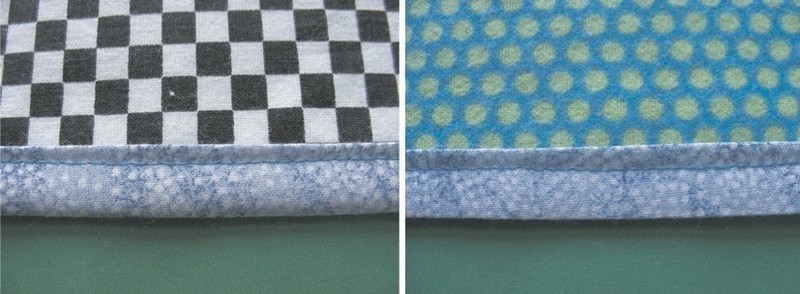
This is what your finished edges will look like, front and back. Still quick and easy, and you get to add a fun border, but the topstitching isn't "heirloom" quality. If you're just making a bunch to be used for everyday - that's perfect. But if you want to make an extra-special keepsake blanket, read on. . . -
 Step 4
Granny Would Be Proud
For this method you do just like the previous version, except you bind it like a quilt.
Cut strips of fabric 2 1/4 inches wide. Piece together enough to make a strip 13 feet long. Fold it in half the long way and press.
Place the two fabric squares wrong sides together and pin. Place the binding on the front of the blanket so that the raw edges are lined up with the raw edges of the blanket. Stitch in place using 1/4 inch seam allowance. Miter the corners.
Fold the folded edge of the binding over to the back of the blanket and ladder stitch it down.
This is what your finished edges will look like, front and back. A nice contrasting binding with no visible stitches. Very nice. Very fancy. Granny really would be proud. -
 Step 5
Finished!
Remember - choose your finishing technique based on your plans for the blanket. If you're making a stack of utilitarian blankets - choose fabulous fabrics that stand on their own and make a batch of unembellished quick and easy blankets in no time flat.
For something a bit fancier, use bias tape to add a little extra pizzaz without a lot of extra effort.
For something that might be THE special blankie, add some applique or embroidery and take the extra time to hand bind it. It's still machine wash and dry (anything else is insane) but it's extra nice - just like you.


Comments

