


About
Just like the ones you used in school, only way cooler.
Keep you books from getting ruined in your purse, or cover your text books with style.
Keep your hooks and needles from ruining the covers of your pattern books! Now you can read romance novels in public without getting weird looks from strangers!
No matter what you're reading, it's got it covered!
I'm going to tell you how to make the adjustable cover here, so the book you should use is one that is a fairly average height(meaning that it's a height that many of your books are), and the THINNIST one you'll want to use this cover for... trust me. The thin one.
-
 Kay T. favorited Reading Rainbow Swap Adjustable Book Cover
11 Nov 09:04
Kay T. favorited Reading Rainbow Swap Adjustable Book Cover
11 Nov 09:04
-
 Ana M. favorited Reading Rainbow Swap Adjustable Book Cover
14 Feb 02:02
Ana M. favorited Reading Rainbow Swap Adjustable Book Cover
14 Feb 02:02
-
 Lady Grim favorited Reading Rainbow Swap Adjustable Book Cover
03 Jul 04:59
Lady Grim favorited Reading Rainbow Swap Adjustable Book Cover
03 Jul 04:59
You Will Need
-
 Step 1
Step One: Get a book and get moving!
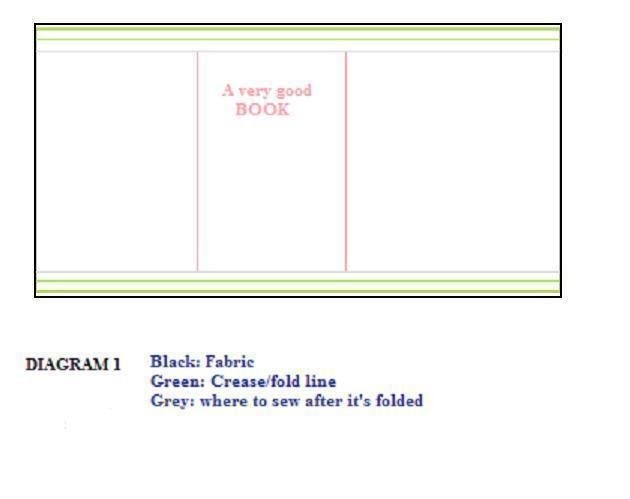
A)Measure the book against the fabric (on the wrong side) and cut about 3/4 of an inch on the top and bottom of the book. Place the open-y side of the book is near the edge of the fabric. Fold the fabric so that the edge of it reaches all the way in to the spine of the book, between the first page and the cover. Do this on both sides (making sure that you can close the book with the fabric in it and it wont bend the cover). Cut where fabric meets the spine and mark the fold line (I use pins). Unfold.
B)Fold down 1/4 of an inch(the first green line), then fold over again(second green line).
C)Pin. Do the same at the bottom.
D) Sew.
There will be a small lip at the top and bottom that's going to hang over your book. That's the only way this will work.***If the book is significantly thinner than another book you'll want to use this cover on, pin the fabric at the cut line and measure to make sure that the cover with fit on the thicker book, and that the book can close easily. You don't want to moosh the pages.
-
 Step 2
Step 2: Prettying up the sides.
A)Like you did with the top and bottom, fold at the green lines.
B)Pin.
C)Sew. -
 Step 3
Step 3: Make it stick!
A) Cut lengths of velcro. 4 short (about an inch) and 4 longish (not longer than the cover of the book on one side). If you buy the velcro roll things like I do, you may have to cut them in half to make sure that they're ONLY sitting on that little extra lip above the cover.
B)Pin.
C)Sew.
**I used a zigzag stitch and pushed it through a little more quickly than the machine actually moves, leaving most of the velcro without thread on it (therefore not blocking the stick power of the vecro)but still well attached.
I had to rip it a time or two to get it right. -
 Step 4
Step 4: Flip it over!
With right side facing up,
A)Measure ribbon against the width of the book cover.
B)Cut two lengths with about 1/3 of an inch extra on each side (to be folded under itself so it doesn't fray).
C)Pin one each to the top and bottom to cover the ugly stitching left by sewing on the velcro.
D)Sew.
**I sewed the top and bottom edges so that the edges didn't curl or stick up. -
 Step 5
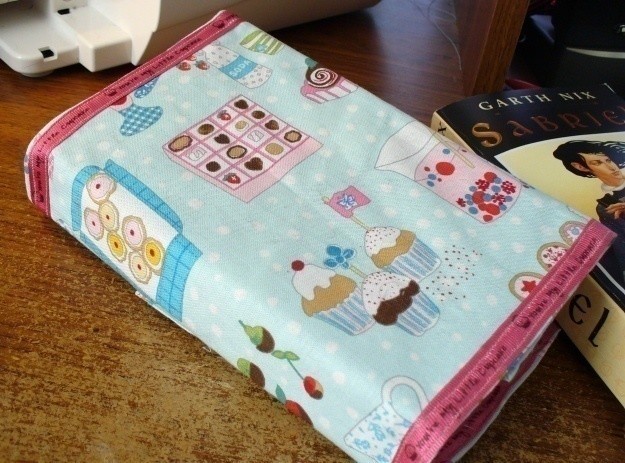
VOILA! You can now put your beautiful creation on your book on mozy on out!
Any questions about the tutorial, just message me and I'll try to get back to you fairly quickly.
ENJOY!


Versions


Comments


