


About
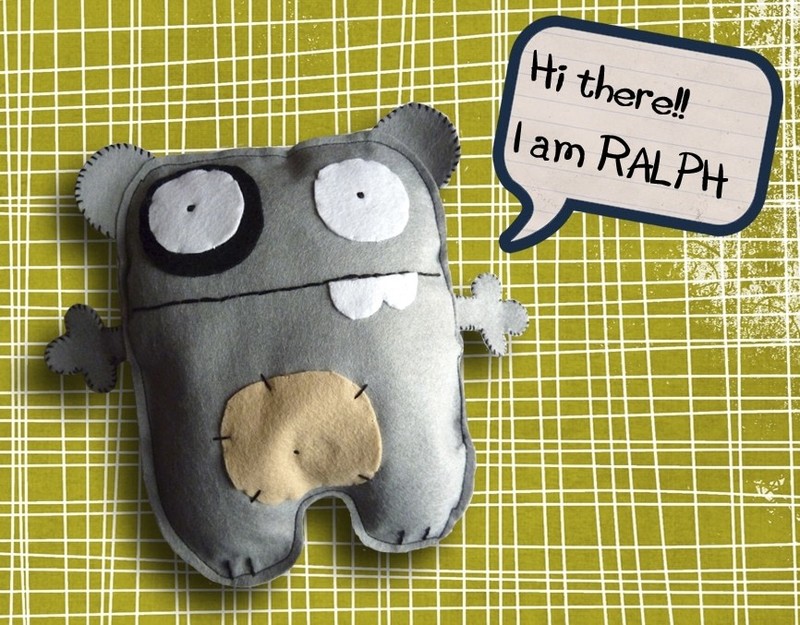
I show you how to make a funny felt bear
Tags
-
 Ilana M. favorited Ralph: The Felt Bear
21 Jan 01:20
Ilana M. favorited Ralph: The Felt Bear
21 Jan 01:20
-
 Xfluffy_unitatoX favorited Ralph: The Felt Bear
17 Nov 18:25
Xfluffy_unitatoX favorited Ralph: The Felt Bear
17 Nov 18:25
-
B B. favorited Ralph: The Felt Bear
20 May 14:59
-
Meagan V. favorited Ralph: The Felt Bear
16 Aug 21:49
-
 Leandra L. favorited Ralph: The Felt Bear
18 Jun 02:24
Leandra L. favorited Ralph: The Felt Bear
18 Jun 02:24
-
 Cr@ftyCh!ck favorited Ralph: The Felt Bear
19 Apr 05:56
Cr@ftyCh!ck favorited Ralph: The Felt Bear
19 Apr 05:56
-
 mmotse03 favorited Ralph: The Felt Bear
14 Apr 10:25
mmotse03 favorited Ralph: The Felt Bear
14 Apr 10:25
-
 Netra H. favorited Ralph: The Felt Bear
07 Mar 12:57
Netra H. favorited Ralph: The Felt Bear
07 Mar 12:57
-
 jaco.pieterse.14 added Ralph: The Felt Bear to Baby toys
04 Feb 10:40
jaco.pieterse.14 added Ralph: The Felt Bear to Baby toys
04 Feb 10:40
-
Ashleigh Y. favorited Ralph: The Felt Bear
28 Nov 02:02
You Will Need
-
 Step 1
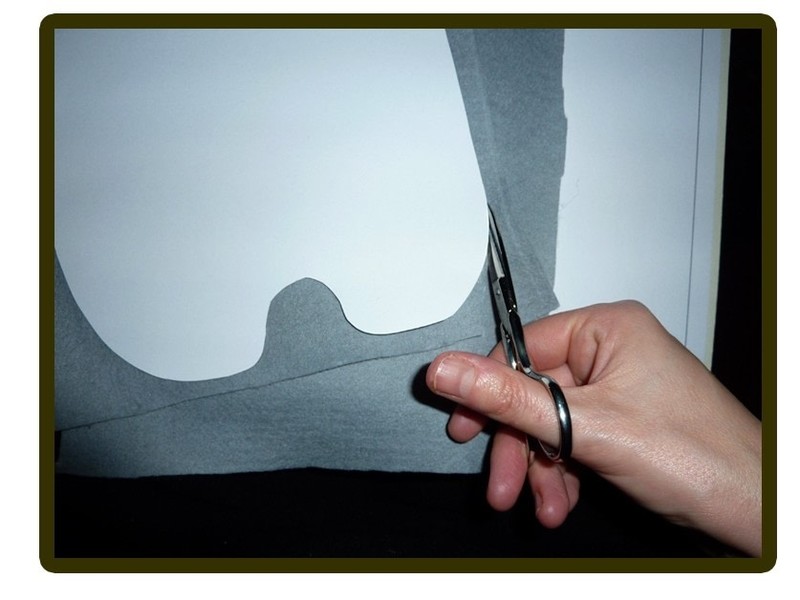
We make the template for what will be the body of Ralph following the pattern shown in this first picture. Body size is about 20 cm long X 16 cm wide.
-
 Step 2
We place the pattern on one of the two large gray felt pieces and cut according to the pattern.
-
 Step 3
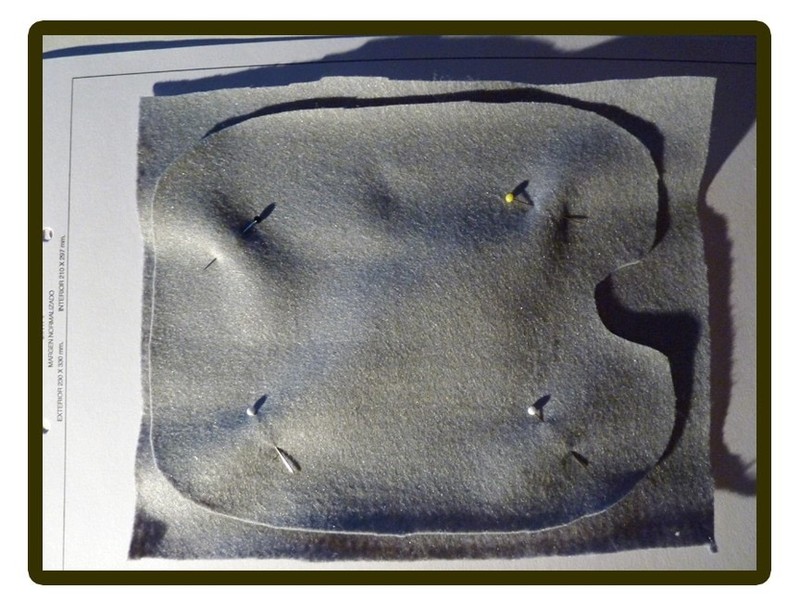
We cut the second big piece of gray felt by positioning the first already cut piece over it. In this step, we can attach both pieces with pins to make easier to cut them.
-
 Step 4
We cut the little pieces that form the face and belly of our friend as we see in the image. The pieces should have the following sizes:
Eyes: circular pieces of 4x4 cm
Black stain in the left eye: 5.5 X 5.5 cm
Teeth: 4 cm long x 2 wide
Belly: 6 cm long x 6.5 in width
Ears: 4 X 4 cm (4 pieces)
Arms: 6 cm long x 4.5 wide (4 pieces) -
 Step 5
We place the parts in one of the pieces of gray felt and sew along. To make it easier, you can stick the pieces firts using glue.
-
 Step 6
We stich the mouth with embroidery thread (6 strands) using the embroidery needle (we need a larger eye for the 6 strands. We cross-stitch the other pieces to make Ralph's eyes, teeth and belly.
-
 Step 7
Use a straight stich few times to draw the eye.
-
 Step 8
Use an overlock stich to sew the pieces that make Ralph's arms and ears. Remember: there are two pieces of each by arm or ear (to make it thicker)
-
 Step 9
Stick all the pieces with pins to prepare the toy for the sewing.
-
 Step 10
Sew along using the sewing machine or use the backstick when sewing by hand. Don't forget to leave a hole in one side to introduce the cotton afterwards.
-
 Step 11
Stuff with cotton and sew shut.
-
 Step 12
And Ralph is ready!!!


Versions

Posted by
Emily W.


Posted by
Anguz B.

Posted by
Adara Rosalie


hes adorable:]
CO + K User