

About
See the rainbow. Taste the rainbow. Wear the rainbow.
I like the way this necklace turned out. I can't wait to wear it to school! :D
Tags
-
 TNTish added Rainbow Necklace to Rainbow Party
04 Feb 19:01
TNTish added Rainbow Necklace to Rainbow Party
04 Feb 19:01
-
 kiki w. added Rainbow Necklace to Craft 2 sell
31 Jan 14:51
kiki w. added Rainbow Necklace to Craft 2 sell
31 Jan 14:51
-
 Conner W. added Rainbow Necklace to fashion
12 Feb 02:25
Conner W. added Rainbow Necklace to fashion
12 Feb 02:25
-
Dolly P. added Rainbow Necklace to Interesting Projects
23 Apr 19:31
-
 craftgirl14 favorited Rainbow Necklace
01 Jun 19:48
craftgirl14 favorited Rainbow Necklace
01 Jun 19:48
-
 Kinhime Dragon commented on Rainbow Necklace
07 Jan 01:19
Kinhime Dragon commented on Rainbow Necklace
07 Jan 01:19
-
 Step 1
Preheat your oven to 325 degrees Fahrenheit. Gather your supplies. I made an outline of my rainbow on the shrink plastic so I wouldn't mess up. Remember to pay close attention to what size you want it to be. (The plastic shrinks to about a third or less of its original size.)
-
 Step 2
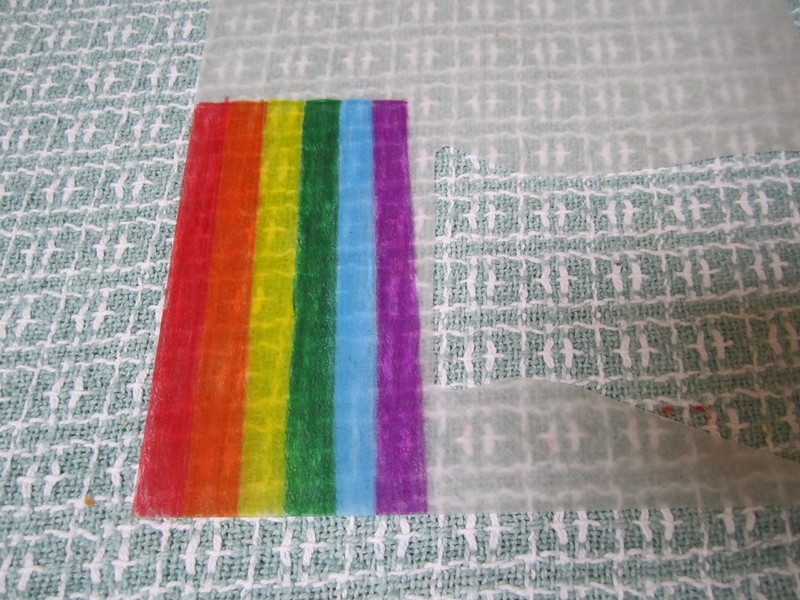
Color your rainbow. Afterwards, it should look a little something like this.
-
 Step 3
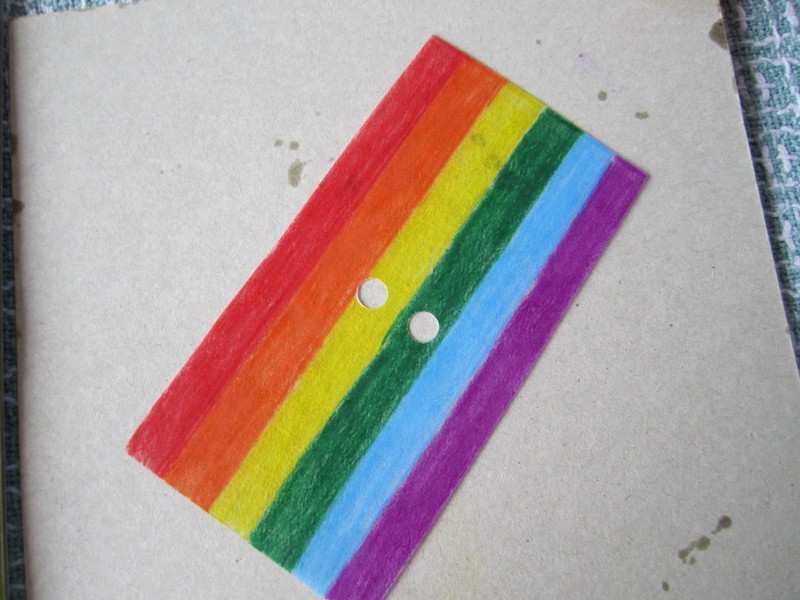
Very carefully, cut out your rainbow.
-
 Step 4
Punch two holes into the middle of the plastic. Not too close, and not too far; about a centimeter apart.
-
 Step 5
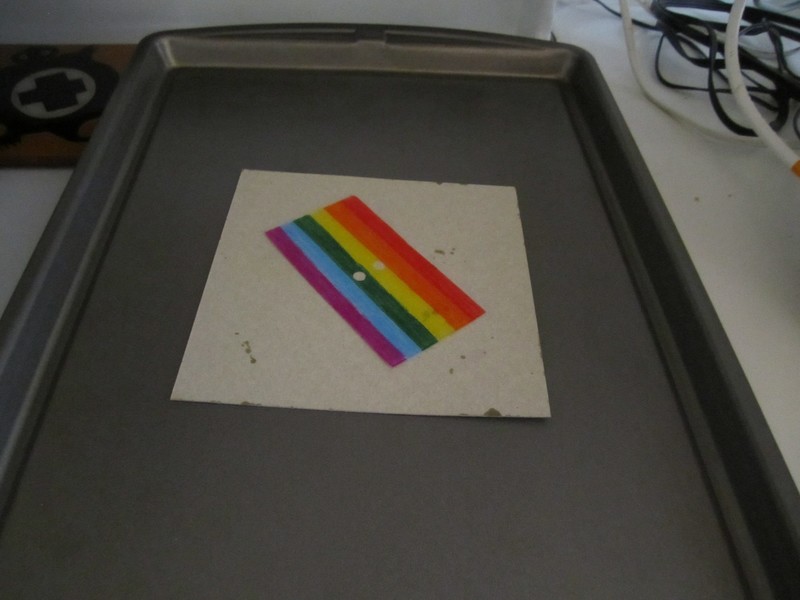
Place the rainbow on the cardboard, and the cardboard on the cookie sheet. Put the cookie sheet in the oven and set the timer on your oven for three minutes.
-
Step 6
This is an important step. You must watch the plastic as it shrinks. What happens is that (for those of you who haven't used shrink plastic before) it curls up and shrinks and then flattens out. However, you have to take it out at the precise moment when it is still curled up, before it flattens out again. This is how the rainbow gets its shape. If you are not satisfied with your rainbow's shape, the plastic is bendable right after you take it out of the oven. Wearing the latex gloves, you can bend it. Beware, because it hardens in a few seconds; obviously, if you continue to bend it without realizing it has hardened, it will break. :( If it hardens, and you still don't like the shape, put it back in the oven. It will get soft again. You can retry bending it to your liking.
-
 Step 7
After the whole oven episode, it'll look like this. :)
-
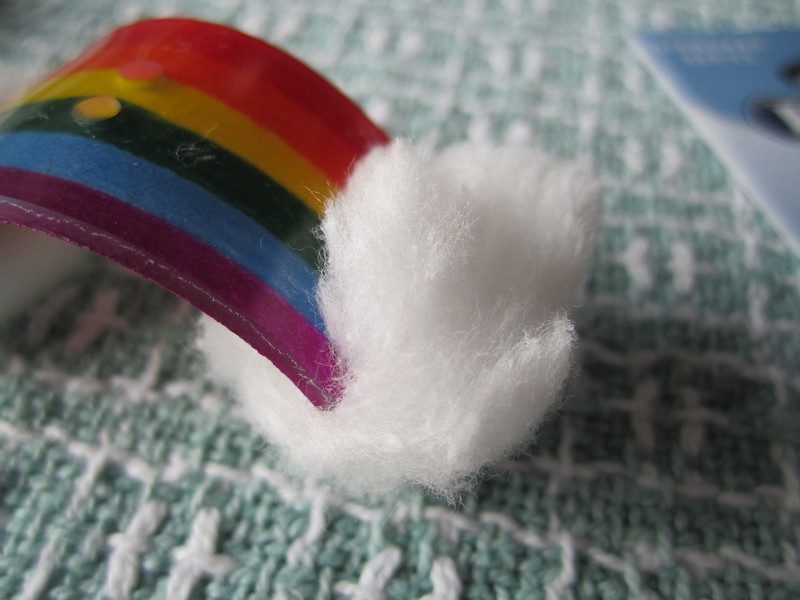
 Step 8
Glue a cotton ball onto each side using the super glue. I found the cotton balls to be a bit big so I cut one in half and used one half for each side.
-
 Step 9
I just wanted to show a picture of the holes before the next step.
-
 Step 10
Twist open a jump ring wide. Put one end of the open jump ring through one hole and out the other. Using the needle nose pliers (or your fingers), close the jump ring with the chain inside, so the rainbow will hang from the chain.
-
 Step 11
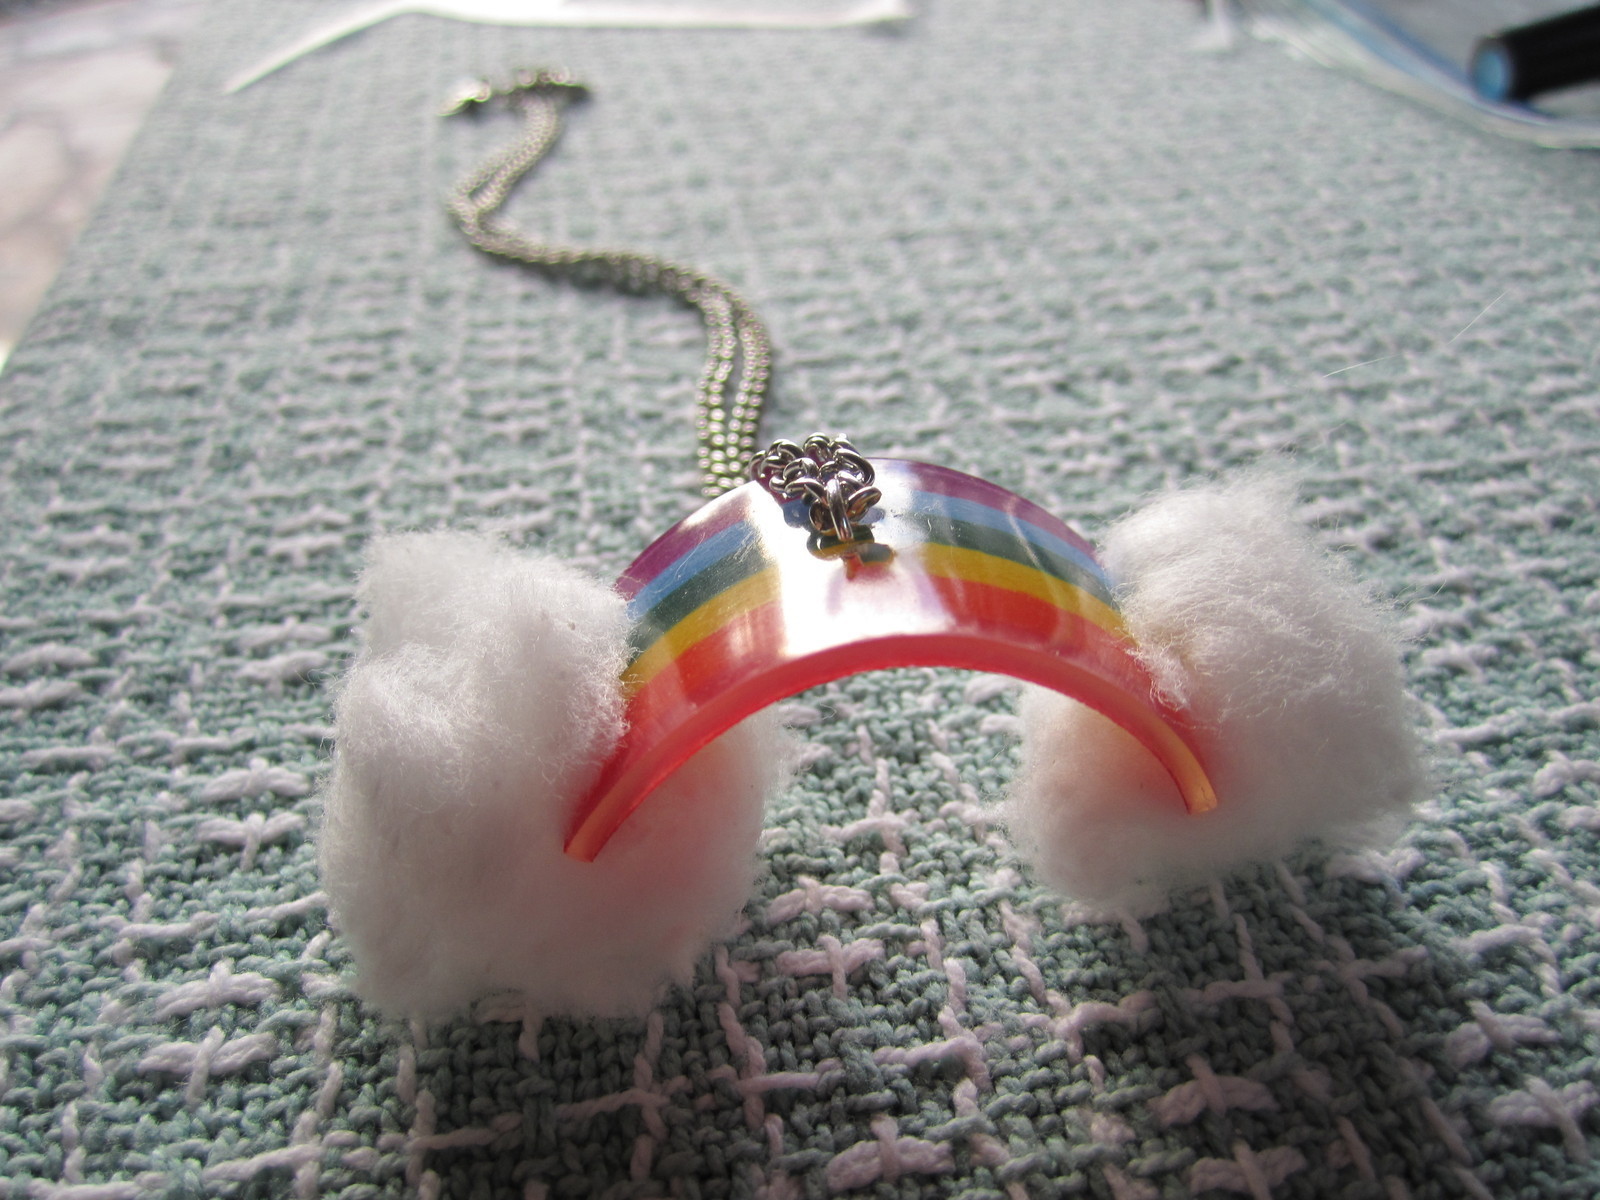
You're done!
Hope you like it ;)


Comments