


About
DIY Dye
Clearly, this is not for the faint
of heart. Rainbow hair makes a statement. If you’re looking to do rainbow tips, check out the Just the Tips section on pages 82–84. That’s a great way to do something really loud and proud without going whole hog. But, if you’re in it for the whole shebang, you’ll want to bleach your whole head—unless you have white or platinum-blond hair (if so, lucky you!). See pages 19–23 for this step, and then return here once you’re done.
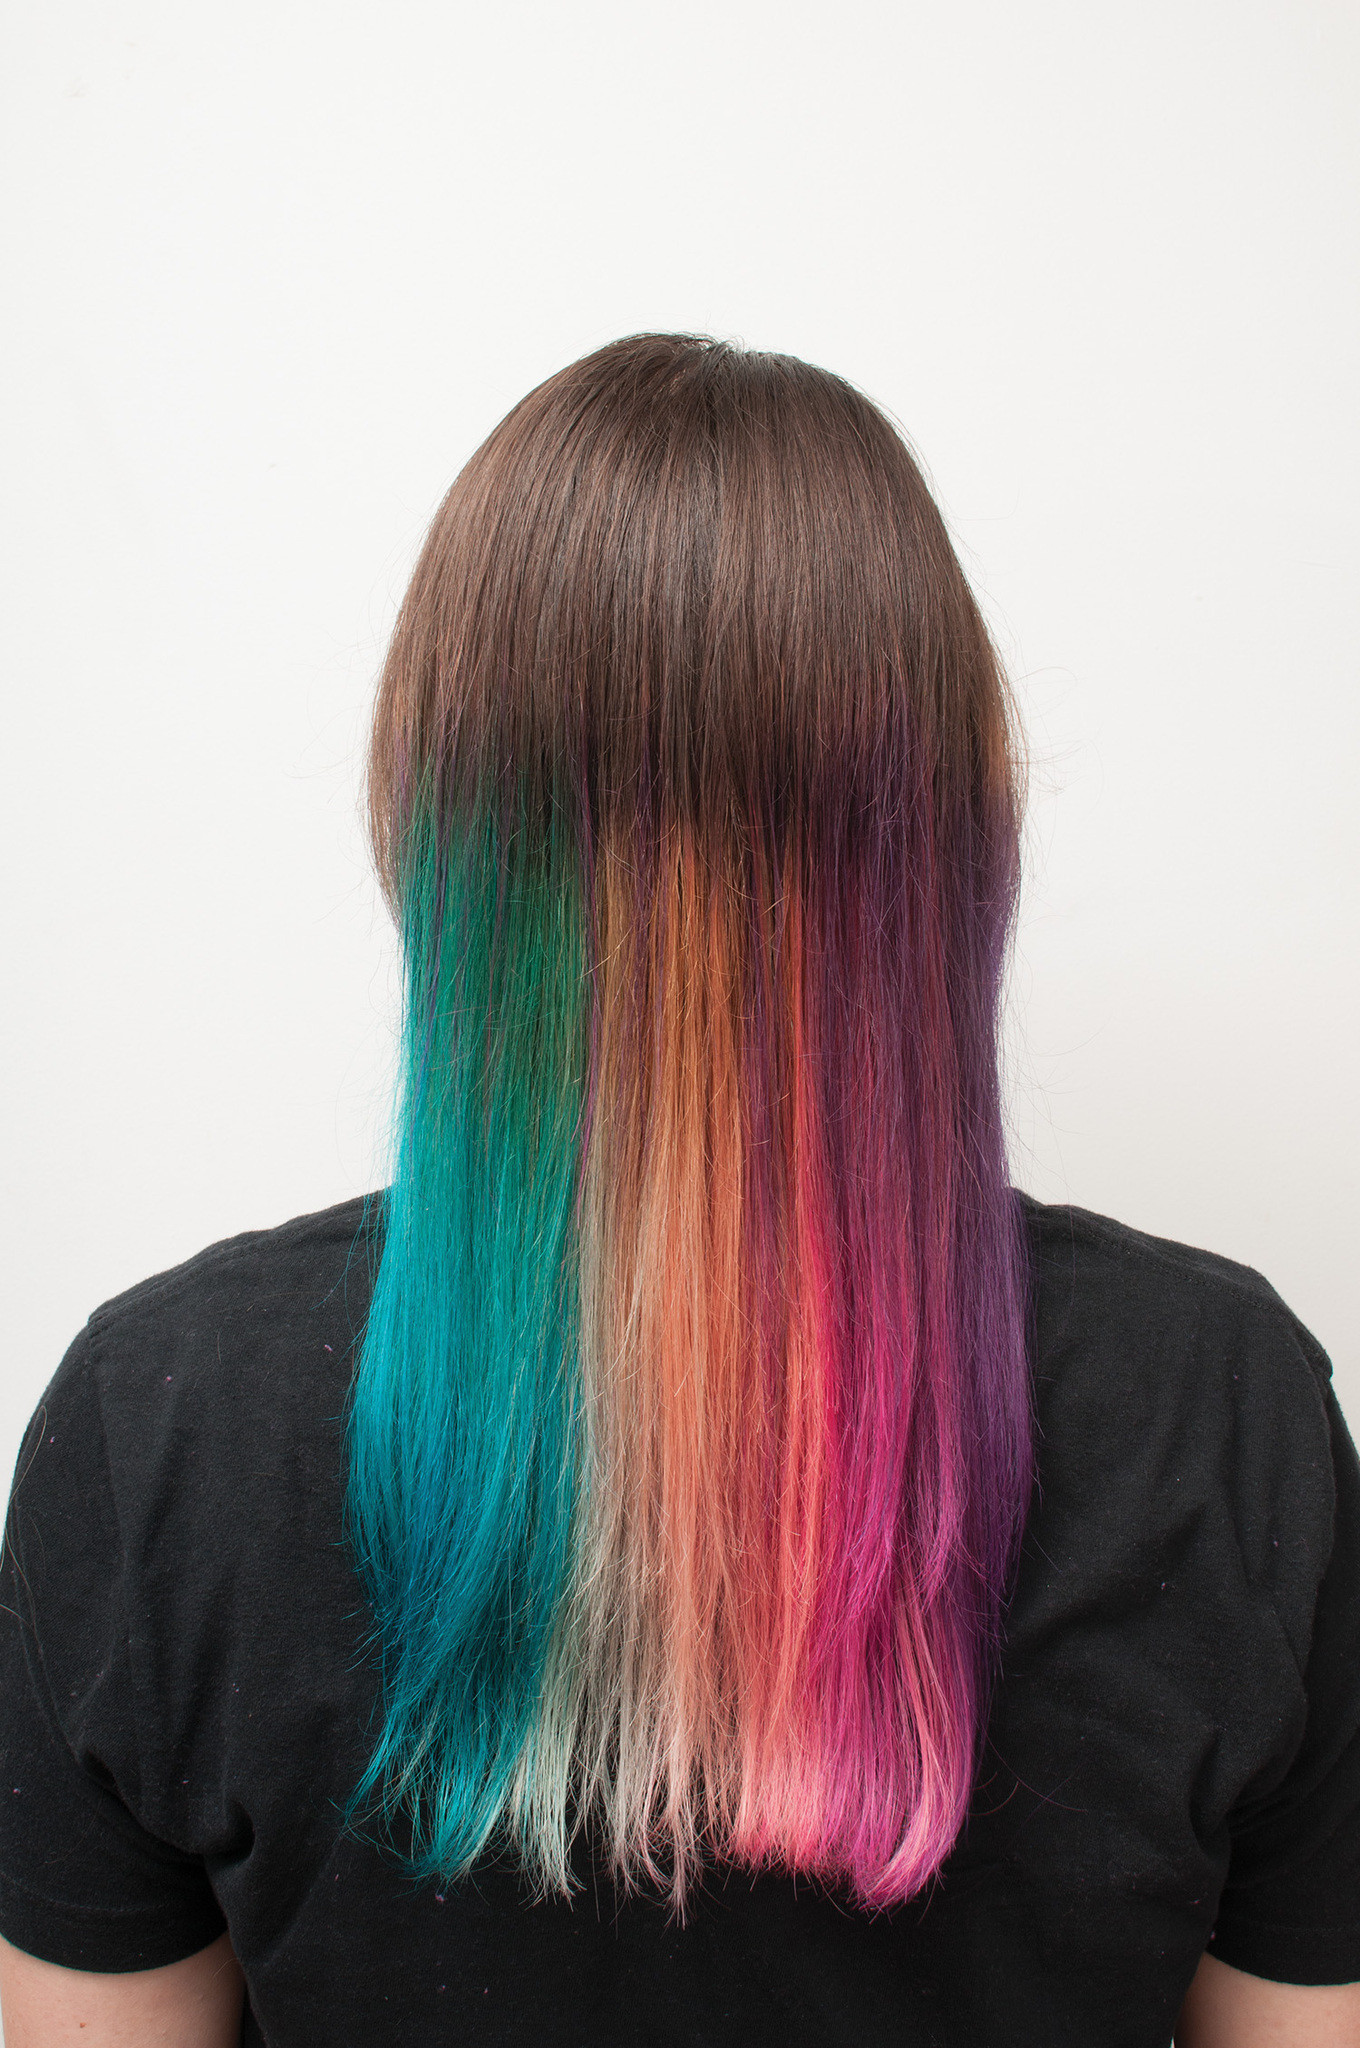
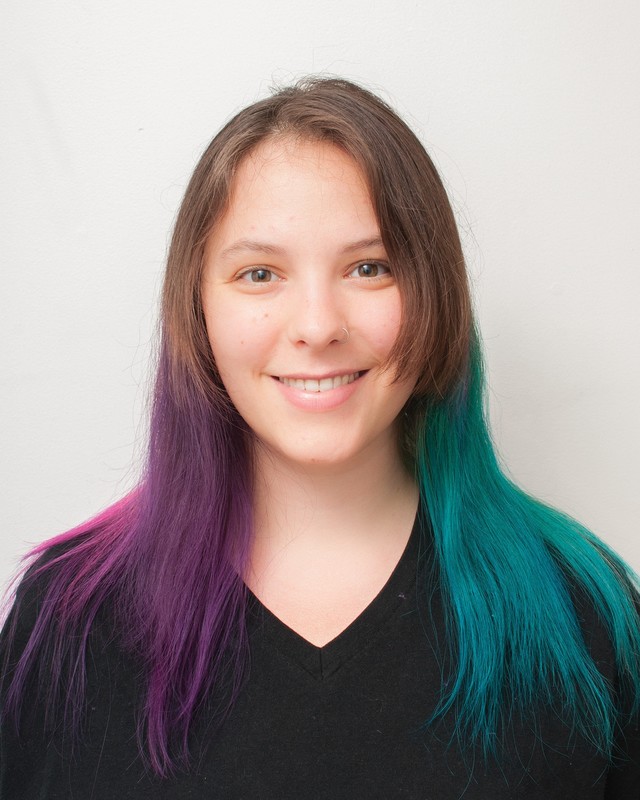
You’ll want to go ahead and choose which sections will get which colors before you do anything. It’s totally up to you if you want four colors or six or eight (or anything in between). Arrange your bottles in front of you, so you can see the colors next to each other. Put them in an order that seems harmonious to you—think about how the colors blend together, as they will over time—and that’s how you’ll end up working around your head. In other words, I wouldn’t suggest putting orange next to purple. Not a pretty combo, baby.
Let’s go over the rainbow!
-
 Melissa Beth favorited Rainbow Hair
25 Aug 22:03
Melissa Beth favorited Rainbow Hair
25 Aug 22:03
-
 Lucy C. favorited Rainbow Hair
20 Feb 00:12
Lucy C. favorited Rainbow Hair
20 Feb 00:12
-
 Steph. added Rainbow Hair to Hair stuff
02 Oct 07:41
Steph. added Rainbow Hair to Hair stuff
02 Oct 07:41
-
 Pam ^_^ commented on Rainbow Hair
23 Sep 23:54
Pam ^_^ commented on Rainbow Hair
23 Sep 23:54
-
Pam ^_^ favorited Rainbow Hair
23 Sep 23:54
-
Steph. commented on Rainbow Hair
20 Sep 09:34
-
Steph. favorited Rainbow Hair
20 Sep 09:29
-
 Ulysses Press published her project Rainbow Hair
28 Jun 15:45
Ulysses Press published her project Rainbow Hair
28 Jun 15:45
You Will Need
-
Step 1
Okay! You’re bleached and ready to go. Make sure your hair is dry, brushed, and parted down the middle.
-
 Step 2
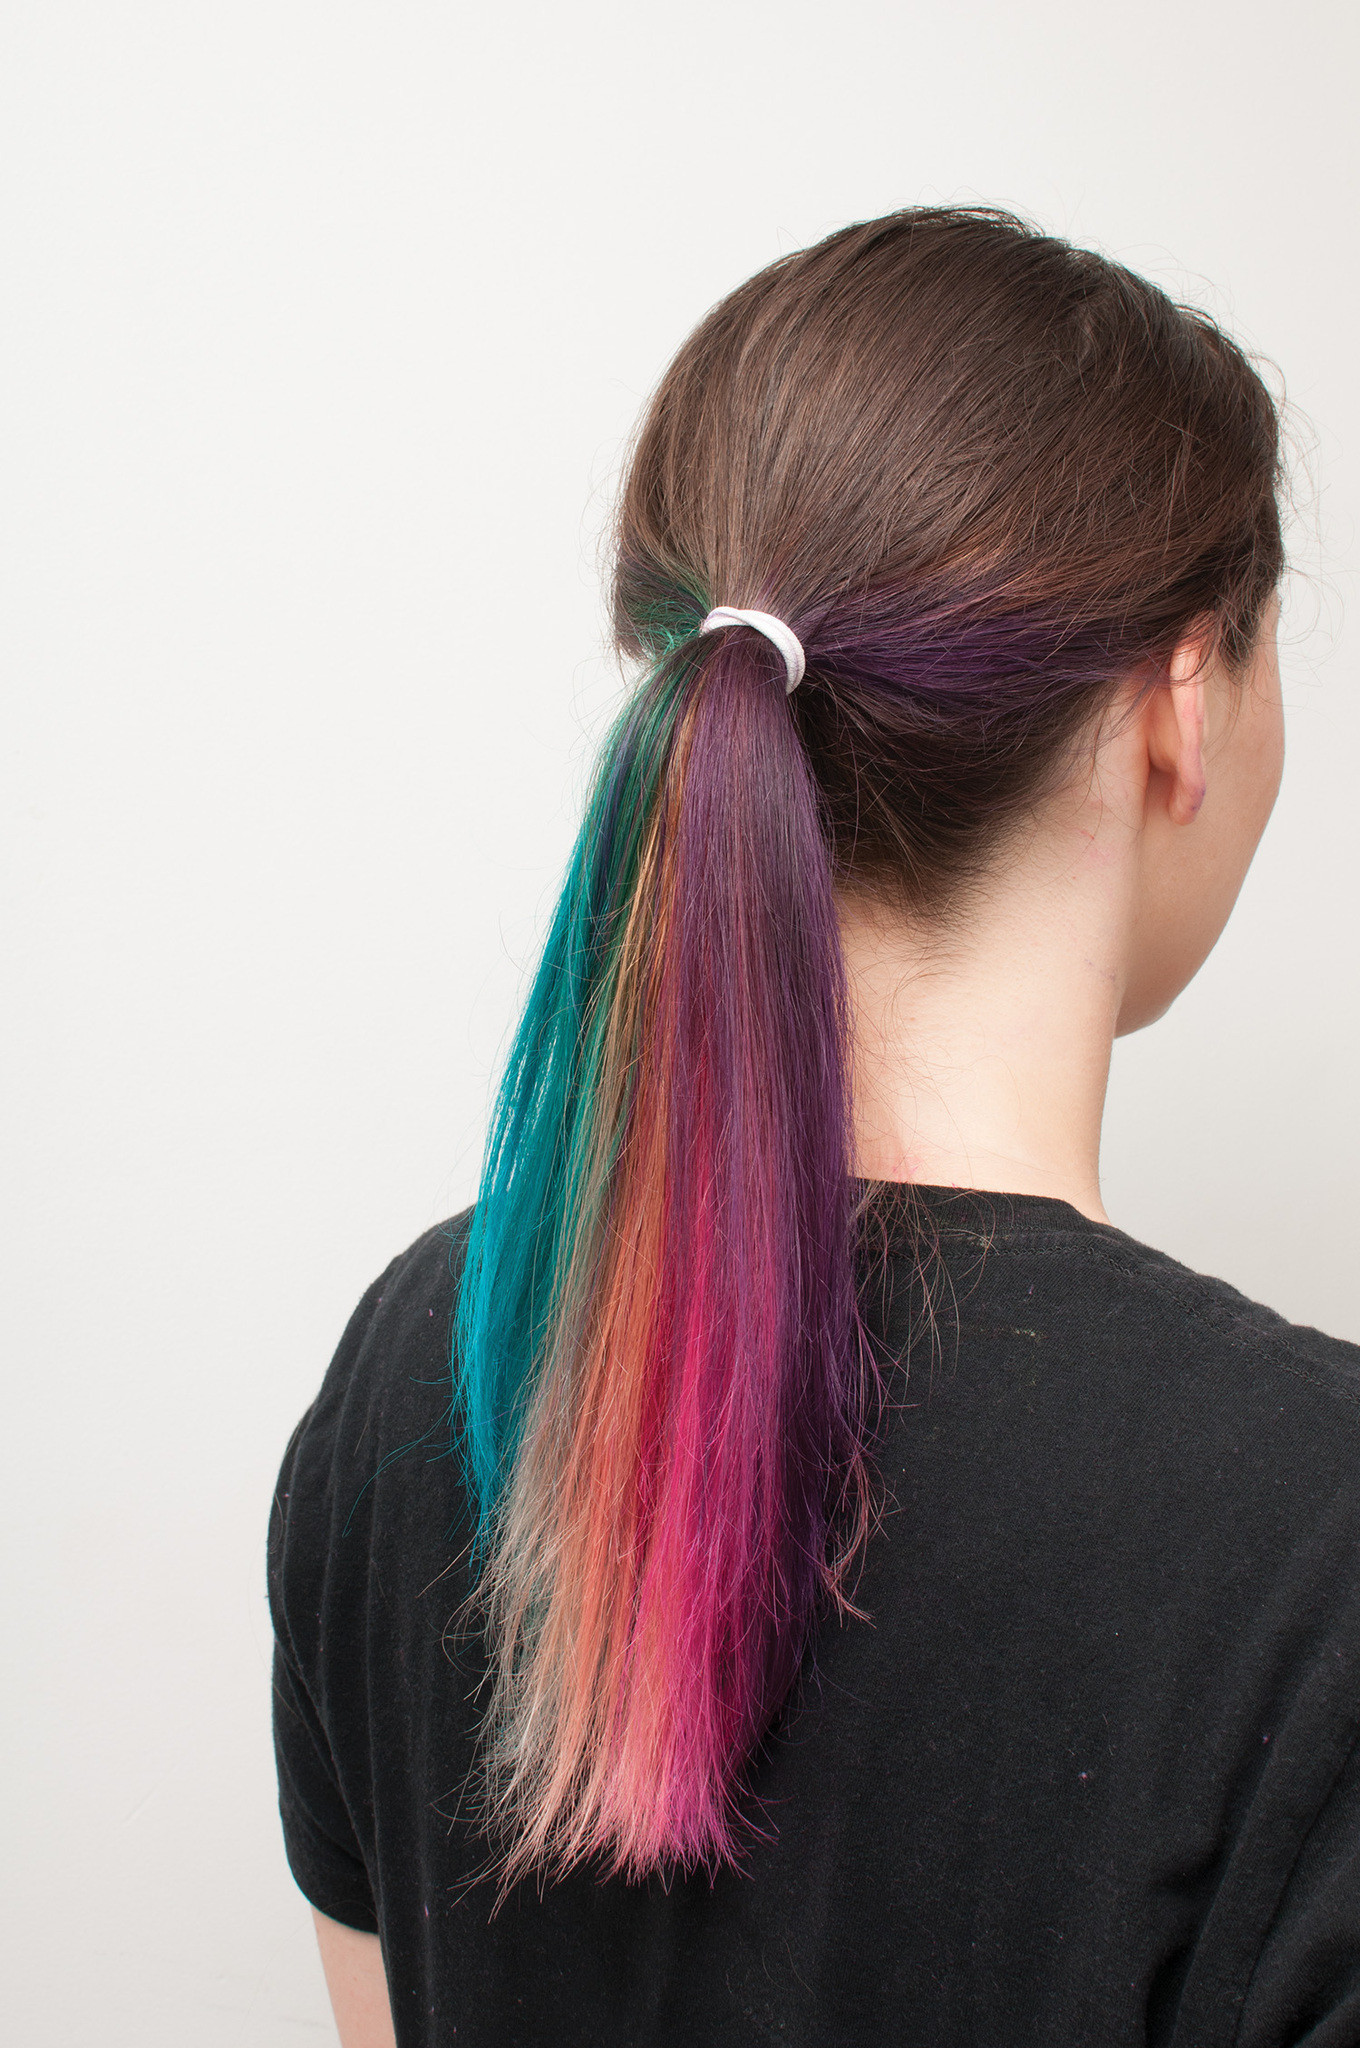
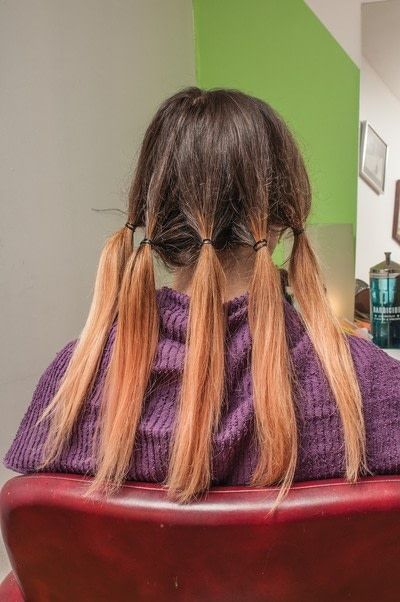
Divide your hair into sections around your head, separating based on when you’ll want to change colors. Tie each section into its own elastic band or clip.
-
 Step 3
Using a tint brush, start at the front of your hairline and work your way back, covering each section with dye from roots (or wherever you want the dye to start) to ends.
-
 Step 4
Each time you finish a section, wrap it in plastic wrap so that none of the colors bleed together in the dyeing process.
-
 Step 5
Once you’ve applied the dye to each section, you’ll wrap all of your separate plastic bundles under a plastic shower cap, or you could just wrap more plastic wrap on top of everything.
-
 Step 6
Now you wait! Your colors and method will dictate your timing, but you’ll probably want to give it at least forty minutes.
-
 Step 7
Once things are looking good, rinse everything out and condition, working out tangles with your fingers.
-
 Step 8
Next, you’ll want to put on a leave-in conditioner. Let it air-dry and do not wash your hair for at least twenty-four hours. The longer you can go without an initial shampoo, the longer your colors will last.
Tips to Dye For: For the Love of Pillows
I’d suggest wrapping your pillow with a towel the first couple of nights so that you don’t stain your pillowcase!


Comments


