


About
"Tie" this NO SEW project on for size!
So, a friend of my parents (quite literally) threw a bag of his old T-shirts at me and said, "Do something with these, would you!?"
So, I did.
I made a throw, or maybe a curtain. You decide. LOL!
I didn't take many pictures in the beginning, so I hope the written steps are enough.
I listed it as so-so difficulty because the cutting can be tricky. Nothing too difficult, but you need to pay attention.
It's going to take at least 2 hours, or more if you're easily distracted, like I am. Measuring and cutting takes a lot of time - less if you use a clear acrylic ruler, rotary cutter and ruled cutting mat rather than scissors and measuring tape. Tying goes pretty quickly, but you need to pay attention or you'll mis-tie.
Most of my T-shirt work (far more than what I have on this site as of now) has been inspired by Megan Nicolay's "Generation T: 108 ways to transform a T-shirt".
Seriously, it's the best book I ever purchased.
This specific project isn't in there, but so many awesome ones are! The book also has great ideas for all the scraps that are going to be left over after you're through with this "quilt".
Also, her website, though it doesn't seem to be updated very often, is www.generation-t.com
-
 Kristen W. added "Quilted" T Shirt Throw to quilts
16 Apr 11:45
Kristen W. added "Quilted" T Shirt Throw to quilts
16 Apr 11:45
-
Denise H. favorited "Quilted" T Shirt Throw
26 Jan 17:47
-
 Brianna S. favorited "Quilted" T Shirt Throw
02 Aug 18:23
Brianna S. favorited "Quilted" T Shirt Throw
02 Aug 18:23
-
 Glenda W. favorited "Quilted" T Shirt Throw
13 Jul 04:11
Glenda W. favorited "Quilted" T Shirt Throw
13 Jul 04:11
-
 C.Rami favorited "Quilted" T Shirt Throw
16 Mar 20:57
C.Rami favorited "Quilted" T Shirt Throw
16 Mar 20:57
-
 Sammantha L. favorited "Quilted" T Shirt Throw
05 Dec 10:11
Sammantha L. favorited "Quilted" T Shirt Throw
05 Dec 10:11
-
 sjanera favorited "Quilted" T Shirt Throw
09 Sep 23:17
sjanera favorited "Quilted" T Shirt Throw
09 Sep 23:17
-
 Whimsical Peacock added "Quilted" T Shirt Throw to fun iDEas
26 Jun 02:25
Whimsical Peacock added "Quilted" T Shirt Throw to fun iDEas
26 Jun 02:25
-
Whimsical Peacock favorited "Quilted" T Shirt Throw
26 Jun 02:25
-
Corine W. favorited "Quilted" T Shirt Throw
08 Jan 15:03
You Will Need
-
 Step 1
NOTE: ALL PHOTOS ARE IN MIRROR - I'M USING MY COMPUTER'S WEBCAM AND DON'T KNOW HOW TO FLIP THE PICTURES AROUND.
Find 8 large or extra large T-shirts.
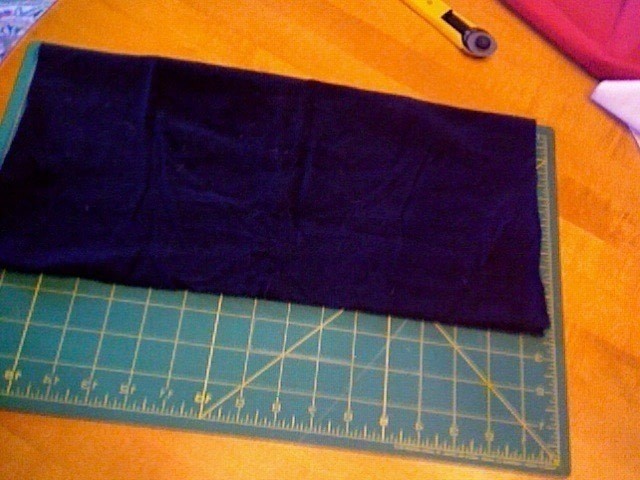
Cut out two 16 inch squares from each shirt - one from the front, one from the back.If there's a graphic on the shirt, try to center it as best you can.
I use a clear acrylic ruler for measurements on this step - it's much easier to see, plus it holds the fabric flat.
-
Step 2
To make a 16" square:
If your graphic can be centered within a 16" square and NOT hit the neckline, measure 8 inches up, down, left and right of the graphic's center point and mark those points with chalk.
Use a ruler to draw the lines to make up the square. "Cut out and keep" the square.If your graphic isn't centered or you don't want it to be, ignore all of that and just measure and cut out two 16" squares from wherever on the shirt you want.
Again, this is not about perfection. -
Step 3
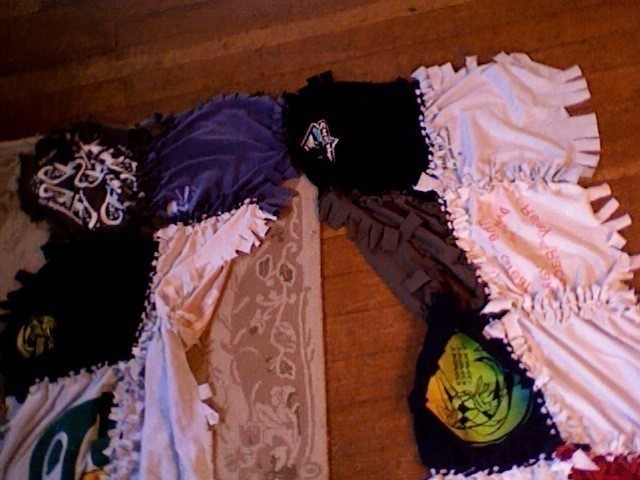
Once you have 2 squares cut from each of the 8 shirts, you will have 16 squares to arrange in a 4x4 'quilt'.
Decide on a way to arrange them and number them with chalk (or marker on the back) so you don't forget!
-
 Step 4
Now it's time to make some snippets!
Cut a 2" fringe all around the square, begin by putting the squares (ONE AT A TIME!!) on your cutting mat.
-
 Step 5
Fold it in half.
-
 Step 6
This is where it is really helpful to have a ruled cutting mat and a rotary cutter.
Make 2 inch cuts, one inch apart along the long UNFOLDED edge, beginning at the 2 inch mark and ending with the 14 inch mark. This leaves a 2 inch block at the corner.
You can see the fringes in the front. -
 Step 7
At the corner, make a diagonal cut, as shown.
-
 Step 8
On the short ends, begin cutting one inch from the folded edge and continue until the 4 inch mark.
(Yeah, I know it's the same pic from step 6...)
-
 Step 9
Open it up and cut the large fringe left in the middle of each of the 'short' ends in half.
Keep your fingers out of the way. I know, do as I say, not as I do.
-
 Step 10
You should now have 12 rectangular fringes on each side, and 2 kind of triangle-shaped fringes on each corner.
Repeat for the other 15 squares.
(Just like I'm repeating photos... LOL!)
-
 Step 11
Okay, time to start tying.
Go one row at a time. I found it was easier to tie together end to end the four squares in a row and then tie the rows together, rather than tie squares together haphazardly.DO NOT TIE THE TRIANGULAR CORNER FRINGES!!
In the picture, you can see the corner fringes at the top and the first knot.
Tie the fringes using a square knot. (L over R, R over L)
You must double-knot them, or they'll come undone.
If the fringes are too short, keep a scissor on hand and open them up, a quarter inch at a time. -
 Step 12
As you're tying, the squares really shrink down. Pull gently on the knotted seams so they stretch back out a bit.
-
 Step 13
See the difference? Even though you pull gently, you'll still hear the fabric tearing a bit. Don't worry about it.
-
 Step 14
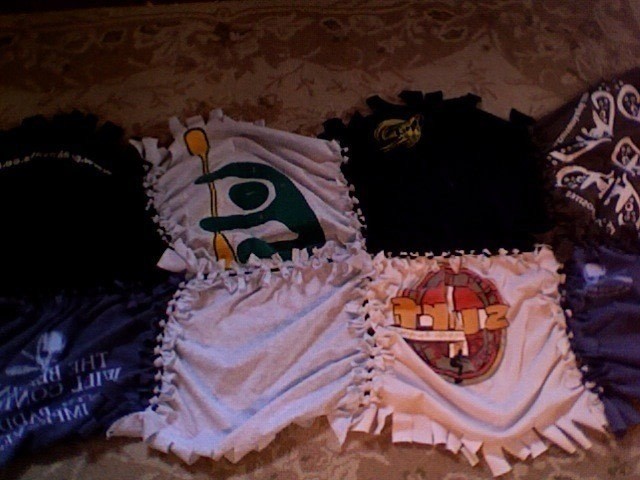
Once four squares are tied end-to-end to form a row, the rows can be tied together.
This picture shows the first two rows.
It's kind of cool how they get all puckered, right?
Stretch them out a bit by gently pulling on the seams as shown in the above two steps. -
 Step 15
I tied the top two rows and the bottom two rows, now they're getting tied together. Almost done!
-
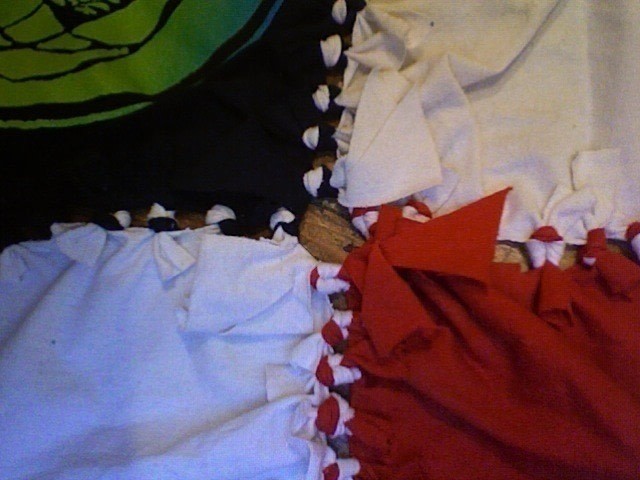
 Step 16
I said not to tie the corners, so they should look like this...
There should be 8 triangular corner fringes, two for each square. -
 Step 17
Now, tie!
Take one each of the triangular corner fringes that are diagonally opposite each other and tie them. Leave their 'partners' free. -
 Step 18
Take one each of the triangular corner fringes from the other two diagonally opposite squares and tie them as you did the previous.
You should have two knots and four corner fringes free.
Do this on each of the seams where four squares meet.
-
 Step 19
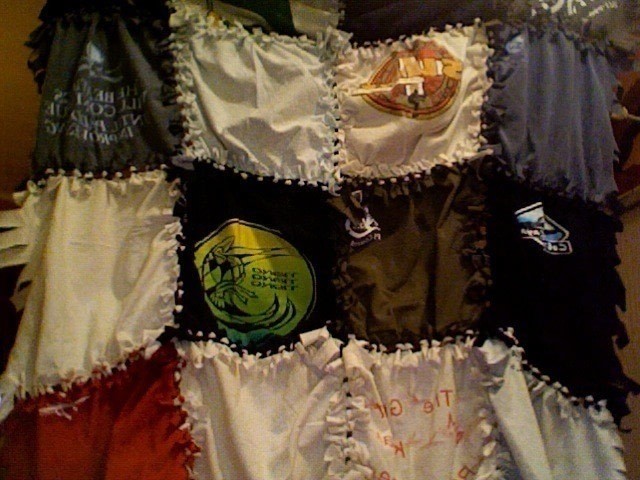
Last step: Hold up and display for the whole world to see! TA DA!!
...
Now I get to throw it (literally) back at him!Update: He uses it all the time. It has a place of honor on his living room couch.


Comments


