About
Pretty, Quick and Easy DIY Necklace Holder made in just 1 Hour!
See this tutorial on my blog: https://theartsycraftsyblogger.blogspot.com/2013/05/diy-easy-necklace-holder-in-just-1-hour.html
For more craft tips visit: http://www.theartsycraftsy.com/p/about-tac.html
Tags
-
 Chelsea favorited Quick And Easy Diy Necklace Holder
10 Aug 14:18
Chelsea favorited Quick And Easy Diy Necklace Holder
10 Aug 14:18
-
 Apples in Honey favorited Quick And Easy Diy Necklace Holder
02 Aug 01:58
Apples in Honey favorited Quick And Easy Diy Necklace Holder
02 Aug 01:58
-
 sherri k. favorited Quick And Easy Diy Necklace Holder
21 Jul 12:35
sherri k. favorited Quick And Easy Diy Necklace Holder
21 Jul 12:35
-
 Step 1
Make sure your wooden board in clean and free from dust. Lightly wipe away with a damp cloth.
Cut strips of the wrapping in V-shapes, or if you want to do free-style, tear it!
Then, use glue to glue the strips of paper on the board.
You don't have to glue it closely to one another, you can leave gaps/spaces in between the strips, leave some room for the wooden surface to be seen. -
 Step 2
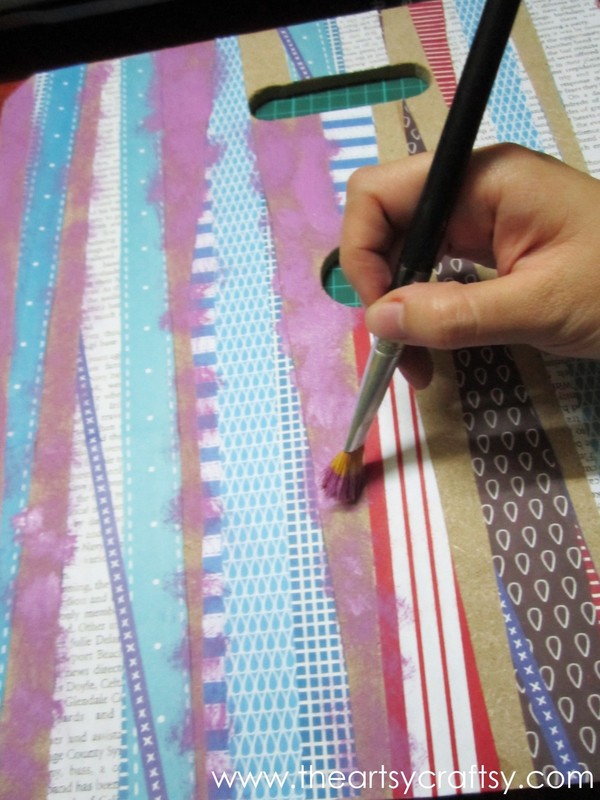
Next, dry-brush (means do not mix your acrylic with water at all) your wooden board.
You can literally paint (up down motion) or dabble to cover the wooden surface.
Don't worry if the paint touches the paper. Try to blend the paint and paper together.
For a quick dry, use a hair-dryer if you must. -
 Step 3
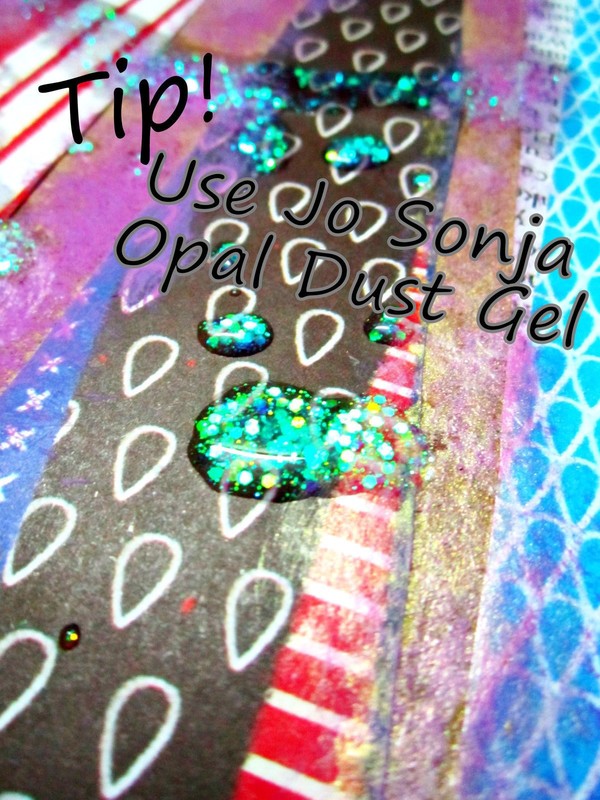
Then, use some glitter gel to enhance the painted board.
Spread the glitter all over. You can even use back the same brush so that the paint and gel mixes.
Don't mix the gel with water. -
 Step 4
For the glitter gel, I used a Jo Sonja Opal Gel dust from the Jo Sonja paint range.
Usually used in folk art painting.
Its holographic particles enhances your paintings, especially if it is on a dark background like black.
But if you have your own choice of glitter gel, you may incorporate into it. -
 Step 5
Part 1 is done! If you have spread the glitter, dry it with a hair dryer. It dries very fast! Varnishing is optional
-
 Step 6
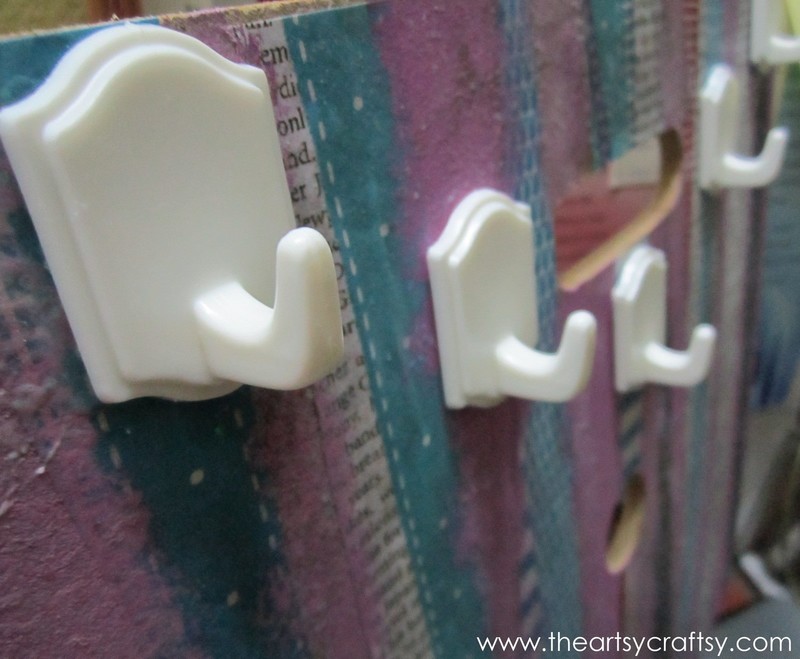
Now, use a plastic adhesive hook for the hanger.
Plan your hook- arrangement and how many do you want to use. -
 Step 7
Here I have arranged it in a V-Shape according to the board's size
and how I want my necklaces to be hung.
Use the UHU glue to glue it. -
 Step 8
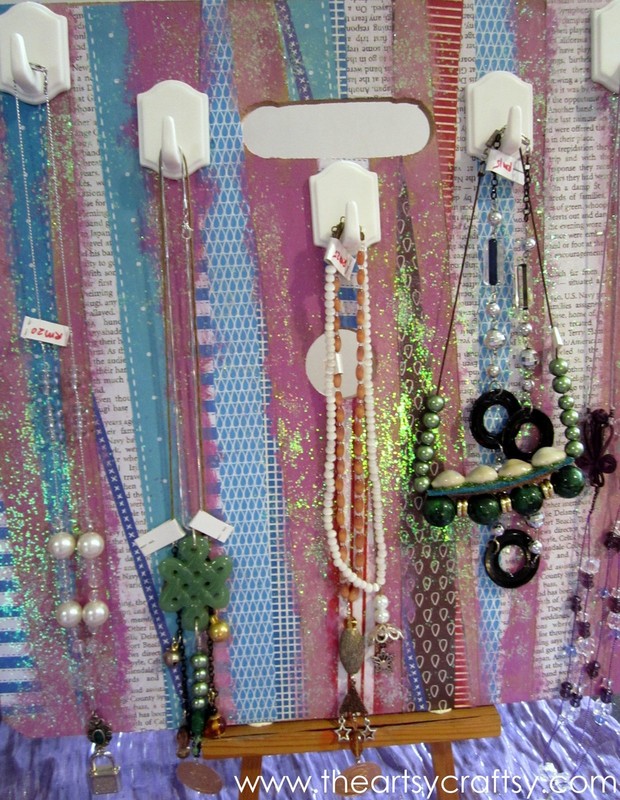
Done! There you go, just 1-hour!
Now you are ready to hang your necklaces. You can add on other things for your convenience. -
 Step 9
Great for craft booths at craft bazaars!