

About
Cute and simple vintage wedding invitation tutorial.
Your wedding invitations are the first clue your guests get as to the theme of your big day. This elegant tutorial can be adapted to suit any wedding theme, and can feature any decorations you like. In fact if you have a drawer of old buttons, or some basic crafts this DIY extravaganza could cost you very little. So, if you're feeling creative, why not impress your guests with handmade invites?
Tags
-
 Miss_Fit favorited Quaint Vintage DIY Wedding Invitation Tutorial
09 Jul 03:05
Miss_Fit favorited Quaint Vintage DIY Wedding Invitation Tutorial
09 Jul 03:05
-
 Penny F. added Quaint Vintage DIY Wedding Invitation Tutorial to CARDS
12 Jan 13:40
Penny F. added Quaint Vintage DIY Wedding Invitation Tutorial to CARDS
12 Jan 13:40
-
 02jhseaby added Quaint Vintage DIY Wedding Invitation Tutorial to Try
21 Jun 18:03
02jhseaby added Quaint Vintage DIY Wedding Invitation Tutorial to Try
21 Jun 18:03
-
02jhseaby favorited Quaint Vintage DIY Wedding Invitation Tutorial
21 Jun 18:02
-
 LaAlex added Quaint Vintage DIY Wedding Invitation Tutorial to Paper Objects
10 Apr 01:45
LaAlex added Quaint Vintage DIY Wedding Invitation Tutorial to Paper Objects
10 Apr 01:45
-
LaAlex favorited Quaint Vintage DIY Wedding Invitation Tutorial
10 Apr 01:45
-
 Shaaron S. published her project Quaint Vintage DIY Wedding Invitation Tutorial
20 Mar 13:07
Shaaron S. published her project Quaint Vintage DIY Wedding Invitation Tutorial
20 Mar 13:07
-
 Step 1
To make these invitations, here are the materials you will need;
• Card
• Paper
• Scissors
• Glue (PVA is fine)
• Lace
• Two different sizes of ribbon, one wider than the other
• A flower centre piece, buttons, gems or sequins etc. -
 Step 2
Step 1 - Work out what size you'd like your invitations to be and then fold the piece of card in half horizontally. Take the lace and wrap it around the front of the invitation and glue it at the back to hold it in place.
-
 Step 3
Step 2 - Then take your thickest piece of ribbon and wrap it around the middle of the lace and glue it down at the back. Cut any excess off.
-
 Step 4
Step 3 - Do the same with the thinner piece of ribbon; make sure it sits in the middle of the wider piece. For this tutorial we have used white and lilac ribbon, as this creates a vintage look. However you can use different colours and materials to suit your colour scheme.
-
 Step 5
Step 4 - Cover the inside of the invitation with paper. Use the card size as a template when you cut the paper to make sure it is the right size. For a professional look, you can print out the wording and use a nice font, or handwrite each invitation for a more vintage, personalised feel. Position the paper and glue it in place.
-
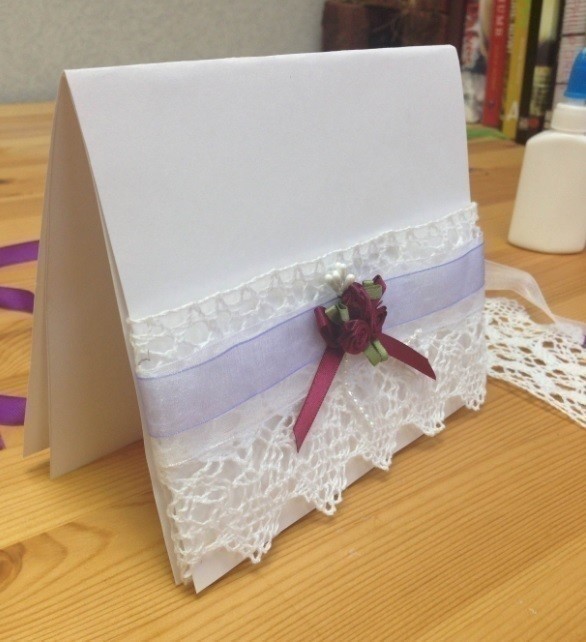
 Step 6
Step 5 - To finish your invites simply place the ribbon rose, button or bow on the outside of the card and glue it in place and you should end up with a cute design like this. You can choose any decoration you like as a centre piece.


