
About
Sew a super cute pouch to hold your odds and ends.
This project is from one of JP Knit & Stitch's classes, and developed by one of our awesome teachers, Alexis! Zippered pouches are fun and quick to sew, and we especially love this extra-cute version. Two fat quarters are enough for two pouches (or more if you cut really carefully); make one to keep and one for a perfect little gift.
Downloads
- 108628_2F2015-04-24-152321-puzzle+piece.jpg 25.8 KB [ Download ]
-
 Julie R. favorited Puzzle Piece Zipper Pouch
27 Mar 04:06
Julie R. favorited Puzzle Piece Zipper Pouch
27 Mar 04:06
-
 Whitney I. favorited Puzzle Piece Zipper Pouch
12 Aug 09:00
Whitney I. favorited Puzzle Piece Zipper Pouch
12 Aug 09:00
-
 ale_corason favorited Puzzle Piece Zipper Pouch
09 May 00:46
ale_corason favorited Puzzle Piece Zipper Pouch
09 May 00:46
-
 JP Knit and Stitch published their project Puzzle Piece Zipper Pouch
08 May 06:00
JP Knit and Stitch published their project Puzzle Piece Zipper Pouch
08 May 06:00
-
 Step 1
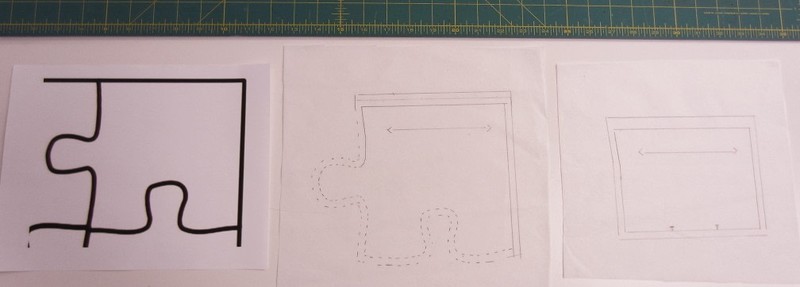
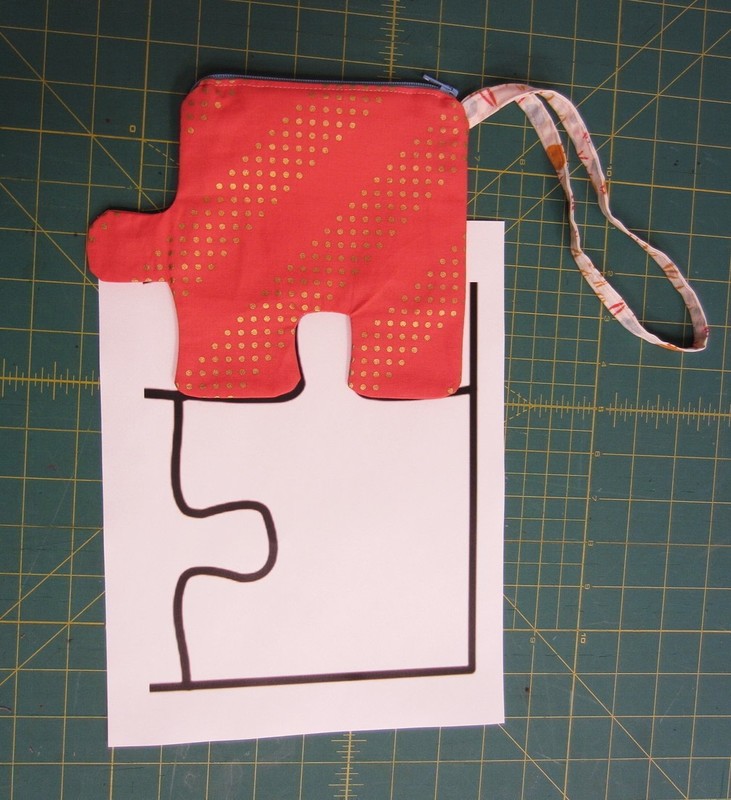
Make your pattern: Print the puzzle piece attachment. Lay tracing paper over the image and trace the shape. Add ¼” seam allowance all around except for the top edge. On the top edge, add ½” seam allowance. This is your main pattern piece. For your lining pattern piece, lay the tracing paper over your puzzle pattern and draw a rectangle that fits snugly inside your puzzle piece. Add seam allowance (¼” all around and ½” for the top edge) to the lining piece. Cut out your pattern pieces.
-
 Step 2
Cut your fabric: Fold your shell fabric in half and, using your main pattern piece, cut out two mirror-image pouch pieces. Fold your lining fabric in half and, using your lining pattern piece, cut out two lining pieces. For the pouch strap, cut out a fabric strip that is 2” by 18”.
-
 Step 3
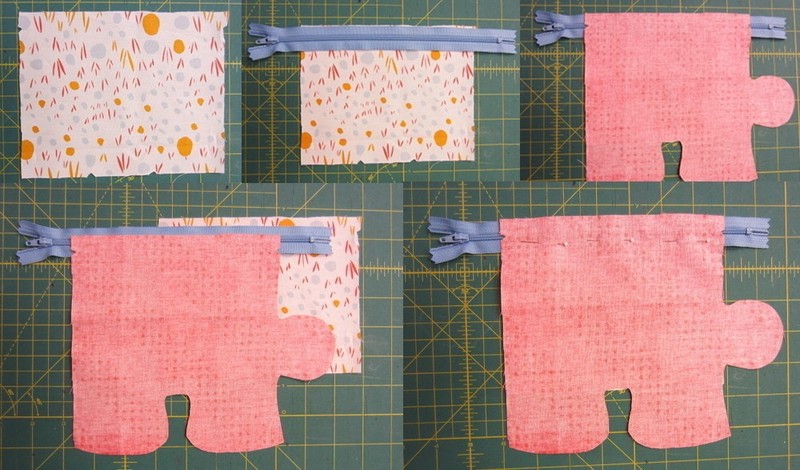
Here's what your pouch pieces should look like.
-
 Step 4
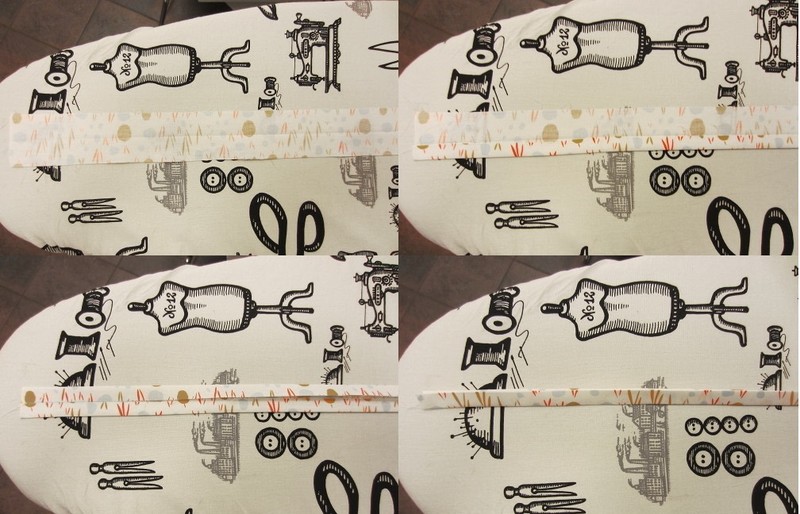
Prepare your strap for sewing: Iron it in half long ways, creating a nice crease, then unfold it. Fold each raw edge into the center and press. Fold the strap again lengthwise so the raw edges are completely encased.
-
 Step 5
Edge stitch your strap along both long edges.
-
 Step 6
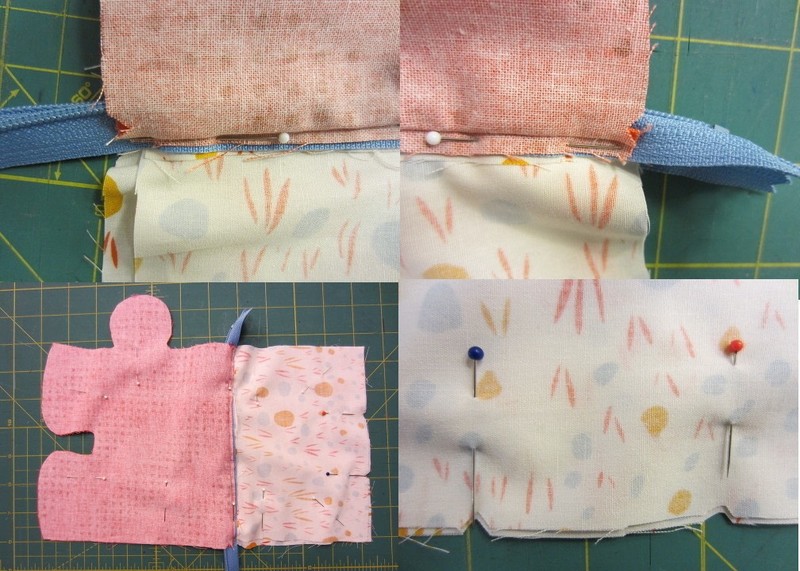
Create a zipper sandwich: Place one lining piece right side up, then the zipper also facing up, and then one shell piece wrong side up. Line up the top edges of the lining, zipper, and shell. Pin all three layers below the zipper coil.
-
 Step 7
Sew the zipper: With the zipper foot, stitch the lining, zipper, and shell piece. Use the right edge of the foot as a guide lining it up with the edge of your fabric (3/8” seam allowance). Iron fabric away from zipper and then topstitch with the zipper foot.
-
 Step 8
Repeat step 6 and 7 for the other side of the zipper with the second shell and lining pieces.
-
 Step 9
Prepare for sewing: Unzip your zipper halfway so that you’ll be able to flip your project right side out at the end. Fold the strap in half and pin just below the zipper, lining up the raw edges of the strap to the edge of the shell. Be sure to pin the strap only to the shell fabric, not the lining.
-
 Step 10
Match and pin the shell pieces with right sides together. Repeat for the lining pieces. When pinning the lining, mark a 2” gap at the bottom edge. This gap will be your starting and stopping point. Fold your zipper in half lengthwise and pin it together to help your project lay flat.
-
 Step 11
Sew the pouch: Stitch all the way around the project using ¼” seam allowance, beginning at the bottom of the lining, sewing around the entire edge, and stopping 2” from your starting point, leaving a 2” opening. When you sew the lining together, pivot at your corners by stopping ¼” away from the edge, putting your needle in the fabric, lifting your pressure foot, and rotating your project. If you have trouble sewing over your zipper you can use your turning wheel to manually move the needle forward. When you sew around the really curvy parts of your puzzle piece it might be helpful to mark every ½" and use the marks as tiny pivot points, only pivoting about 5 to 10 degrees. Press your seams.
-
 Step 12
On the pouch shell, clip and notch your curves so that your pouch will lay flat. For convex curves, cut out little triangles. For concave curves, clip every ¼”. Do not cut too close to your stitching.
-
 Step 13
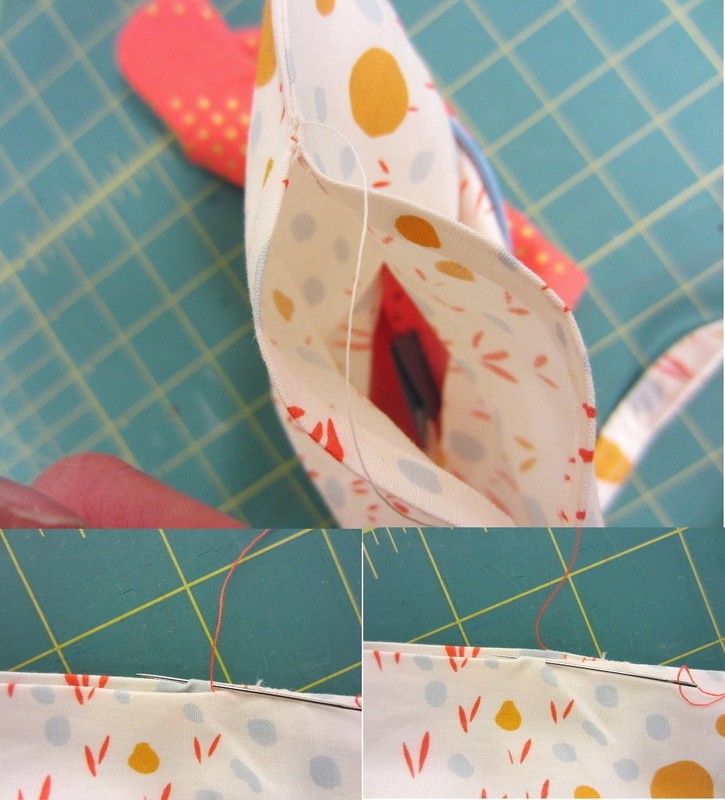
Turn right side out: Use the 2” gap at the bottom of the lining to pull your project right side out. Use a corner turner to poke out the puzzle piece curves so they are nice and crisp. Press all seams flat. Turn the seam allowance from the gap in the lining to the inside, hiding the raw edges, and press.
-
 Step 14
Close the gap: Edge stitch with your machine or hand sew the lining gap closed.
-
 Step 15
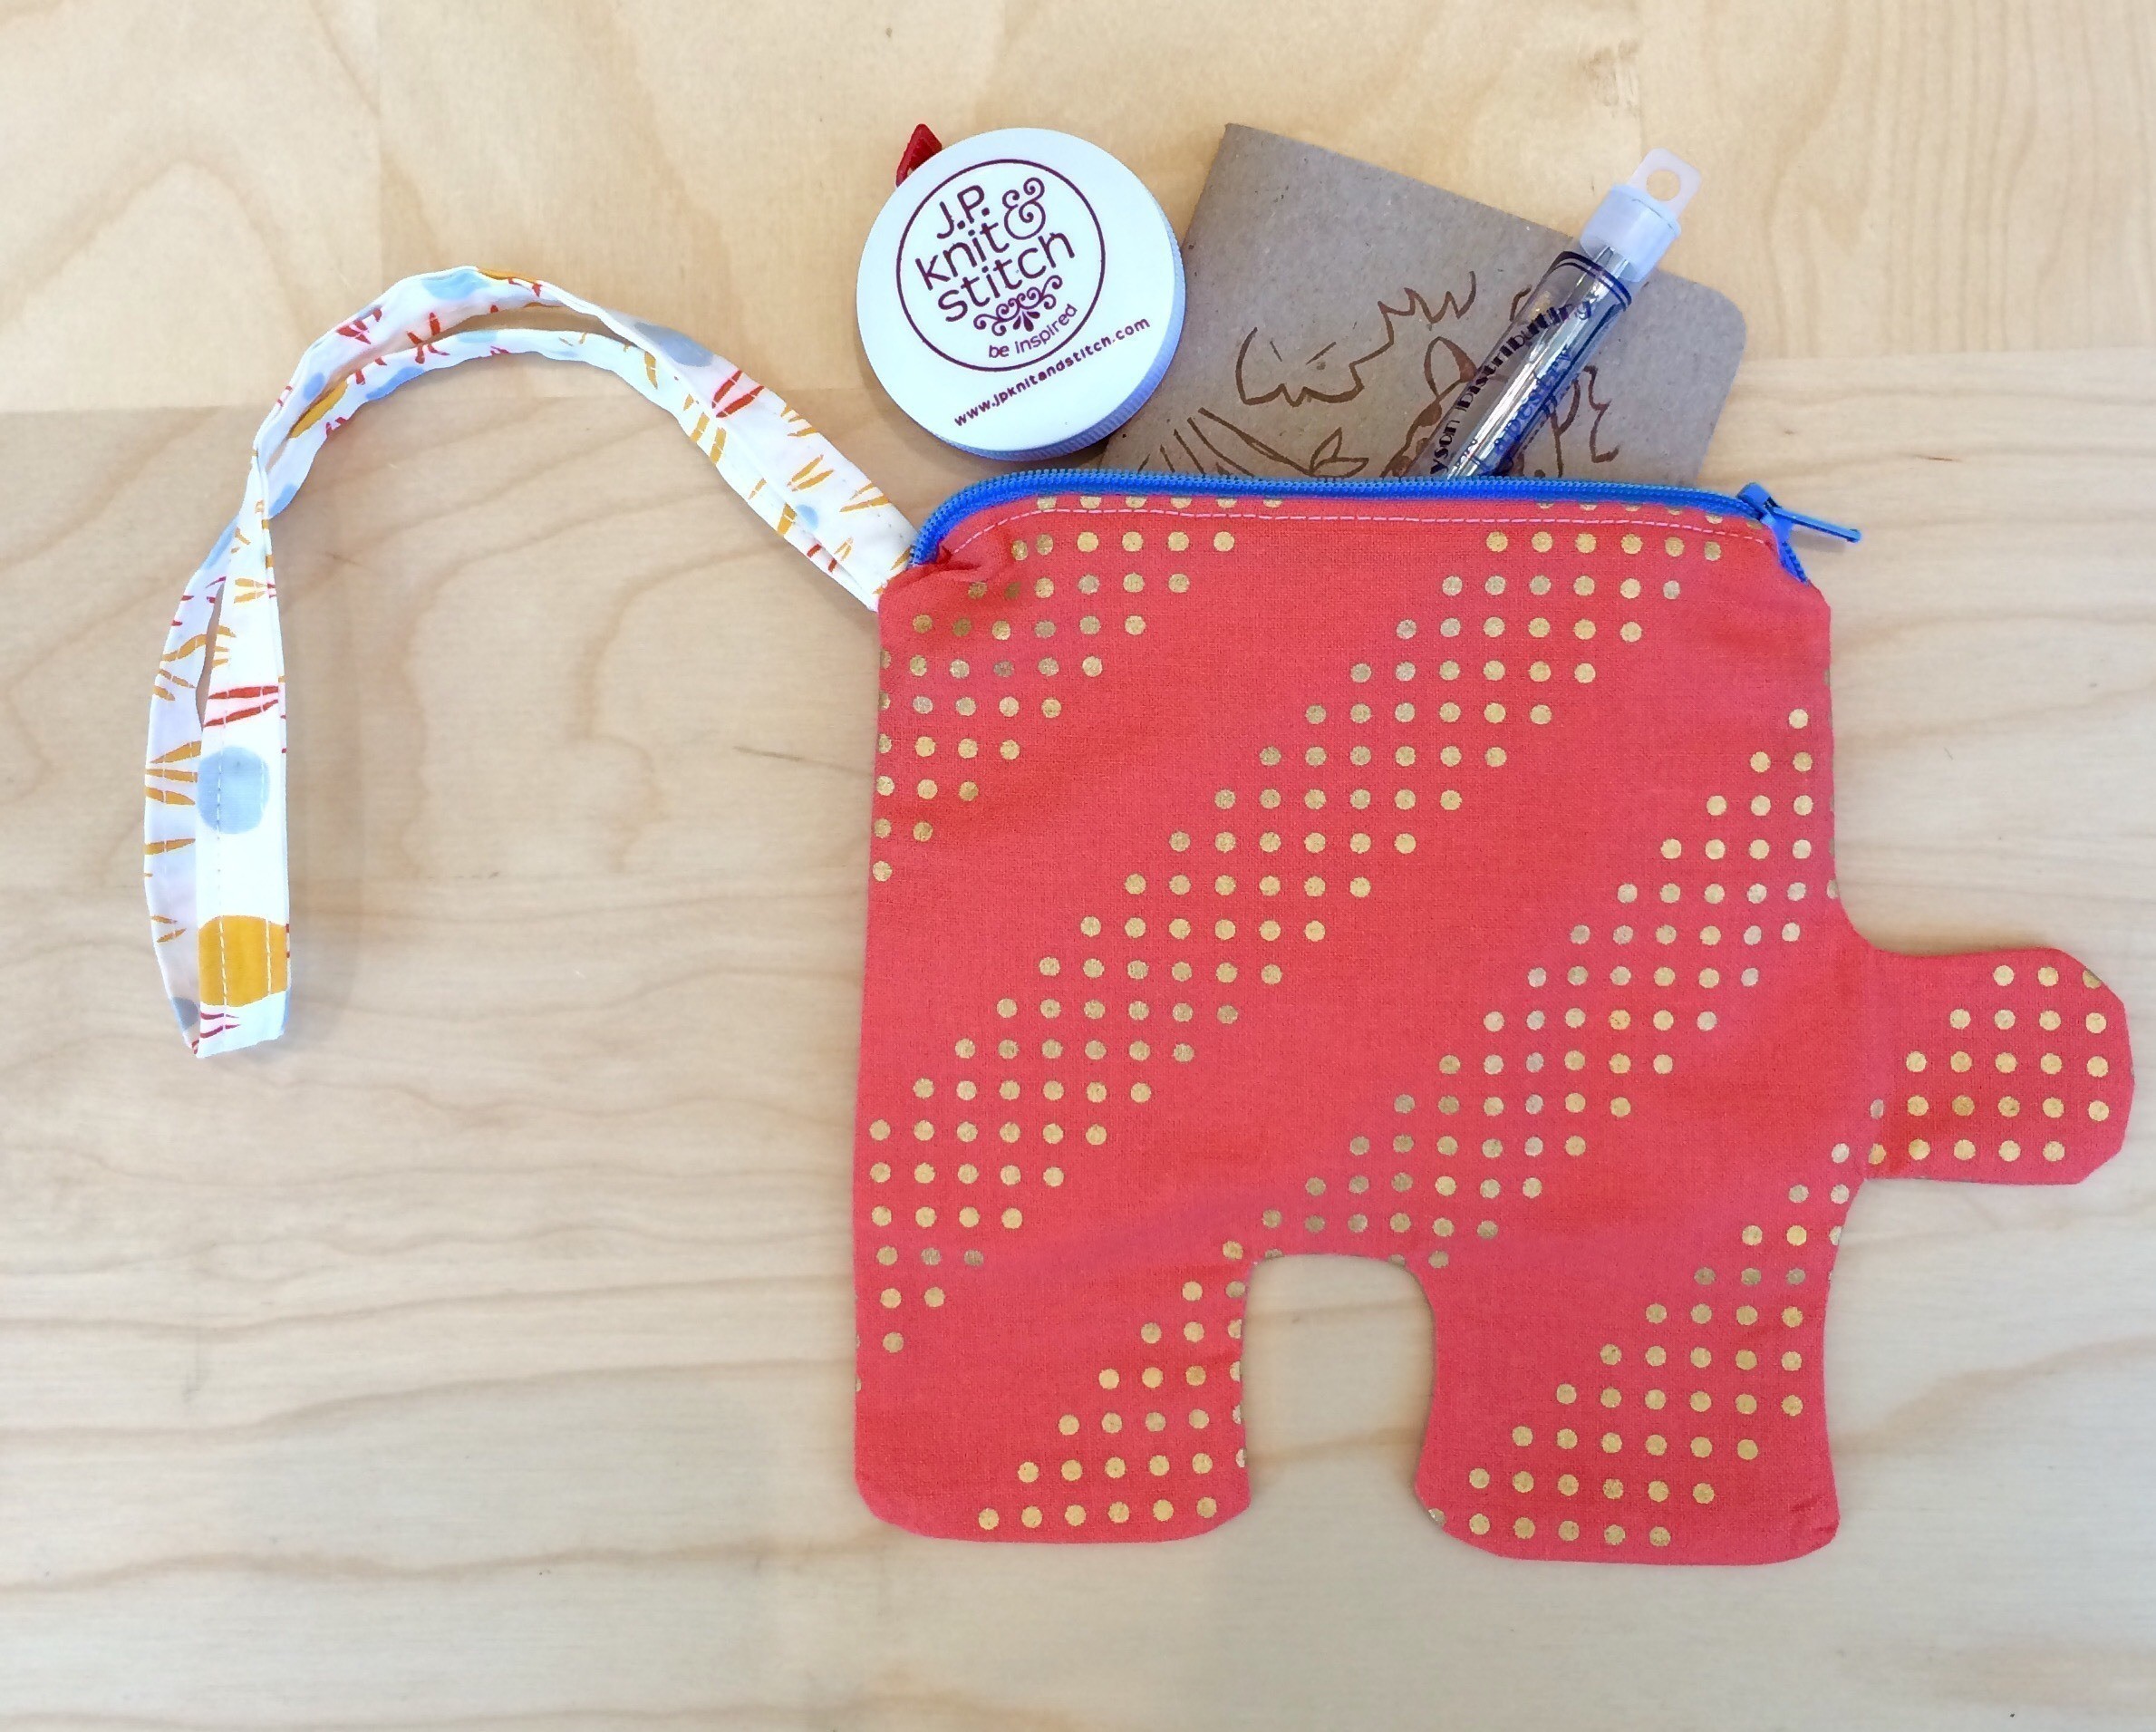
14. Tuck the lining into the pouch and give your project one more good press You now have a super cute puzzle piece zipper pouch, and all you have to do is make a matching one.