


About
Just because I'm a corporate drone doesn't mean I have to look like one!
I don't know about you, but I have to work a corporate job. They are fairly lax on the whole dress code thing , fortunately, so I am able to dress the way I want to. Our elevators have a mirror-like finish so I am able to watch people look me up and down behind me. Now, I'm not as outrageous as I could be, but a fat girl with pink and black hair, with visible tattoos and piercings, and wearing all black doesn't exactly scream "corporate."
I can almost hear these observers thinking: "Does she work here? She doesn't look like she works here. Maybe she works in the art department. But that's 2 buildings over unless she's just visiting? Maybe? I wonder if her boss is okay with it. Is it up to the dress code? I wish I could be that brave. Hmm... my daughter would love her watch/bag/etc." (*grins*)
Besides just my usual clothing, I like to veer from the corporate norm with other things as well.
Tags
-
 elarablair favorited Punked Out Badge/Id Holders
23 Feb 18:27
elarablair favorited Punked Out Badge/Id Holders
23 Feb 18:27
You Will Need
-
 Step 1
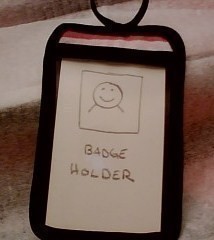
~ For the front and back of outside, cut out a piece that is 4.25" x 2.75" with all 4 corners rounded and one that is 0.75" x 2.75" with 2 corners along one long side rounded. (see diagram)
~ Do the same with the lining.
~ If using interfacing, cut out a piece that is 4.25" x 2.75" with all 4 corners rounded. (see diagram)
~ On the plastic, cut out a piece that is 3.625" x 2.75" with 2 corners along one short side rounded. (see diagram) -
Step 2
Do any applique or decorative sewing on the outside before preceding with the next steps.
-
Step 3
Layer the lining and outside pieces of the small back area together, right-sides out.
-
Step 4
Cut two 3" pieces from the bias tape.
-
Step 5
Sandwich the non-rounded edges of the small back pieces inside one of the pieces bias tape and sew in place with a running stitch. Trim off the excess tape when done.
-
Step 6
Do the same with the plastic piece and other strip of bias tape you just cut.
-
Step 7
If using interfacing, place the outside fabric face down with the wrong side up, layer the interfacing on top of it and the lining on top of that right-side up. Iron together. Otherwise, just layer the outside and lining pieces, wrong sides together.
-
Step 8
You should now have a large front piece, a small back piece trimmed on one side with bias tape, and the plastic piece trimmed on one side with bias tape.
-
 Step 9
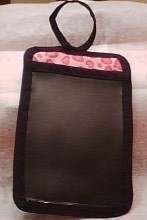
Lay the front piece and small back, lining sides together, tops lined up.
(use the photograph as a reference)
-
Step 10
Starting in the center of the top, sandwich the pieces between the bias-tape and sew through all the layers with a running stitch.
-
Step 11
Be sure to pleat the tape as you sew it around the corner.
-
 Step 12
As you get close to the trim of the small back piece, line up the plastic piece so the bottom rounded corners are even with the rounded corners of the main front piece and the trim overlaps the trim of the small back piece.
(use the photograph as a reference)
-
Step 13
Continue sewing the tape around the edge of the pieces until all 3 pieces are held together by the tape.
-
 Step 14
Once you get back to the top, form at least a 4" loop with the bias tape and attach.
(use the photograph as a reference)
-
Step 15
Trim off any excess. Attach the loop to your lanyard or badge clip and you are good to go!


Comments


