About
Puff-painted shirts
During a throw-back pre-wedding slumber party, we girls got together and puff-painted shirts, made s'mores, told ghost stories, and watched scary movies, just like the good ol' days back in junior high. Only this time we had margaritas!
This is the result of the puff painting.
Your painting time may vary, but give your paint at least overnight to dry.
You Will Need
-
 Step 1
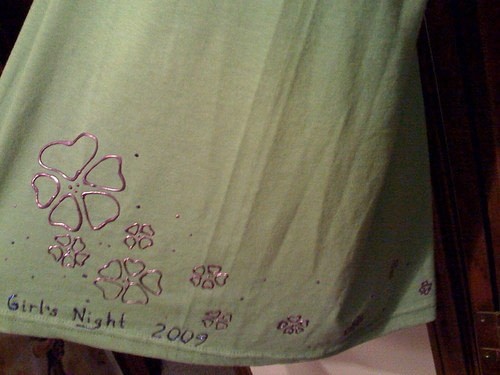
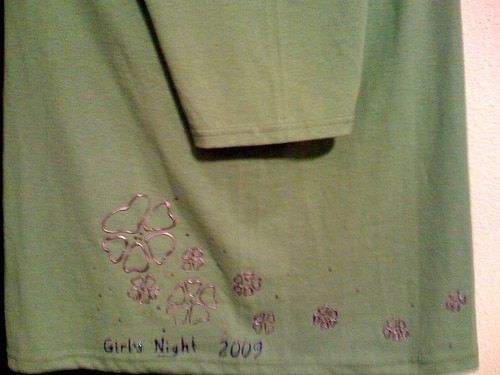
I made a green shirt with purple hibiscus-like flowers along the hem, that flowed down the side and disappeared around the back.
-
 Step 2
The trick with this shirt was to fold it so that I could see front and back where my design would go all at once. Instead of folding it so the sleeves were on the sides (like you might usually do), I folded it so each sleeve was in the center, front and back.
-
 Step 3
Then, with a steady hand, I drew out shallow-lobed hearts joined at their points. I made them smaller as they went down and off to the right (around the back of the shirt). Using two colors of purple, I made the flowers and little dots of paint interspersed.
I also wrote Girls' Night, 2009 right above the hem.
The final step is to let the shirt dry overnight without moving it at all! My second shirt suffered a bit of smearing from a moving mishap.
-
 Step 4
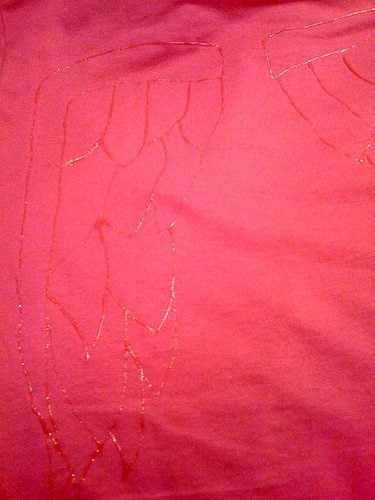
Although difficult to see due to the tone-on-tone colors of paint and shirt (I intended these wings to only be seen when the paint shimmered as I moved), these wings are painted on a pink shirt using the same technique as the green shirt's flowers. The only difference was that for this design, I folded the shirt like normal, with the sleeves on the sides and painted only on the back. I made as neat a square as i could, keeping my design area centered.
-
 Step 5
I practiced drawing the wings on a piece of paper, making sure to draw a left and a right wing until I had it just right. Then once the paint started flowing, it's all systems go. Keep the paint moving and don't stop!
I started with a thick shape like the number 7 (for the right wing, or an upside down L for the left) and added some V-shaped feathers beneath.
Try sketching a simple line drawing of a wing! It's easier than you think, and when it's on your back, it'll clearly be a wing from context.
-
 Step 6
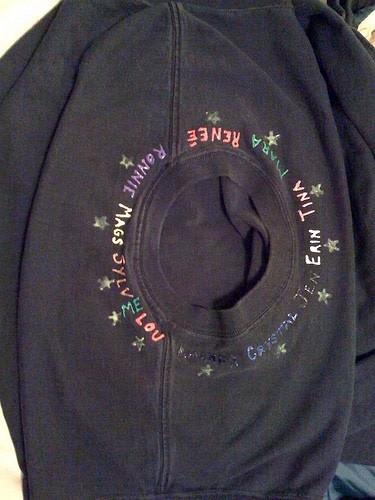
Try all sorts of things! On this black shirt, I wrote all the girls' night names around the neck in each girl's favorite color. In this case, I made sure to fold the shirt so the neck was visible and flat, as in the picture.
This technique might look nice with, for instance, gold lettering as if it were a necklace or a halo, perhaps in conjunction with the angel wings. Maybe you can write in Elvish and write out the One Ring inscription around a plain shirt. Just be creative!
The real trick is folding the shirt so all of your design can be seen at once, especially if it's a continuous design such as the hem flowers or a ringed neckline. Then be patient and let it all dry overnight before re-folding or moving your shirt.
Just have fun with it. I used plain purchased shirts as well as old shirts I already had. Look in your closet to liven up what you have!