
About
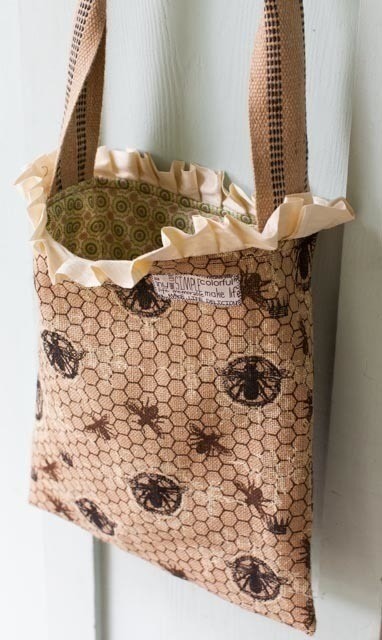
Quick and easy tote with a fun pleated silk ruffle
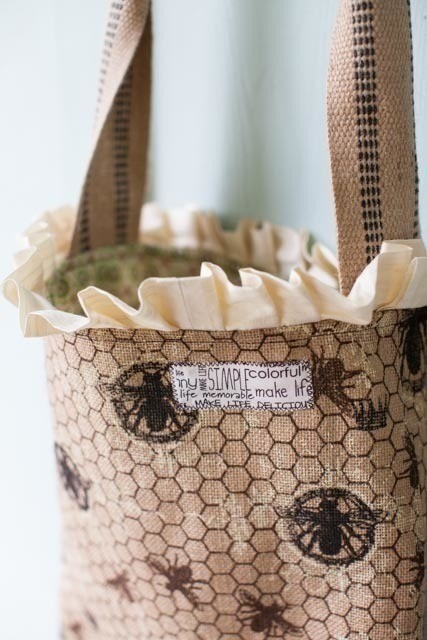
This quick tote is the perfect size to carry your laptop computer or school books! The wide, long strap allows you wear it across your body!
-
 Zacharie M. favorited Printed Burlap Tote Tutorial
01 May 17:55
Zacharie M. favorited Printed Burlap Tote Tutorial
01 May 17:55
-
 The Sewing Maven favorited Printed Burlap Tote Tutorial
05 Feb 20:16
The Sewing Maven favorited Printed Burlap Tote Tutorial
05 Feb 20:16
-
 lleeahs favorited Printed Burlap Tote Tutorial
05 Feb 19:50
lleeahs favorited Printed Burlap Tote Tutorial
05 Feb 19:50
-
Cynthia S. published her project Printed Burlap Tote Tutorial
03 Feb 09:00
-
 Step 1
Cut 2 pieces of burlap that measure 15 x 16.5 inches.
Place the pieces right sides together and stitch down the side, across the bottom and them back up the other side, pivoting at the corners. Remember to back tack at the beginning and the end of your seams.
-
 Step 2
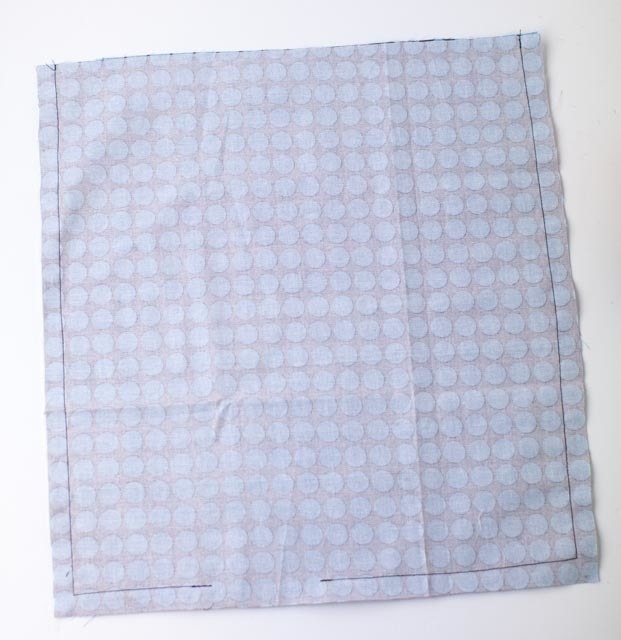
Cut 2 pieces of coordinating cotton fabric that measure 15 x 16 inches.
Place the pieces right sides together and stitch down the side, across the bottom, but this time you need to stop about 7 inches in, back tack, then start stitching again, leaving about a 4 inch opening. Continue stitching until you reach the other corner and pivot and then stitch up the other side. Remember to back tack at the beginning and the end of your seams.
-
 Step 3
Clip the corners at a diagonal. This will give the tote nice sharp corners once you turn it right side out.
-
 Step 4
Flip the tote right side out and using a chop stick poke the corners out.
-
 Step 5
Using an iron ... press the side seams open ... trust me, this really helps to find the side seam when you go to press the tote flat.
-
 Step 6
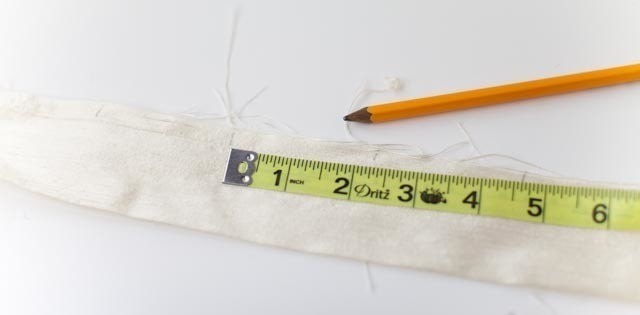
Next, cut a strip of cream color silk shantung that measures 4 inches wide x the width of the fabric. I'm pretty sure that my silk was 44 inches wide.
Press the strip in half width-wise and then using a tape measure and a pencil make a small mark every 2 1/4 inch for the entire length of the strip.
-
 Step 7
Place one end of the strip under the sewing machine foot and stitch just a few stitches. Before you reach the pencil mark form a small pleat with your finger, about 3/8 to 1/2 inch deep. Stitch across the pleat and then repeat for every pencil mark.
-
 Step 8
Pin the pleated silk to the right side of the top of the burlap tote. You may want to baste around the top of the tote to keep the silk in place.
-
 Step 9
Cut a length of jute webbing that measures 50 inches.
Pin the jute to the tote, centered at the side seams. Baste the straps if you feel you need to.
-
 Step 10
Place the burlap tote inside the cotton lining, right side together and pin around the top edge. Stitch in place.
-
 Step 11
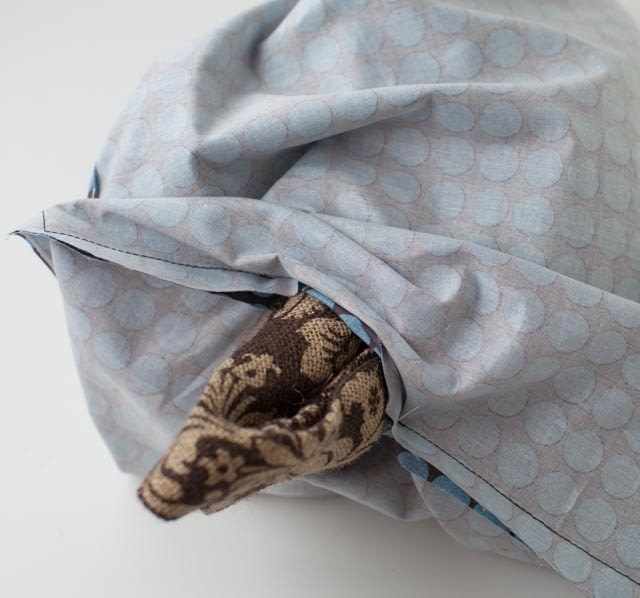
Remember the opening you made at the bottom of the lining? Well ... here's where it comes in handy!
Birth the tote through that hole ... I know kind of funny! That's the costume shop talk coming out in me!
-
 Step 12
Almost there ... It can be snug, depending on just how wide of an opening you left in that lining.
-
 Step 13
Push the lining to the inside and press the top edge.
-
 Step 14
Stitch around the top edge through all layers, about 3/8 inch from the top edge.
-
 Step 15
Stitch a small scrap of fabric with text printed on it ... using a zig-zag stitch and you are done!