


About
This is how you let the fairies into your home and attract them to your garden!
After finding out you could make fairy doors from polymer clay I decided to try my hand at making one. One turned into five and will soon be sold on my Etsy site. This is my version of polymer clay fairy doors.
Tags
-
 Key West Witch favorited Polymer Clay Fairy Door
28 Jun 18:15
Key West Witch favorited Polymer Clay Fairy Door
28 Jun 18:15
-
 Ellis Pritchard favorited Polymer Clay Fairy Door
22 Jun 07:37
Ellis Pritchard favorited Polymer Clay Fairy Door
22 Jun 07:37
-
 Oliver Daniels favorited Polymer Clay Fairy Door
17 Oct 07:48
Oliver Daniels favorited Polymer Clay Fairy Door
17 Oct 07:48
-
 Julie Phillips favorited Polymer Clay Fairy Door
17 Oct 06:16
Julie Phillips favorited Polymer Clay Fairy Door
17 Oct 06:16
-
 Tess M. favorited Polymer Clay Fairy Door
08 Apr 21:10
Tess M. favorited Polymer Clay Fairy Door
08 Apr 21:10
-
 Victoria D. favorited Polymer Clay Fairy Door
07 Oct 21:04
Victoria D. favorited Polymer Clay Fairy Door
07 Oct 21:04
-
 PineconePrincess favorited Polymer Clay Fairy Door
03 May 22:59
PineconePrincess favorited Polymer Clay Fairy Door
03 May 22:59
-
 mmotse03 favorited Polymer Clay Fairy Door
04 Mar 00:07
mmotse03 favorited Polymer Clay Fairy Door
04 Mar 00:07
-
 Lynne H. favorited Polymer Clay Fairy Door
24 Mar 13:55
Lynne H. favorited Polymer Clay Fairy Door
24 Mar 13:55
-
Tiffany L. favorited Polymer Clay Fairy Door
14 Mar 01:58
-
 Step 1
Collect all supplies needed for the project.
-
 Step 2
Massage clay to soften it until it is the desired consistency. Do not over soften the clay.
-
 Step 3
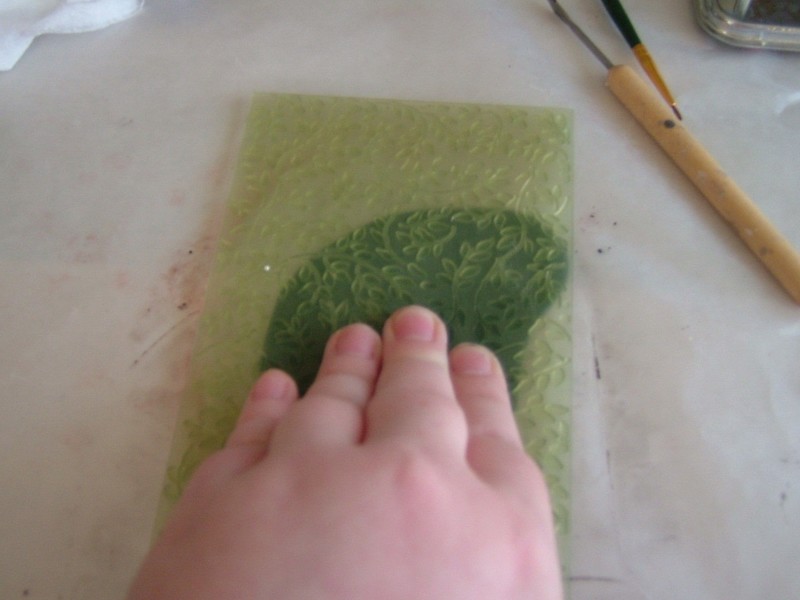
Roll out clay into a sheet and press the texture plate into the sheet of clay. Make sure you put enough pressure on the plate so that the image is properly transferred.
-
 Step 4
Peel off texture plate and cut the desired shaped door into the clay using your carving tool.
-
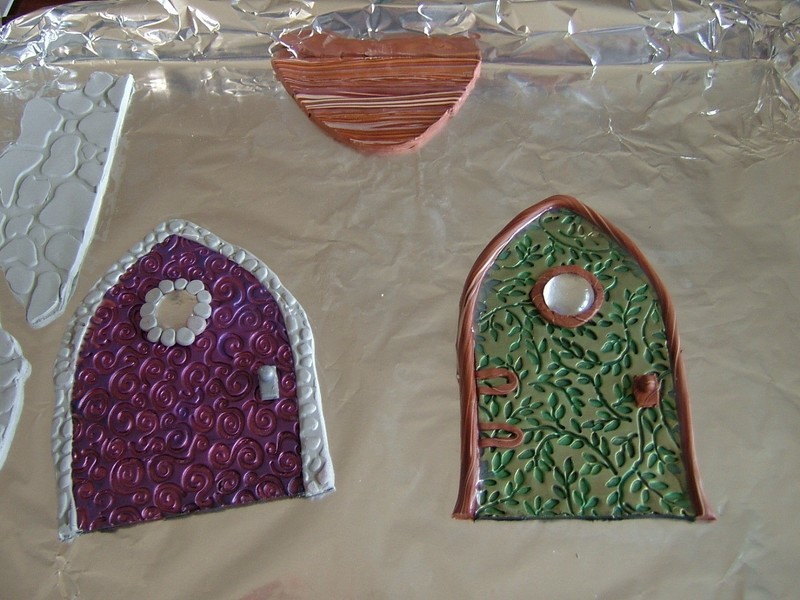
 Step 5
Dip finger into Pearl Ex pigment powder and gently rub on top of door, trying not to get the powder into the textured sections.
-
 Step 6
Use a different color to paint the inside of the textured sections. I recommend using a darker color for this part.
-
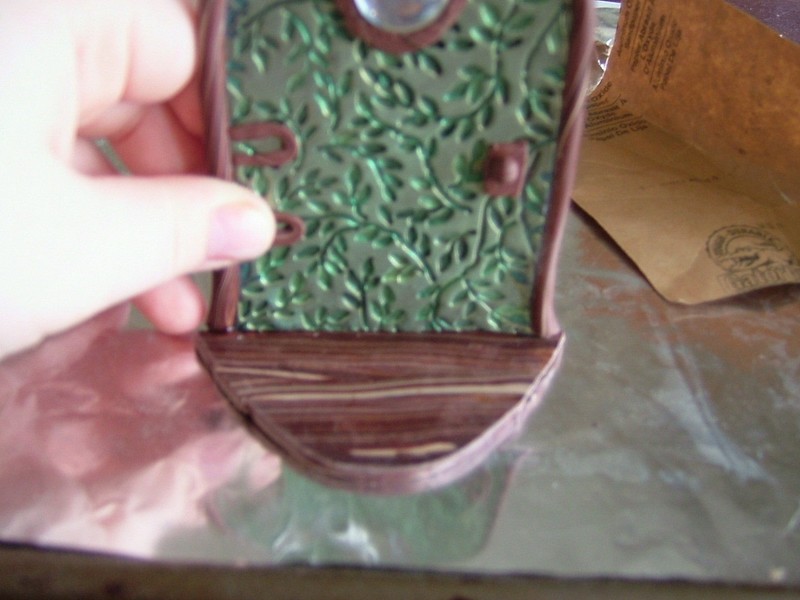
 Step 7
Add fixtures such as hinges, a door knob, and a window. The window is simply a glass pebble that was placed into the door and surrounded with woodgrain clay. For the woodgrain clay design, see the other Woodgrain Polymer Clay tutorial.
-
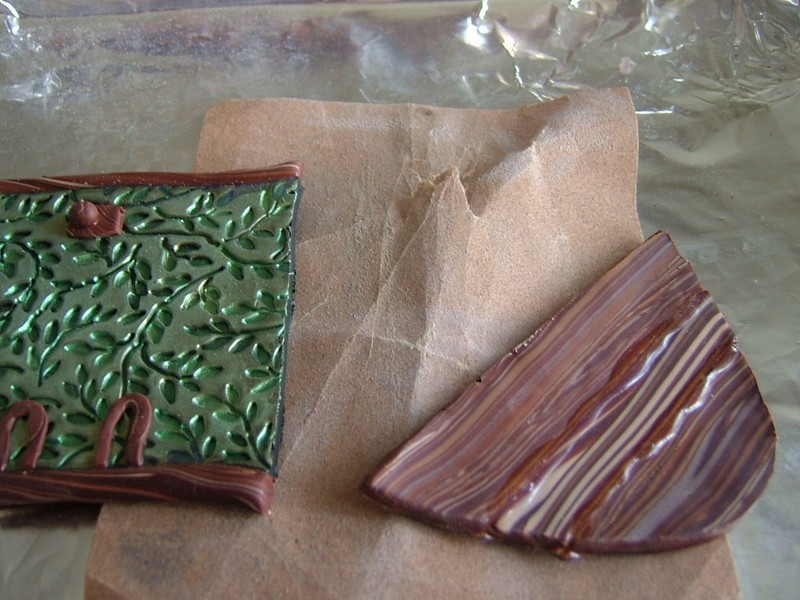
 Step 8
Using the woodgrain clay design, cut planks of "wood" and create a door step that is a suitable size in comparison to the door.
-
 Step 9
Place all pieces onto a baking sheet that has been covered in foil. Bake at 275 degrees Fahrenheit for approximately 40 minutes, or 30 minutes per 6mm.
-
 Step 10
Sand down rough edges on both the bottom of the door and the base. When done sanding, wipe off the dust that's been created from sanding.
-
 Step 11
Glue door to base and hold in place till dry.
Tah-dah! You're done!


the detail is insane!