


About
Renew your old cutlery with beautiful clay decorations
Polymer clay allows you to make almost anything you want, and creating patterns with it can be fun and useful. I decided I had to try this even if it looked complicated, but I found out it's much easier than I thought!
I decided to cover some old cutlery I had (knife and teaspoon), but you can cover anything you want with this techinique!
-
 Rebecca M. favorited Polymer Clay Covered Cutlery
13 Jun 20:39
Rebecca M. favorited Polymer Clay Covered Cutlery
13 Jun 20:39
-
Sue A. commented on Polymer Clay Covered Cutlery
03 Oct 23:55
-
 xXJULESXx commented on Polymer Clay Covered Cutlery
11 Jul 21:39
xXJULESXx commented on Polymer Clay Covered Cutlery
11 Jul 21:39
-
xXJULESXx favorited Polymer Clay Covered Cutlery
11 Jul 21:37
-
 Kara B. favorited Polymer Clay Covered Cutlery
14 May 01:42
Kara B. favorited Polymer Clay Covered Cutlery
14 May 01:42
-
C T. added Polymer Clay Covered Cutlery to Household crafts! x
04 Apr 22:39
-
 Eleanor favorited Polymer Clay Covered Cutlery
04 Apr 02:07
Eleanor favorited Polymer Clay Covered Cutlery
04 Apr 02:07
-
lesley d. favorited Polymer Clay Covered Cutlery
01 Apr 17:56
-
 WerewolfCas favorited Polymer Clay Covered Cutlery
29 Mar 08:15
WerewolfCas favorited Polymer Clay Covered Cutlery
29 Mar 08:15
-
 Emma H. favorited Polymer Clay Covered Cutlery
29 Mar 00:38
Emma H. favorited Polymer Clay Covered Cutlery
29 Mar 00:38
-
 Step 1
Take 2 little pieces of clay: white and red. They need to be about the same size.
Pass both pieces, one at a time, through a clay (or pasta) machine. Start from its thickest level and keep passing the clay through the next ones, until it's about 1,5 mm thick (0.05 inches). -
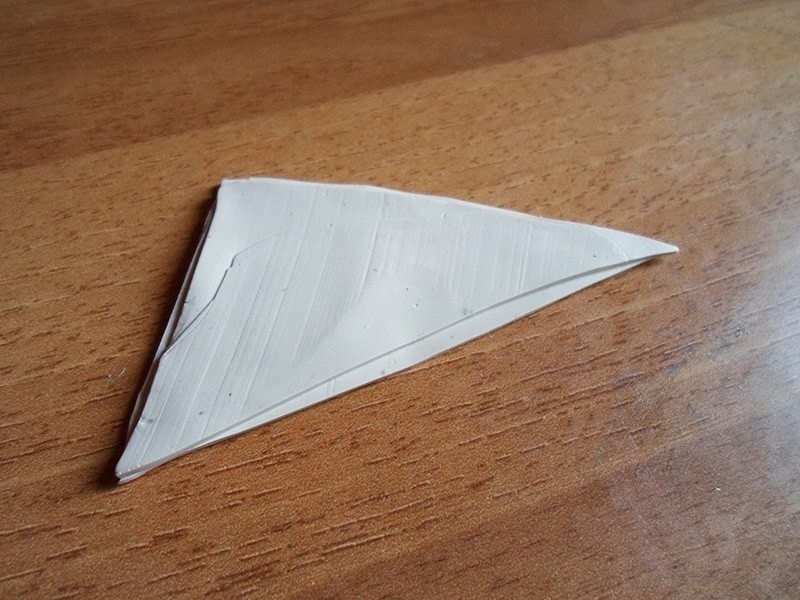
 Step 2
Cut both pieces into identical rectangles then divide both of them in 2 triangles, making a cut on their diagonal.
-
 Step 3
Place one of the 2 triangles on the other one of the same color to obtain a thicker triangle. Do the same for the other 2 (the red ones).
-
 Step 4
Join the white thick triangle with the red one forming a new bicolor rectangle.
-
 Step 5
Pass the new rectangle through the machine.
-
 Step 6
Fold it in half.
-
 Step 7
Pass it through the machine and fold it again.
Keep doing all this until the 2 colors create a good shade from red to white. Make sure to always fold your clay on the same side.
You need to do this at least 20 times to obtain this result. -
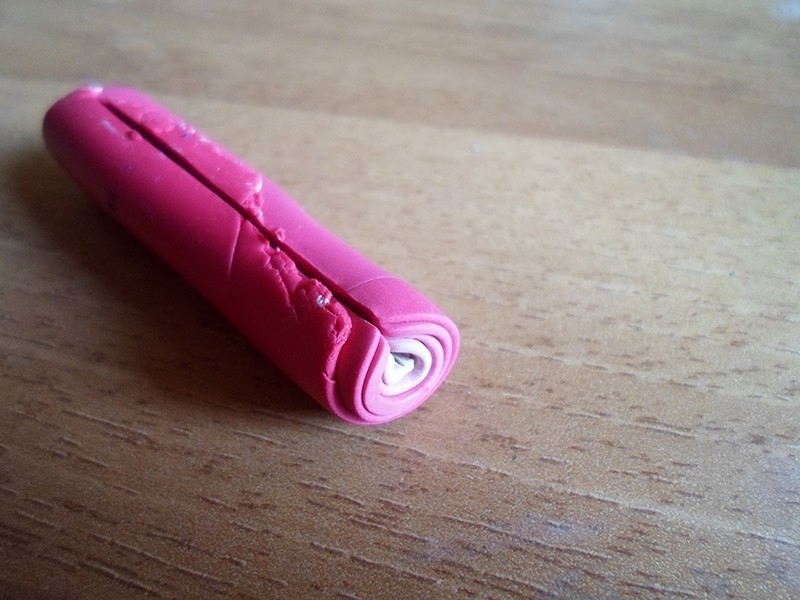
 Step 8
Roll your clay rectangle starting from the white side. This way you'll obtain a cylinder.
-
 Step 9
Make a cut into the roll that goes from the longest side of the cylinder to its middle.
-
 Step 10
Make other 2 cuts that start from the same cut you made previously: one must end on its right, the other on its left. This way these 3 cuts will look like an M.
-
 Step 11
Take a piece of blue clay now and flatten it passing it through the machine to create a rectangle.
Divide the blue rectangle in 3 strips, making 2 cuts on the longest side. -
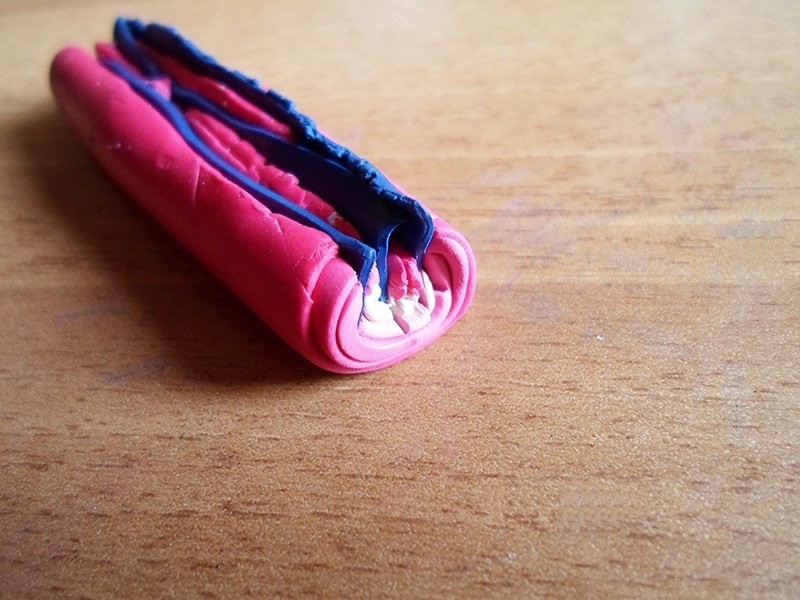
 Step 12
Insert each of the 3 blue strips into the 3 cuts you made in the red cylinder.
-
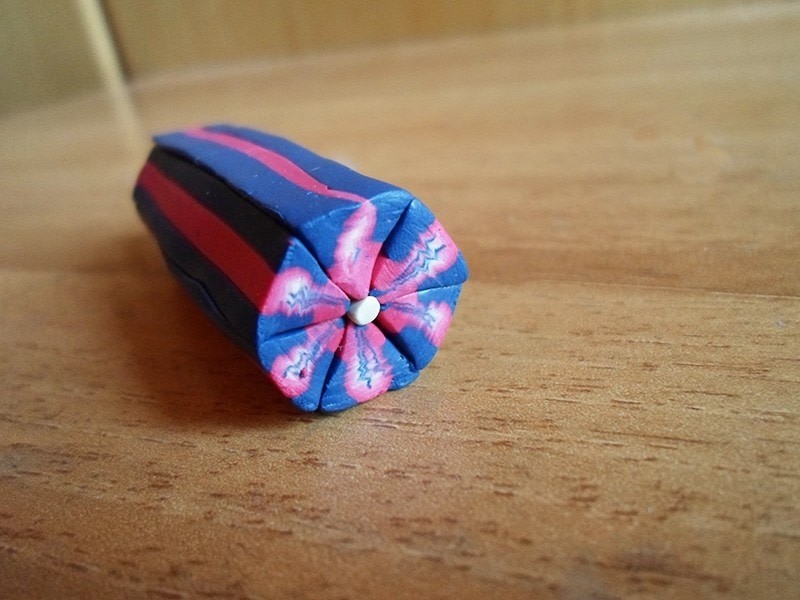
 Step 13
Press the side of the cylinder where the blue strips touch each other with your fingers to obtain a petal shape.
-
 Step 14
Make 2 thinner cylinders using blue clay. Make them as long as the red one and give them a triangular shape with your fingers.
Place the blue pieces on the petal's base: one on the left, one on the right. The base of the petal is where the red part is thicker. -
 Step 15
Press all the pieces together always keeping a triangular shape. Gently pull it to make it longer and thinner. It needs to be about 1 cm thick (0.39 inches).
Divide this long piece of clay into 6 equal pieces. -
 Step 16
Place 3 pieces side by side to form a semicircle and do the same with the other 3 pieces.
-
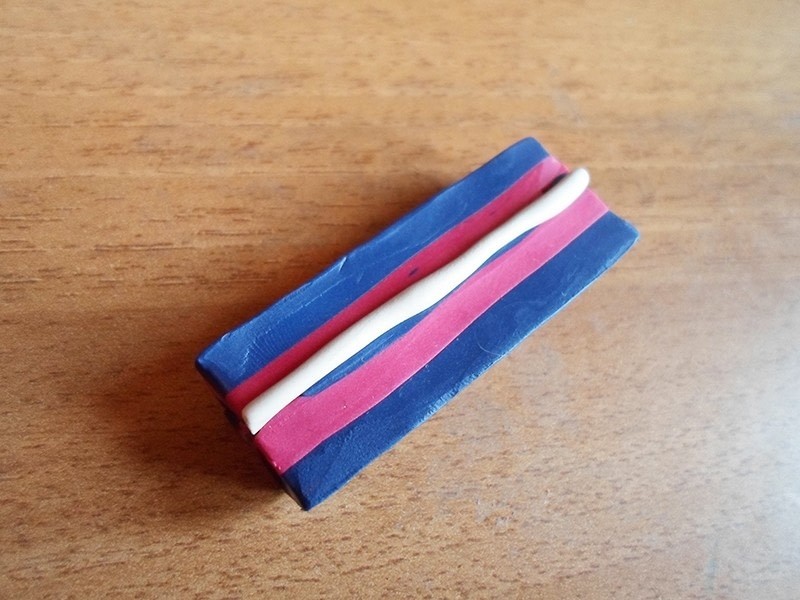
 Step 17
Take a little bit of white clay and make a very thin cylinder with it. Make it as long as your semicircle and place it in the middle.
-
 Step 18
Compose the circle adding the other semicircle on top. This new cylinder is the flower!
-
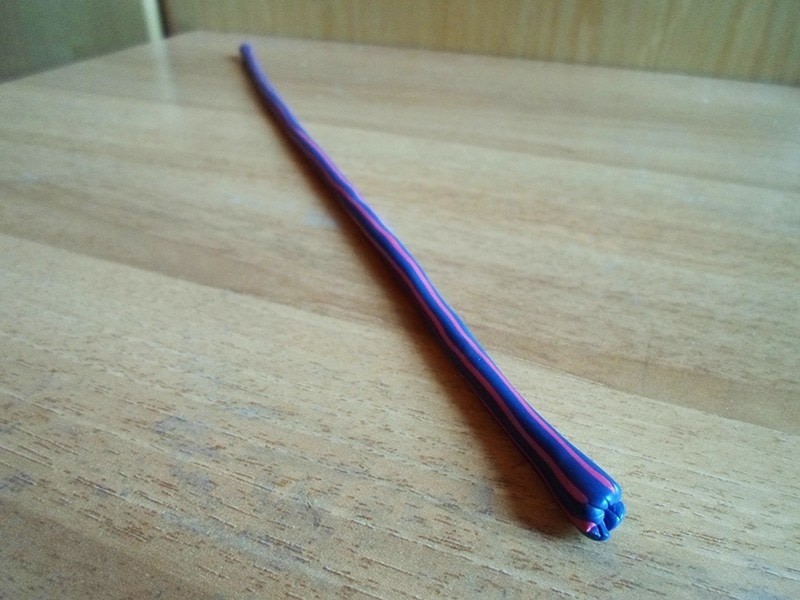
 Step 19
Press the cylinder with your fingers to make sure that all pieces stick together, and gently pull it to make it longer and thinner (about 5mm - 0.19 inches).
-
 Step 20
Cut out the beginning of your cylinder and slice the remaining part. These thin slices contain tiny flowers in them.
-
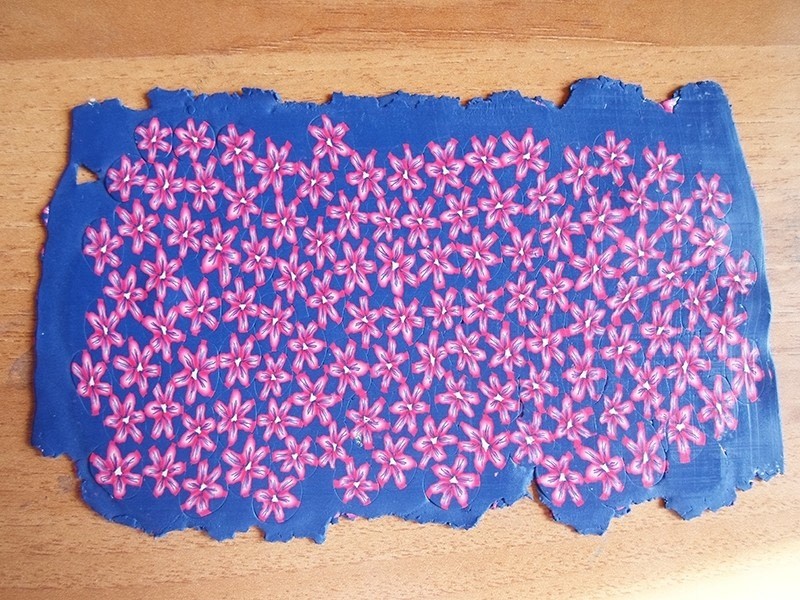
 Step 21
Cut a new piece of blue clay, pass it through the machine and create a rectangle. Place all of your flower slices on the blue rectangle, one next to the other.
-
 Step 22
When your rectangle is finally full of flowers, pass it through the machine again, making sure to always start from the thickest level.
-
 Step 23
Lay your clay upside down on the table and place your piece of cutlery's grip on it to cut the amount of clay you'll need to cover it.
-
 Step 24
Cover the grip with your piece of clay and smooth it with your fingers.
Finally, place your clay-covered grip in a way that it doesn't touch any surface, and bake in the oven at 110/120C - 230F for 15 minutes (or follow the instructions on your clay package).
Take everything out of the oven when the time is up and let the clay cool down. -
 Step 25
After a few minutes your clay grip is finally hard and dry. Your brand new flatware is done!
-
 Step 26
I had a piece of clay left so I decided to cover a key with it. Do you like it? :)


Comments


