


About
Room decor for cheap
I'm not generally a fan of decor involving words... esp. when they're mass-produced and say something cheesy and generic like "inspire" or "dream" or whatever. But when I saw this www.cb2.com/family.aspx?c=587&f=6584, I fell in love! Positive, but open to interpretation. However, with a $150 price tag I decided to make them myself, but in plush form, costing a total of about $20!
Tags
-
 Roughwaters44 favorited Plushy Alphabet
08 Jul 03:42
Roughwaters44 favorited Plushy Alphabet
08 Jul 03:42
-
 banu added Plushy Alphabet to Sewing fun
30 Mar 08:19
banu added Plushy Alphabet to Sewing fun
30 Mar 08:19
-
banu favorited Plushy Alphabet
30 Mar 08:18
-
 Sarah B. added Plushy Alphabet to Housewares
28 Mar 03:09
Sarah B. added Plushy Alphabet to Housewares
28 Mar 03:09
-
 colourChemist favorited Plushy Alphabet
09 Jun 08:28
colourChemist favorited Plushy Alphabet
09 Jun 08:28
-
Cara F. favorited Plushy Alphabet
19 Jan 02:31
-
 katthecat favorited Plushy Alphabet
05 Jan 23:22
katthecat favorited Plushy Alphabet
05 Jan 23:22
-
 Danosa favorited Plushy Alphabet
21 Oct 15:27
Danosa favorited Plushy Alphabet
21 Oct 15:27
-
 DideRosa favorited Plushy Alphabet
13 Sep 16:01
DideRosa favorited Plushy Alphabet
13 Sep 16:01
-
 Step 1
Make your templates. Newspaper is great to use... but I used old paper bags. I wanted these to be about 22" tall and about 3" wide. Draw it out using a ruler & cut.
-
 Step 2
To get nice, uniform rounded corners for the S, I used a candle holder. for the smaller corners on the inside curve, I used the candle.
-
 Step 3
I didn't leave a seam allowance on my template - that comes next.
-
 Step 4
trace the shapes onto your fabric. I moved the template over about a centimeter to give a nice seam allowance, but on the other letters, I just eyeballed it. It doesn't need to be perfect. Make sure to cut two of each, with the sides you want to show facing each other.
It may help you to mark your seam line on the opposite side. -
 Step 5
Cut! Making sure to leave that seam allowance.
Note: I used Minky fabric (also known as cuddle) and boy does it shed! Someone told me that once your pieces are cut out, if you throw them into the dryer for ten minutes, it pulls off all the fuzz and it won't shed anymore... however, if you cut again, the shedding will start back up. Since we have coin-op laundry, I didn't do this at first and my house looked like it snowed neon. Everything was covered in acid snow! I highly recommend the dryer treatment. -
 Step 6
You could just sew the pieces together at this point, but I wanted a little more depth. I cut my scraps into three inch strips (and sewed them end-to-end) for the sides. Its an extra step, but I think it adds so much.
-
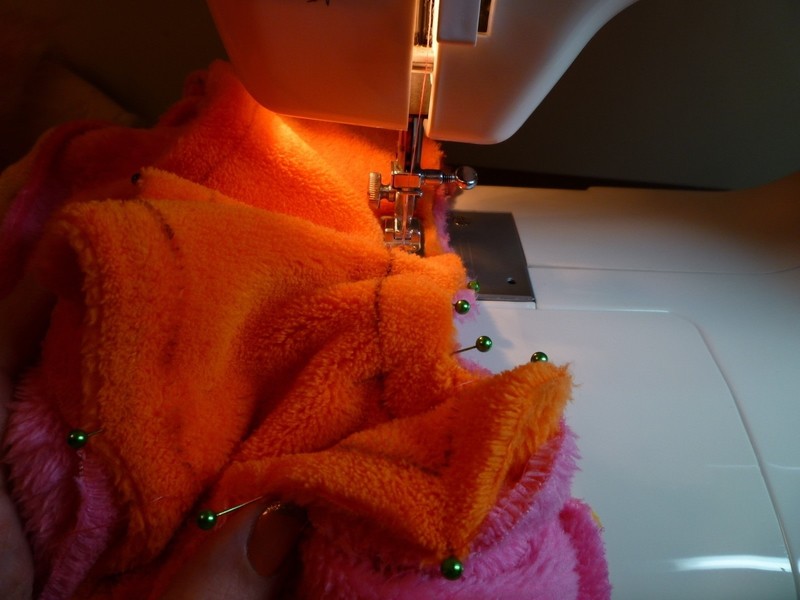
 Step 7
Stitch together! I didn't pin the Y or the E together first because there weren't any curves to worry about. Although, after the front was stitched to the side piece, I marked all the corners on the side to match the front. I learned this the hard way - my Y came out really crooked the first time!
-
 Step 8
Stitching the S together was not the most fun ever, but definitely doable.
-
 Step 9
Make sure to leave a space unstitched to turn your piece right side out, and to stuff it.
-
 Step 10
stitch it up once you're stuffed, and voila! You're done!!


Comments

