


About
Recycled bottle flower!! Really easy!
This is made from the end of a bottle which i've heated with a heatgun and a little bit of green foam.
I want to make a hair clip out of it but i dont have the findings right now. If you had a smaller one a ring would look awesome i think! You could colour the plastic in. I like it clear though as i think it would go with anything!
I really look forward to seeing your versions, especially if you've coloured it in or used glitter :)
Tags
-
 Amanda P. added Plastic Bottle Flower to Recyclables
17 Jun 22:15
Amanda P. added Plastic Bottle Flower to Recyclables
17 Jun 22:15
-
 Adrienne S. added Plastic Bottle Flower to RECYCLE PROJECTS
29 Apr 21:57
Adrienne S. added Plastic Bottle Flower to RECYCLE PROJECTS
29 Apr 21:57
-
Adrienne S. added Plastic Bottle Flower to YARD ART
29 Apr 21:56
-
 katrina.n.cavens added Plastic Bottle Flower to Crafts
15 Aug 12:35
katrina.n.cavens added Plastic Bottle Flower to Crafts
15 Aug 12:35
-
 ToshiaBear favorited Plastic Bottle Flower
20 Jul 20:52
ToshiaBear favorited Plastic Bottle Flower
20 Jul 20:52
-
 SteamAlyce favorited Plastic Bottle Flower
10 Jul 06:53
SteamAlyce favorited Plastic Bottle Flower
10 Jul 06:53
-
 Whimsical Peacock added Plastic Bottle Flower to fun iDEas
18 Jan 23:17
Whimsical Peacock added Plastic Bottle Flower to fun iDEas
18 Jan 23:17
-
Whimsical Peacock favorited Plastic Bottle Flower
18 Jan 23:16
You Will Need
-
 Step 1
Cut the base off a plastic bottle. This might be a bit tough so what i do is make a cut with a craft knife then use scissors.
Be careful not to stab yourself!! -
 Step 2
Cut within the grooves of the bottle. This will form the petals of the flower.
Mine is a 5 petal flower, but i guess with different bottle designs there will be a different number of grooves. Just experiment! :D
-
 Step 3
I've done the photo wrong here! Very sorry. The flower should be turned over that the grooves are on the bottom.
Using a heat gun heat up the bottle. It will slowly start to melt and hopefully the petals will crumple upwards. Keep turning and heating until you have your desired look.
Dont over heat though or you'll end up with a hole like mine has here lol
(If you want it coloured paint of colour the inside with markers or paint before you heat.)
You dont really have full control over how the petals will crumple so every one is unique!!
-
 Step 4
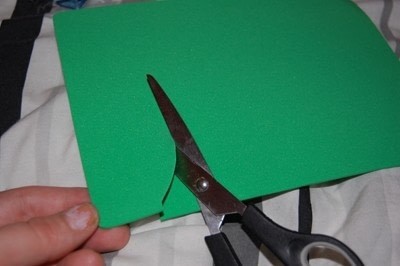
Take some green material (Here i've used green foam.) to make your leaves. You could draw or punch them out but i just cut them out free hand :)
-
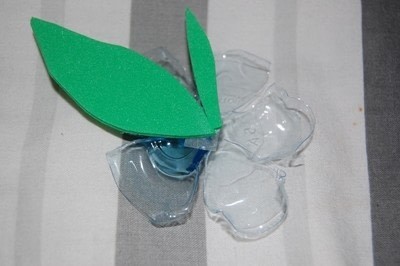
 Step 5
Take some double sided tape and stick to the back. Then place your leaves.
I found you have to use tape to keep them secure. PVA was too slippy.
-
 Step 6
You could leave it at that but i put a little dab of PVA on the back and let it dry. It makes the leaves a bit more secure.
-
 Step 7
Attach whatever finding you want to the back as you normally would and
TA DA!!!
One really pretty and quick plastic flower :)


=]