


About
This is recon on its best xD
Reduce the amount of nasty evil plastic bags on the earth from 4 ugly ones to a single stylish one! Yaaay!
( No time on the left? Yeah, I worked about two days xD )
Promised, I will add some better photos... Tonight, Bag is having it's first night out, there might be a possibility to make better pics...
-
 Brigit favorited Plastic Bags To... Plastic Bag?
09 Apr 07:09
Brigit favorited Plastic Bags To... Plastic Bag?
09 Apr 07:09
-
 Tasha B. favorited Plastic Bags To... Plastic Bag?
01 Jan 08:37
Tasha B. favorited Plastic Bags To... Plastic Bag?
01 Jan 08:37
-
 Jackie_bo_backie favorited Plastic Bags To... Plastic Bag?
24 Jun 23:13
Jackie_bo_backie favorited Plastic Bags To... Plastic Bag?
24 Jun 23:13
-
 Step 1
Gather your materials. I had three bags from the same shop, two big ones, a small one, and later on, I added a big red bag.
-
 Step 2
Cut the biiig sized bags in stripes. It's up to you how you do it, just make sure they are roughly even. Mine were about 1 inch and double length of the bags width.
And cut, and cut, and cut... This step seems to last forever and needs the most concentration, otherwise your strips will be a mess.
When you're about 2/3 done, put your glue gun on so it is hot enough to use later.
Don't cut the small bag, hons.
And, plus, keep the upper parts with the handles aside. We'll need those later. -
 Step 3
After half an eternity, you will have a huuuuge bunch of strips.
At this wonderful moment, step back and padd your shoulder.
-
 Step 4
Now, another eternity will pass while you're hotglueing the ends of the strips together!!! Pay attention not to melt the plastic too much, and pay even more attention to your fingers. I burned myself, got a blister, not very funny. Put in pity sounds here.
Glue, glue, glue some more...
I always did two yellow strips and a red one, then two yellow ones again... blabla... Gave my bag a wonderful zig-zag-pattern while knitting. <3You may also knot the strips together, dunno if this works... Though, this was my first idea of doing it...
-
 Step 5
Once you're done, roll the 1000000footlong strip to a nice, fluffy ball and padd your shoulder once again.
-
Step 6
I could flush myself down the toilet for forgetting to take pictures from now on for some time -___-
Whatever, start knitting!!! Make sure your needles are reeeeally huge. <3
Plastic isn't so easy to knit, but I thought it would be much easier than crocheting...
If you're good at knitting, sit back and watch a nice movie while working.I'd LOVE to show you the whole zig-zaggy piece... :'(
-
Step 7
Well, once your "thread" gets shorter, come to an end and fold the piece in half, just how you want your finished bag to be. You could - which I didn't - fold it so that there is this kind of an overlapping part for the opening, if you get what I mean...
-
 Step 8
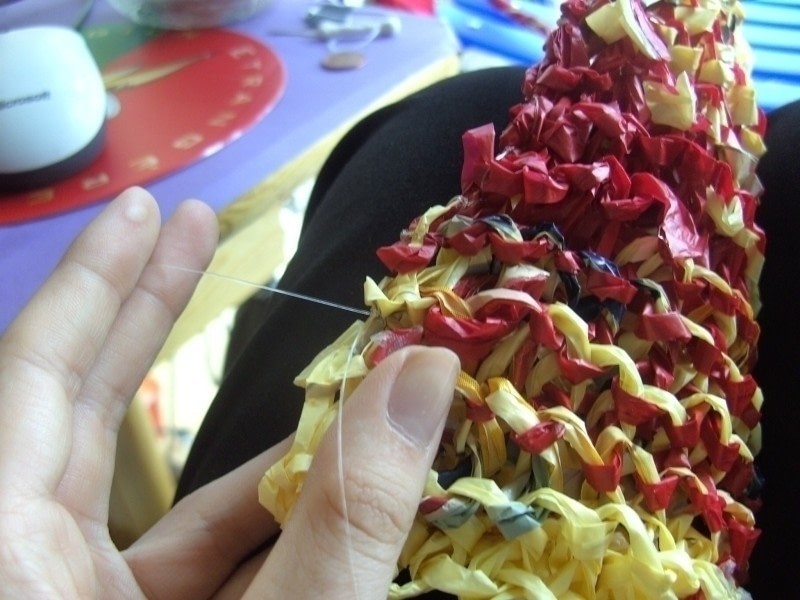
Grab your nylon thread ( this is GREAT for using leftovers!!! ) and close the sides of your bag ( which should be inside-out now. Just decide which side looks better! ). Juuuust put the thread through each side and make a knot, then heat-seal the ends.
Voila. Looks somehow like a bag now, doesn't it???
And yeah, that's the nasty blister on my finger. Yeah, it hurts. Gimme some pity, wouldya??? xD
-
 Step 9
Now for the handle: Get the bag-handle pieces and just braid them together, with a knot on each side. Finished! xD
-
Step 10
Now, if you want to or if you plan to put small items inside the bag, you may give the bag a little inner-bag... Know what I mean? My english is a little bit rusty by now. xD xD xD I guess some explanaitions miiiight sound a little... disturbing...
So, whatever, grab the small bag, cut one side so it fits into the knitted bag, close again with tape. support the borders of the opening with more tape and attach to bag. I think I don't wanna explain how I did this, guess I made it WAY to complicated... Just use your little grey cells up there, you'll figure out a way...
-
Step 11
Attach the handle using nylon thread. Easy.
And maybe you want to be able to close the bag, well, then just add a button and a plastic-loop.
You're DONE!
This is a rather noisy bag, but it's really ECO and by the way water proof. xD


Comments


