

Plastic Lunch Bags
Extract from Eco Craft: Recycle Recraft Restyle • By Susan Wasinger • Published by Lark Crafts


About
Do lunch right
The sack of sacks. No one knows exactly how many bags Americans throw away every year, but most estimates put the number in billions. Those mountains of plastic shopping bags can take hundreds - even thousands - of years to break down in a landfill. Put those tenacious and ubiquitous properties to good use. Turn those trashy bags into a hardy, hip, seemingly indestructible lunch tote. All it takes is the household iron to meld layers of plastic bags together into a tough, flexible "fabric" that looks cool, wears long, and wipes clean. No sewing or gluing in necessary- the same iron that laminates the fabric melts the seams together.
Anyone who's ever accidentally touched a plastic bag to toaster oven knows that plastic melts quickly and sticks tenaciously. Laminating four to eight plastic shopping bags together makes the perfect weight of "fabric" for this unique, quirky lunch tote. The graphics on shopping bags become transparent as they fuse and give the final product a subtle collage effect.
-
 OverlordSayo favorited Plastic Lunch Bags
16 Jun 18:58
OverlordSayo favorited Plastic Lunch Bags
16 Jun 18:58
-
 david l. favorited Plastic Lunch Bags
24 Apr 10:46
david l. favorited Plastic Lunch Bags
24 Apr 10:46
-
 Tiffany E. added Plastic Lunch Bags to so cute
17 Sep 09:25
Tiffany E. added Plastic Lunch Bags to so cute
17 Sep 09:25
-
Crystal M. favorited Plastic Lunch Bags
28 Jun 15:40
-
 Grace C. favorited Plastic Lunch Bags
18 Mar 00:37
Grace C. favorited Plastic Lunch Bags
18 Mar 00:37
-
 Lotusburger favorited Plastic Lunch Bags
04 Jan 15:29
Lotusburger favorited Plastic Lunch Bags
04 Jan 15:29
-
 Step 1
Cut the bags down the side seams with scissors and undo the bottom pleat to make a long rectangle of material. Four to eight bags layered together make a nice laminate, depending on the thickness of each bag.
-
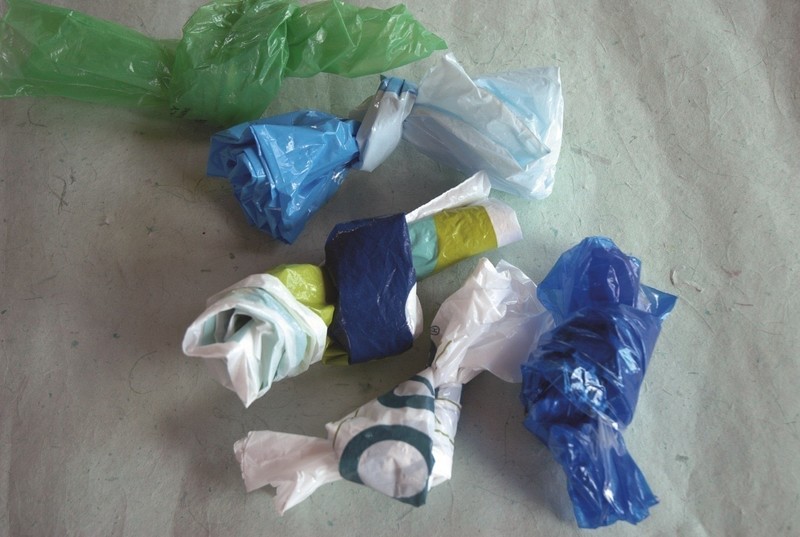
 Step 2
Most plastic grocery bags are a little too flimsy for this project, so gather some sturdy plastic bags like the kind you get at your favorite clothing stores. Looking for a pleasing mix of colors and graphics.
-
 Step 3
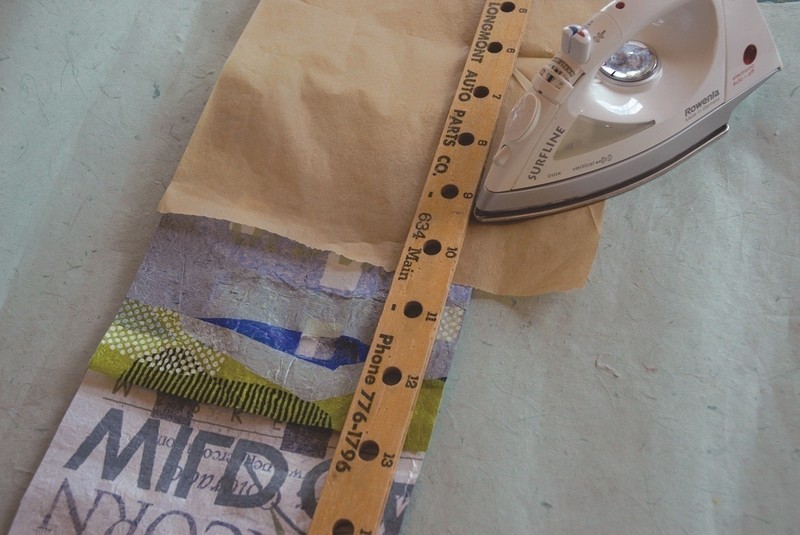
Layer the bags one on top of the other and secure them with clothespins to keep them from shifting. Heat your iron to medium high. Put a layer of baking parchment over your ironing board and on top of the stack of plastic bags. Iron from the center outward, being careful to iron each section thoroughly for 30 to 60 seconds. Let the paper cool until it comes off the surface easily and check the fabric to ensure that it's fully laminated. If it isn't, iron it again.
-
 Step 4
Trim your laminated plastic fabric into a long rectangle that's about 9 x 30 inches (22.8 x 76.2 cm). Fold the rectangle in half and crease the bottom edge.
-
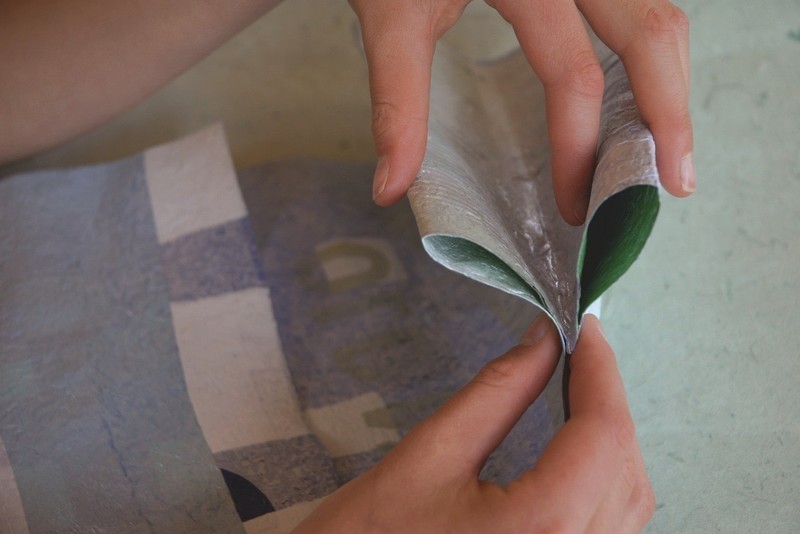
 Step 5
Now fold down the front half of your material to create a rabbit-ear pleat or gusset along the bottom edge of the bag as shown in pictures 5 and 6.
-
 Step 6
This pleat will create a nice roomy bag that can stand on it's own. The excess material at the top will create the fold-over flap at the top of your finished bag.
-
 Step 7
Flatten and crease the bag into shape.
-
 Step 8
To make the side seams, place a wooden ruler or straightedge about 5/8 inch (1.6 cm) in from the edges. The wooden edge will ensure that the heat of the iron melts together only the side seams and doesn't fuse the bag front to back. Make sure the top flap of your bag is open and doesn't get ironed into the seam. Protect your iron and board with parchment, then iron the seams together on both sides until they're completely fused. Take special care to iron the sides of the pleat, as there are several layers to fuse.
-
 Step 9
You can decorate the top flap of your bag by cutting fun shapes (stars, circles, words, initials, etc.) out of plastic bags and ironing them on. Take care to protect the other parts of your bag when you iron on the decorations so you don't accidentally fuse other parts of the bag together. Add a dot of self-adhesive hook-and-loop tape to close the flap if you like.


Really nice!