


About
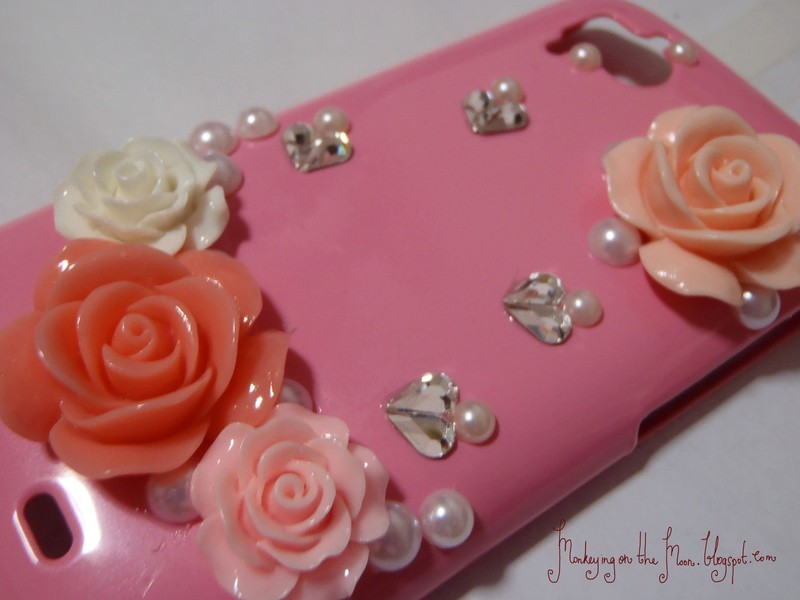
A very shiny cover that every girl secretly wants! *winks*
This a a tutorial for doing a very very shiny blinged phone. Haha. It is pretty easy to do, it just take a lot of time and patience. If you want to know where I got my materials from, do check out my blog. It has more explicit details and "personal touches" Haha. Please enjoy and let me know what you think of my very girly phone case:p I made the link for my site direct to the tutorial post. I hope it helps.
Tags
-
 CraftyCat favorited Phone Case Decoden * *
29 Nov 07:30
CraftyCat favorited Phone Case Decoden * *
29 Nov 07:30
-
 IcaKay favorited Phone Case Decoden * *
06 Sep 19:15
IcaKay favorited Phone Case Decoden * *
06 Sep 19:15
-
 mmotse03 favorited Phone Case Decoden * *
30 Jul 01:16
mmotse03 favorited Phone Case Decoden * *
30 Jul 01:16
-
 Sirena rosa favorited Phone Case Decoden * *
02 Dec 17:49
Sirena rosa favorited Phone Case Decoden * *
02 Dec 17:49
-
 Rebecca L. entered her project Phone Case Decoden * * to Wander & Hunt
23 Nov 13:25
Rebecca L. entered her project Phone Case Decoden * * to Wander & Hunt
23 Nov 13:25
-
 maryetta.bina added Phone Case Decoden * * to must do
18 Nov 07:12
maryetta.bina added Phone Case Decoden * * to must do
18 Nov 07:12
-
 tara P. favorited Phone Case Decoden * *
11 Aug 22:55
tara P. favorited Phone Case Decoden * *
11 Aug 22:55
-
 FrankieStein favorited Phone Case Decoden * *
15 May 07:46
FrankieStein favorited Phone Case Decoden * *
15 May 07:46
-
 kristy c. favorited Phone Case Decoden * *
05 Feb 03:52
kristy c. favorited Phone Case Decoden * *
05 Feb 03:52
-
kristy c. added Phone Case Decoden * * to jewelry
05 Feb 03:52
You Will Need
-
 Step 1
Firstly, lay out your table with all your materials. It helps if you are more organised:) Plan out your design or vaguely draw it out. It helps a lot:)
-
 Step 2
Paste the bigger cabochons first. For a better hold, I used E6000 glue. Let it dry for at least 24 hours before the next step:)
-
 Step 3
24 hours later, paste on the rhinestones/pearls next to the cabochons first! This helps because it is quite tricky putting rhinestones into those shadowed spaces if you do the rest first.
-
 Step 4
I normally bling my stuff from inside out and this time is no exception. Take your time to choose where and what rhinestones to put where. There is no correct sequence though I would recommend buying a bigger range of rhinestone if you want a "messy" look like mine. Wait for a while for the glue to somewhat dry so that the rhinestones will not slide around so much. It can be a bane as it ruins your design.
-
 Step 5
I always keep tricky corners to the last because it is much faster that way. When you have four corners, you can do one side while waiting for the other to dry. And soon you will be done! One tip is to buy rhinestones with varying sizes so that you can fill up even the tiny spaces!
-
 Step 6
Last step, admire your handiwork. Haha. It is very satisfying to see hours and hours of hard work become a masterpiece. The last tip is to space out your work. Don't do it in one sitting. I did mine 2 to 3 hours a night. 3 to 4 nights in total.


Sorry for the late reply. I got my roses from Sophie and Toffee! Here's the link! http://sophieandtoffee.com/
I love how messy urs is too!
i wish i could do something similar,but no matter how i do things,all the time i get the impression my designs look too organised,while i want the messy effect =.=