

About
A personalized dish perfect for a wedding or just to catch your jewelry at the end of the day.
This is a simple DIY for a personalized ring dish.
-
 mmotse03 favorited Personalized Heart Ring Dish
29 Mar 06:11
mmotse03 favorited Personalized Heart Ring Dish
29 Mar 06:11
-
 Rebecca M. favorited Personalized Heart Ring Dish
05 Jan 17:26
Rebecca M. favorited Personalized Heart Ring Dish
05 Jan 17:26
-
 the little crafty mermaid <3 favorited Personalized Heart Ring Dish
26 Dec 06:46
the little crafty mermaid <3 favorited Personalized Heart Ring Dish
26 Dec 06:46
-
 Vi A. added Personalized Heart Ring Dish to decor
03 Sep 01:08
Vi A. added Personalized Heart Ring Dish to decor
03 Sep 01:08
-
 Hannah F. favorited Personalized Heart Ring Dish
21 Aug 14:51
Hannah F. favorited Personalized Heart Ring Dish
21 Aug 14:51
-
 Taylor K. favorited Personalized Heart Ring Dish
11 Jul 00:42
Taylor K. favorited Personalized Heart Ring Dish
11 Jul 00:42
-
 WaterAngel added Personalized Heart Ring Dish to To-make list
23 Apr 17:23
WaterAngel added Personalized Heart Ring Dish to To-make list
23 Apr 17:23
-
 cupcakejazzie favorited Personalized Heart Ring Dish
26 Feb 04:35
cupcakejazzie favorited Personalized Heart Ring Dish
26 Feb 04:35
-
 Kc F. favorited Personalized Heart Ring Dish
04 Feb 01:23
Kc F. favorited Personalized Heart Ring Dish
04 Feb 01:23
-
 Stephanie C. favorited Personalized Heart Ring Dish
20 Jan 20:08
Stephanie C. favorited Personalized Heart Ring Dish
20 Jan 20:08
You Will Need
-
 Step 1
Materials: Red Oven-Bake Clay, Heart-Shaped Cookie Cutter, Letter Stamps, Rubber Gloves, Rolling Pin, Oven
-
 Step 2
Roll about half of the clay brick into a ball and flatten to around a 1/4" thickness with a rolling pin.
-
 Step 3
Use the cookie cutter to cut out a heart. If you don't have a cookie cutter, you can make your own template by drawing/printing out a heart on copy paper, cutting it out, and using it as a guide to cut the clay. A butter knife will do just fine for that.
-
 Step 4
Gently manipulate the clay to give it some curvature and to smooth out the edges. The gloves just help prevent fingerprints in the clay. You can also use other smooth objects you might have lying around (like a wooden dowel) to help smooth the edges.
-
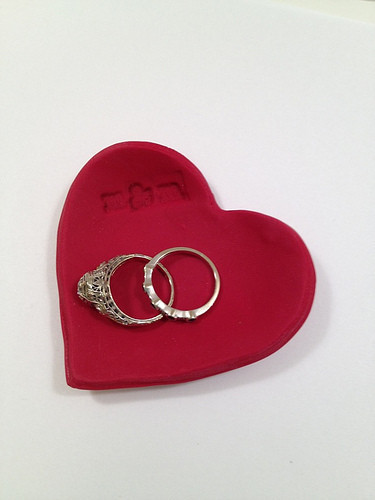
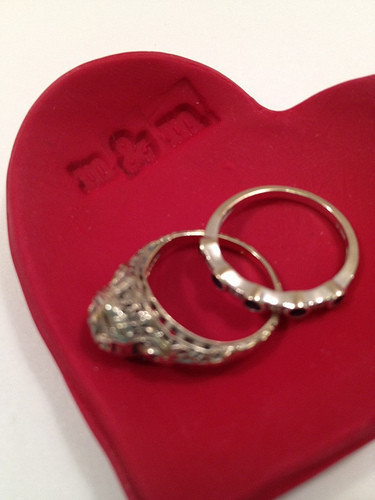
 Step 5
Personalize with letter stamps. I put our initials in there.
-
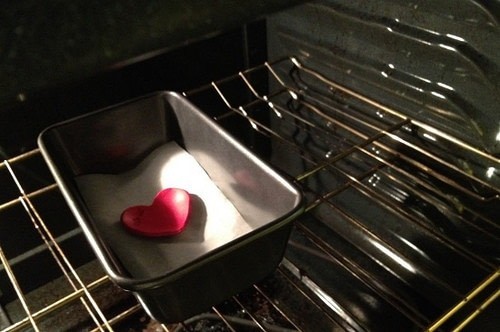
 Step 6
Bake according to the directions on the clay packaging.
-
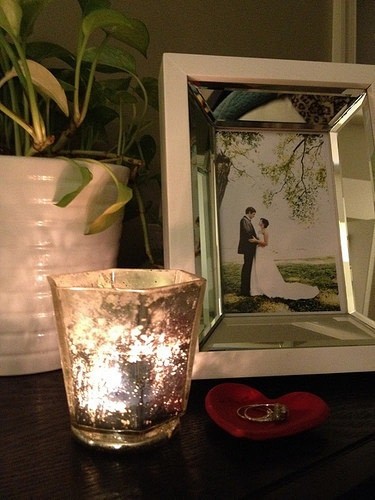
 Step 7
Now load that thing up with rings. Done and done. Mine has a little home by our favorite wedding photo. Romantic, no?