


About
Master the art of chevron stitch when you make this beautiful pearly bracelet.
ADDING MORE THREAD At some point you will start to run out of thread. To finish off, weave your remaining thread through the beads on the bracelet base. Every so often knot around the bracelet base thread to secure. Cut off any excess. To begin a new piece of thread prepare your needle with about 400cm of thread doubled as in step 1. Then weave through in the same way as you finished off, again, knotting at certain points until you come out where you left off.
-
 janetjewal favorited Pearly Dew Bracelet
08 Mar 15:25
janetjewal favorited Pearly Dew Bracelet
08 Mar 15:25
-
 Ilana M. favorited Pearly Dew Bracelet
23 Feb 04:30
Ilana M. favorited Pearly Dew Bracelet
23 Feb 04:30
-
 Florence B. favorited Pearly Dew Bracelet
06 Sep 07:12
Florence B. favorited Pearly Dew Bracelet
06 Sep 07:12
-
Diane R. favorited Pearly Dew Bracelet
01 Oct 08:13
-
 kasey week 2. favorited Pearly Dew Bracelet
26 Aug 08:38
kasey week 2. favorited Pearly Dew Bracelet
26 Aug 08:38
-
 dmx.diana favorited Pearly Dew Bracelet
19 Aug 21:59
dmx.diana favorited Pearly Dew Bracelet
19 Aug 21:59
-
 Anna C. favorited Pearly Dew Bracelet
18 Aug 11:57
Anna C. favorited Pearly Dew Bracelet
18 Aug 11:57
-
 Amy J. favorited Pearly Dew Bracelet
18 Aug 10:31
Amy J. favorited Pearly Dew Bracelet
18 Aug 10:31
-
 Tami G. favorited Pearly Dew Bracelet
18 Aug 07:36
Tami G. favorited Pearly Dew Bracelet
18 Aug 07:36
-
 Rafael C. favorited Pearly Dew Bracelet
15 Aug 08:35
Rafael C. favorited Pearly Dew Bracelet
15 Aug 08:35
You Will Need
-
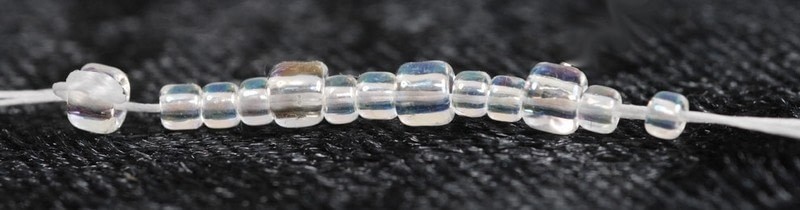
 Step 1
Prepare your needle with about 400cm of nymo loom thread doubled up to make 200cm length. Thread on one size 8 rocaille moving it to about 15cm from the end of your thread. Loop round and pass your needle through the rocaille again. Pull tight. This will be your stop bead. Pick up 3 size 11 rocailles. The next beads you add will be the start of your chevron chain. Pick up 1 size 8 and 2 size 11 rocailles. Repeat twice more.
-
 Step 2
To form your first triangle pass your needle back through the second size 8 rocaille you added i.e. the start of your chevron chain.
-
 Step 3
Pick up 2 size 11 rocailles, 1 size 8 and 2 more size 11. Go back through the last size 8 rocaille you added on your first triangle. This will form your second triangle. Continue in this way, i.e. adding 2 size 11 rocailles, 1 size 8 and 2 more size 11 rocailles and passing through the last size 8 rocaille added on the previous triangle, until your bracelet is long enough.
-
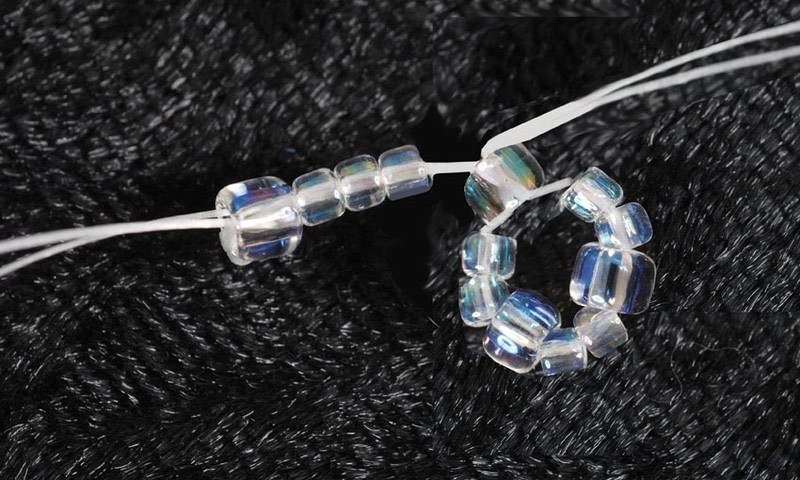
 Step 4
To make your end loop fastener pick up 18 size 11 rocailles. Pass your needle back through the beads on the last side on the last triangle you made on the bracelet. Pass through the 18 beads again for extra security.
-
 Step 5
You are now ready to start decorating your bracelet with tassels and daisies! The idea is to make your decoration as random as possible. So add tassels of different lengths with varying sizes and colours of beads. Tassels are very easy. Simply pick up several beads of your choice, for instance 5 size 11 rocailles, a pearl and then a size 8 rocaille. Then pass your thread back down through all the beads you have picked up apart from the last one added, in this case the size 8 rocaille. Then thread through the bracelet base to the opposite side and add another tassel. Work your way along the bracelet adding tassels and daisies (step 6 and 7) until you are back at the start of your bracelet.
-
 Step 6
To make a daisy pick up 8 rocailles. Use either size depending on how dainty you want it to be. Pass the needle through the first rocaille again.
-
 Step 7
Pick up a 4mm pearl. Then pass your needle through the fifth rocaille added. Pull tight. Then weave through on your bracelet base until you get to where you want your next tassel or daisy to be.
-
 Step 8
To finish off, thread through the 3 size 11 rocailles and the stop bead you started with. Pick up a large pearl followed by about 12 size 11 rocailles, another smaller pearl and another rocaille. Just as you did with the tassels, miss out the end rocaille and weave back through all the beads you just picked up. Finish off as before by weaving through the base bracelet, knotting in several places and cutting off any excess. For a neat finish, thread your needle onto the 15cm thread you left at the start of your bracelet. Pass it through your end large pearl, rocailles, smaller pearl and rocaille as you did with your other thread and back again. Again, trim off any excess.
-
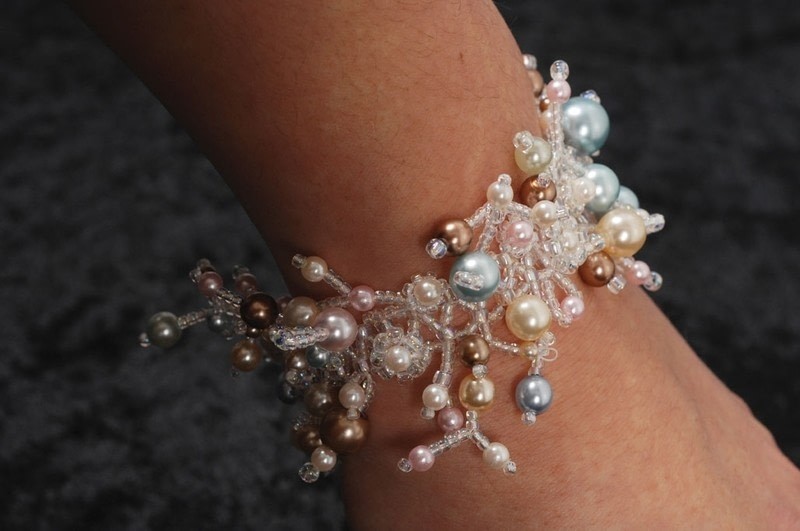
 Step 9
Your finished bracelet should look something like this.


Debbi