


About
Just a quick and easy way to make flowers that almost last forever.
Very pic heavy sorry girls and guys. (=
Tags
-
 Rhiannon R. added Paper Roses to Stuff
09 Apr 05:00
Rhiannon R. added Paper Roses to Stuff
09 Apr 05:00
-
Rhiannon R. favorited Paper Roses
09 Apr 05:00
-
 Lee B. favorited Paper Roses
18 Aug 03:29
Lee B. favorited Paper Roses
18 Aug 03:29
-
 Jordyn N. added Paper Roses to Paper/Pen/Origami
13 Apr 16:12
Jordyn N. added Paper Roses to Paper/Pen/Origami
13 Apr 16:12
-
Carla H. added Paper Roses to 3/29
14 Mar 22:39
-
Carla H. added Paper Roses to party crafts
28 Oct 21:21
-
Carla H. added Paper Roses to book pages/newspaper
28 Oct 21:21
-
 zoegirl221 added Paper Roses to Paper
15 Sep 22:52
zoegirl221 added Paper Roses to Paper
15 Sep 22:52
-
 Deana V. added Paper Roses to Flowers in My Attic
22 Aug 23:18
Deana V. added Paper Roses to Flowers in My Attic
22 Aug 23:18
-
 Jessica A. favorited Paper Roses
11 May 22:42
Jessica A. favorited Paper Roses
11 May 22:42
You Will Need
-
 Step 1
1st you take a square piece of paper and fold in half. Unfold it, and then fold it in half the opposite direction. You should have to intersecting lines made from the folds.
-
 Step 2
Now this part is a little tricky to explain. You need to pinch in the sides using the indents from folding. The left and right side should fold, and the top and bottom will be the only 2 out of the 4 sides you will see.
-
 Step 3
It should look like this when you are done. (=
-
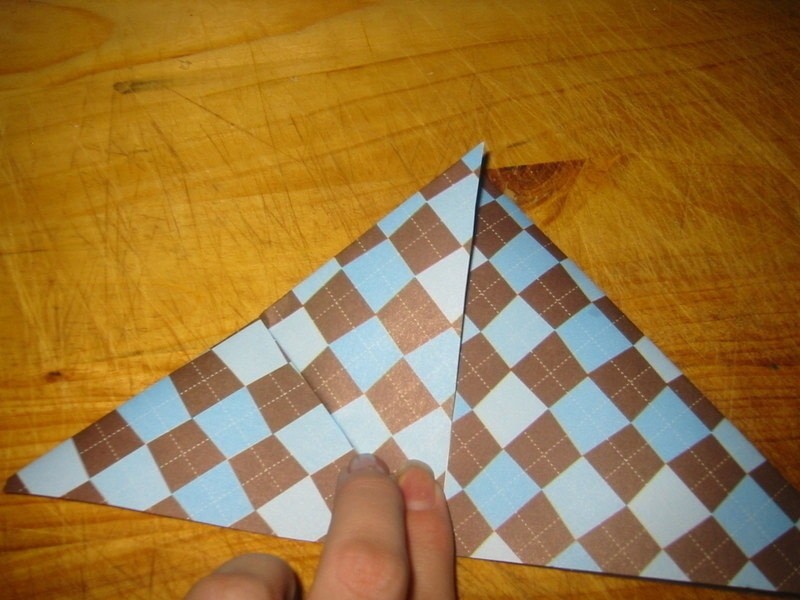
 Step 4
Now your going to fold the bottom corner up to the top corner. It doesn't matter which side you do first.
-
 Step 5
It shold look like this.
-
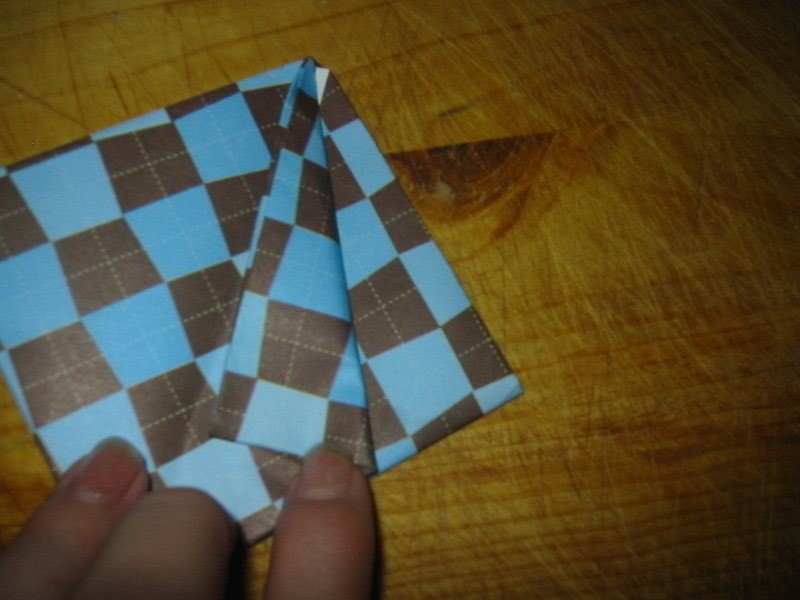
 Step 6
Repeat with opposite corner. The flip it to the otherside and repeat.
Stay with me guys! haha
-
 Step 7
When your done folding all the sides you should have a diamond. Then you need to put the left and right sides together on each side. You should still have a diamond that looks like this same size and everything. Sorry I can't explain that better. If you need help just ask.
-
 Step 8
Now you need to fold all the sides in to the middle.
-
 Step 9
When your done it should look like this, on both the top and bottom sides.
-
Step 10
You need to tape where I have my fingers. After you have taped both sides, you need to blow into the hole at the bottom of your rose.
-
 Step 11
It should look like this now.
-
 Step 12
Now you take a pen or whatever is convienent and roll the petals down.
-
 Step 13
Now this is for the stem. You take a different piece of paper and roll it up. (try to keep it as small as you can.) After you've rolled it. Tape it up.
-
 Step 14
Now stick it in the hole you used to blow it up.
-
 Step 15
This is for the leaves. Just fan fold the paper all the way from one corner to the next.
-
 Step 16
Tape the part where my fingers are.
-
 Step 17
Wrap the leaves around the stem and tape in place. Tada! You have a rose. Now spray them with your fave perfume, and you got yourself an alomst forever rose! Hope you like.


Versions

Posted by
FoxesinBoxes

Posted by
LG

Posted by
kolodeznikova*

Posted by
Hanna Wischmoepp
Comments


