


About
Inspired by traditional Mexican tissue flowers.
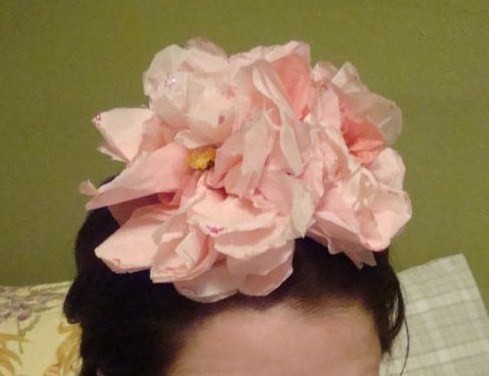
I made several of these flowers last October (2008). I used them to decorate my office and as part of my Halloween costume. I was a Calavara of Frida Kahlo. I followed basic instructions found on the internet and then used pipe cleaners, glitter glue and decorative paper to embellish them. I used bobby pins to keep them in my hair.
Tags
-
 Kepi added Paper Flowers to Frida Fiesta
07 Feb 04:23
Kepi added Paper Flowers to Frida Fiesta
07 Feb 04:23
-
 judithchen added Paper Flowers to Kourtney
24 Nov 11:22
judithchen added Paper Flowers to Kourtney
24 Nov 11:22
-
 Nena added Paper Flowers to Sugar skull
22 Aug 20:22
Nena added Paper Flowers to Sugar skull
22 Aug 20:22
-
 Nina H. added Paper Flowers to Possible gifts
13 May 21:42
Nina H. added Paper Flowers to Possible gifts
13 May 21:42
-
 Rachael H. added Paper Flowers to Want to do!
16 Dec 01:37
Rachael H. added Paper Flowers to Want to do!
16 Dec 01:37
-
 Susi S. added Paper Flowers to Chiliqueens
30 Sep 19:43
Susi S. added Paper Flowers to Chiliqueens
30 Sep 19:43
-
Susi S. favorited Paper Flowers
30 Sep 19:42
-
 a h. added Paper Flowers to MAKE
23 Apr 00:29
a h. added Paper Flowers to MAKE
23 Apr 00:29
-
Debbie S. favorited Paper Flowers
30 Mar 23:23
-
 Sarah G. added Paper Flowers to To-make list
30 Mar 21:35
Sarah G. added Paper Flowers to To-make list
30 Mar 21:35
You Will Need
-
 Step 1
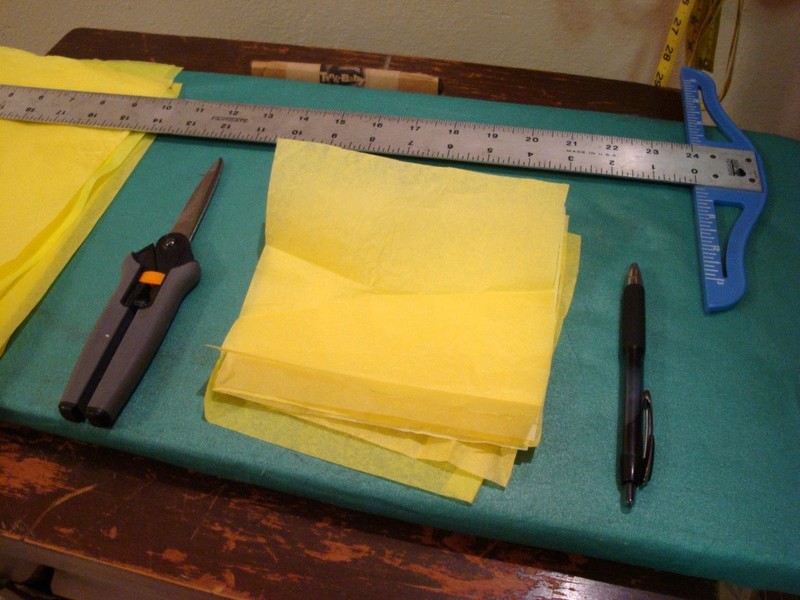
You will need to cut the tissue paper into squares. The size that I normally use and the flowers in my hair, are 6 inches. 6 layers of paper usually work best, but you can use less or more(and any size square you want too). The squares don't have to be exact; you'll trim later. Lay them on top of each other.
-
 Step 2
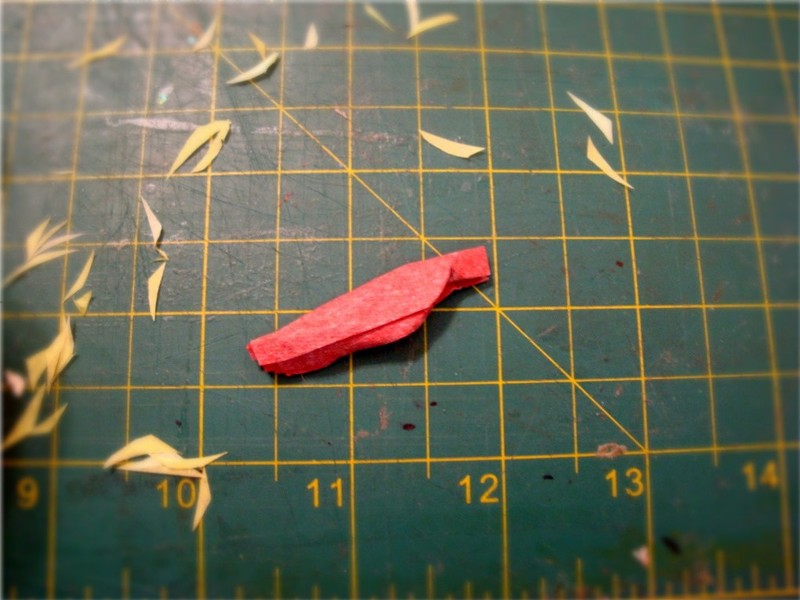
Once you have a pile of tissue squares fold them accordion style with about a half inch between each crease. When the paper is completely folded (it will be a long rectangle), make a "V" shaped notch on each side in the middle. The point of the V should be in the center of the fold (as pictured). Then use a piece of pipe cleaner (using floral wire in the pictures, but I prefer pipe cleaner) to secure paper where the notch has been cut. At this time, you can also trim your petals (the ends of the paper). I chose a rounded edge, but use what you like.
-
 Step 3
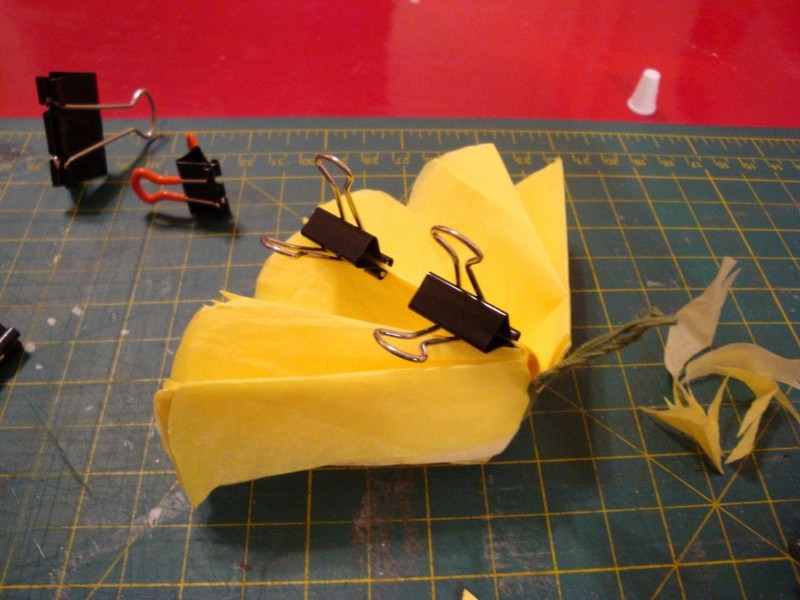
I like to use a contrasting color of tissue paper to create a stamen. In my photos I waited until later to add this, but I think it would work better at this point. Take another piece of tissue paper and fold into a long, skinny rectangle (it is not necessary to use an accordion fold for this). The size you use will depend on the size of your squares, but for a 6 inch square, a 3/8" x 1.5" rectangle should work well. Pinch the rectangle in the middle so it is folded in half, apply some glue to the under side and place over the center (notch) of the flower. You can hold it until the glue sets or use a clip.
-
 Step 4
This, and the addition of the stamen, is where my method starts to differ from the ones that I've seen elsewhere. I use a thin line of glue to attach the open portions of the flower. You want to start the glue near the flower's center, but don't take it all the way to the edge of the petal (I forgot and did this. I had to tear them later).
-
 Step 5
This is done for each of the openings. Hold the paper or use clips until the glue sets. After you do the first side you will most likely need to cut slits into the creases between each petal so the flower will have enough give to close. Once both openings have been glued the flower will have a slightly cupped shape. I cut a little at a time as I go and stop when I like the way it looks. I also continue to shape the ends of the petals. The picture shows the front and back of the flower after it has been glued.
-
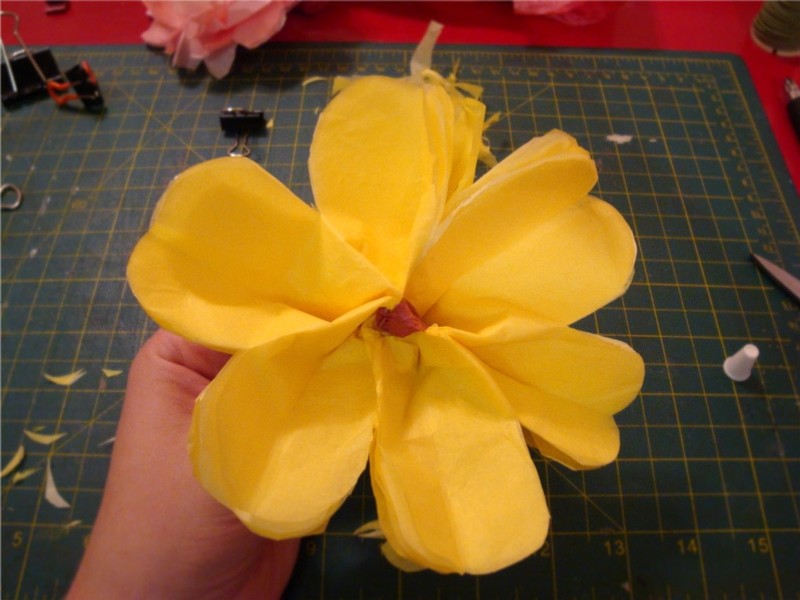
 Step 6
This what you should have so far; a "closed" flower with a stamen, wire stem, and a slightly cupped shape. Now it's time to start shaping the flower.
-
 Step 7
The flower is shaped by gently pulling the petals toward the center. Start with the first layer (on the face of the flower) and do your best to pull them individually. From here, you scrunch and pinch and pull and maybe even trim until you get a shape that you like.
-
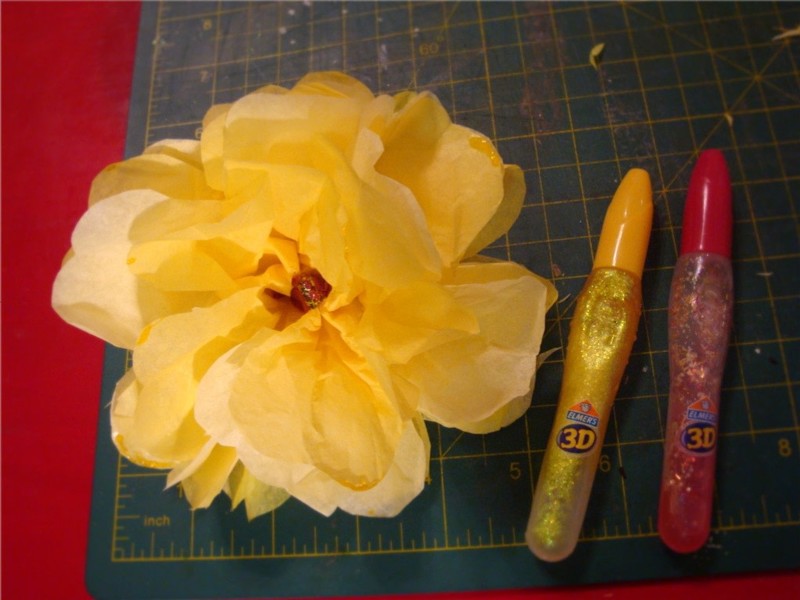
 Step 8
Now to embellish! I used glitter glue in a matching color to create a dewy look. I added some to the center and then randomly lined the edges of petals and threw in a few globs for drops. If you look closely, you can see the glue in this picture. The glue I used was old and didn't work quite the way I wanted it too since it came out very rubbery and thick. Use new glue and you'll be able to get a finer, thinner line.
-
 Step 9
Now, you should have a paper flower. If you'd like a more finished look, wrap the "stem" (wire) in floral tape or apply a little glue and use more paper. Wrapping at an angle like you would with a tennis racket or bicycle handle bars works well. I didn't do that this time so here's a picture of the materials that were used. Enjoy and let me know if anything is confusing. I can provide another photo or a more thorough explanation.


Comments


