


About
Head Board That Doubles As Art
Here is our new Paint Chip Headboard. We'd been doing without a headboard for a few years now, and I decided it was time for something new and interesting. Our old headboard went with the also old twin(!) bed before we bought the queen size. So now our headboard didn't match, but we lived with it for a while until I couldn't stand looking at it any longer and pitched it.
I had been in a room design rut, and I was sick of looking at my Asian-themed red and gold cloud feature wall, which sounds uglier than it actually was. I managed to convince B that the wall desperately needed repainting, and after being inspired by ReadyMade and Design*Sponge, wanted to create my own headboard/art piece. We went to Home Depot and loaded up on paint supplies (and paint chips and plywood for my project.) Since the condo was already newly painted (pancake batter yellow, under certain light conditions) we left it as it was when we moved in. The color we picked is called Polished Pearl by Behr (Premium Plus, with the primer already mixed in), and it's few shades lighter than the rest of the room. Surprisingly, it only took two coats to cover the red. It really brightened everything up. But enough about that. Onto the headboard!
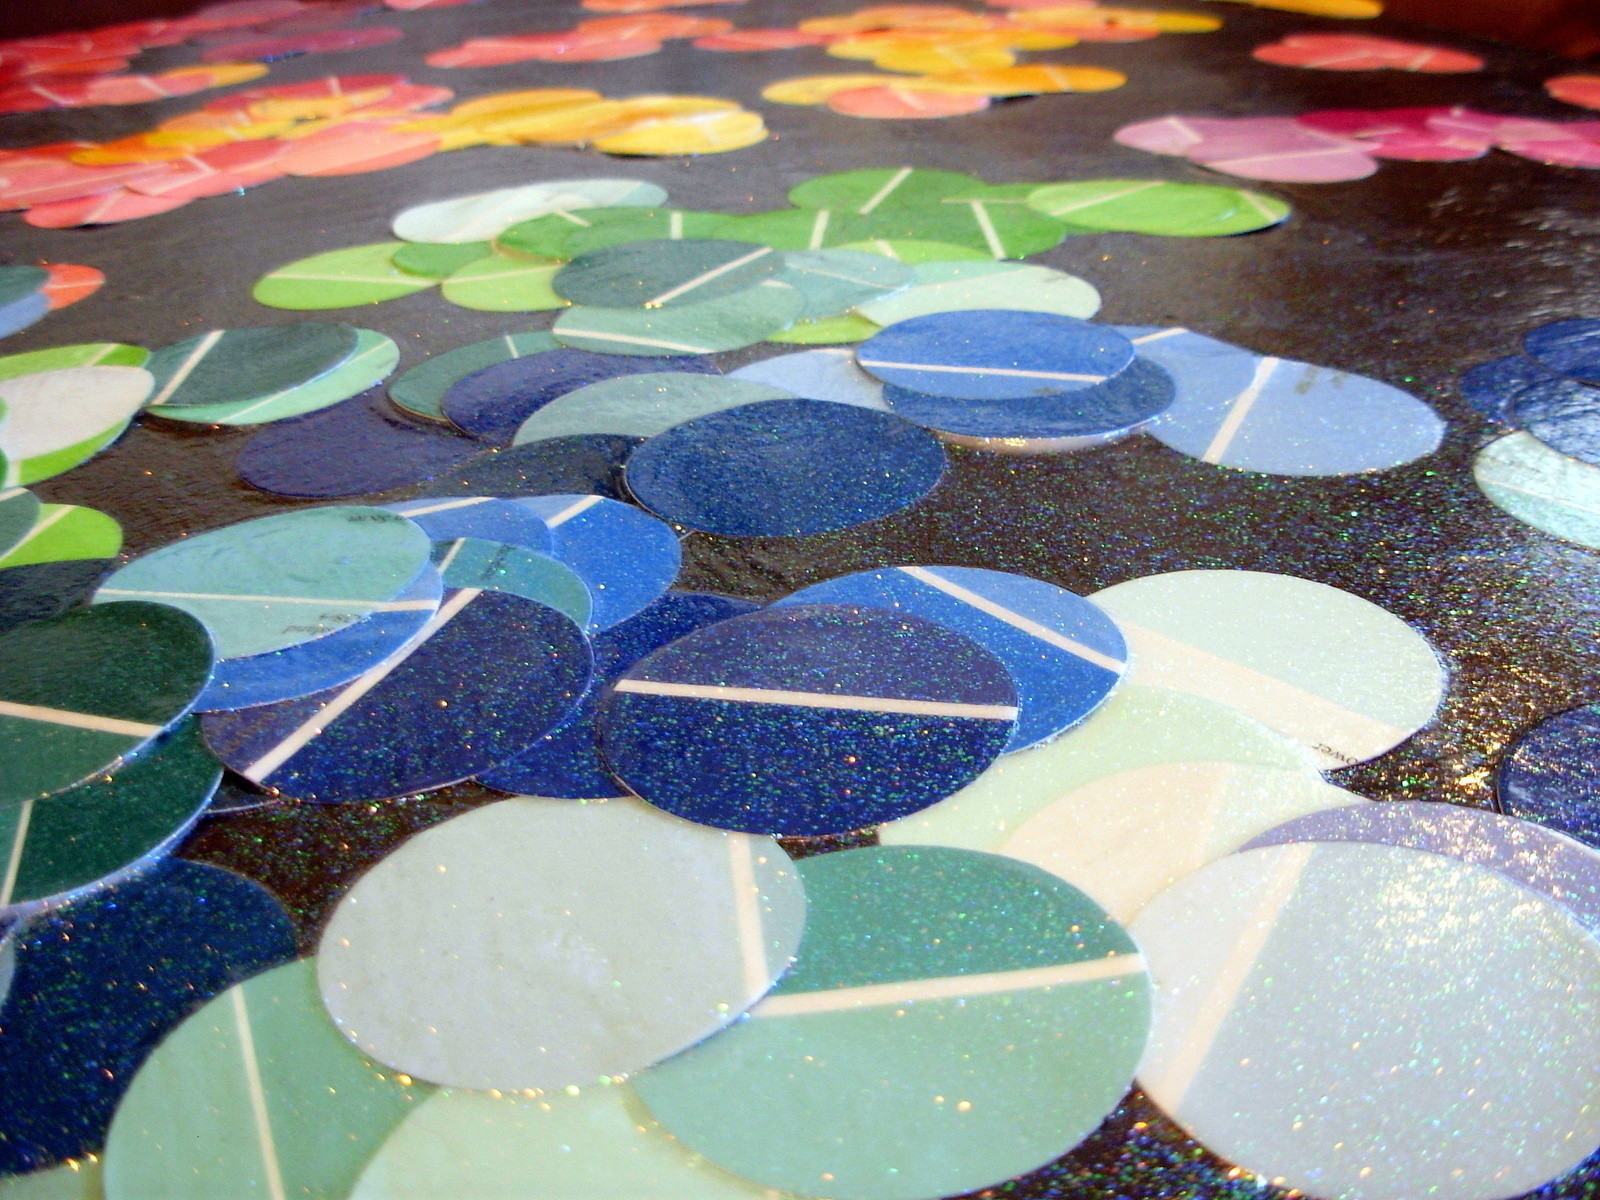
The actual board is a 2' x 4', 1/4" sheet of birch plywood, the flattest one they had. I painted it black, or more specifically, "Besalt" by Ace paints using a 2 ounce sample I had. I punched the circles with a circular hole punch, taped them together in bunches and affixed them to the board with Elmer's spray adhesive. The circle punching was the most difficult and time consuming part of this project.
I gave the piece a nice thick coat of matte Mod Podge and allowed it to dry for several hours. I started applying a second, nice thick coat, but ran out three-quarters of the way through. I had to finish the piece with only other sealer I had-- the Sparkle kind! I was unhappy at first, but then I decided it gives the whole piece a cool deep-space effect.
Bob hung it with screws directly to the wall, but you could use frame hooks.
-
 isobel.l favorited Paint Chip Head Board
10 Feb 20:07
isobel.l favorited Paint Chip Head Board
10 Feb 20:07
Impybat posted this project as a creation without steps
Here are some similar tutorials to help you make this one!


