


About
How to turn a coffee table into a comfortable ottoman for hardly any money or time.
I have been wanting an over sized ottoman to use as a window seat. After looking online to purchase one, I've decided I couldn't afford the $200 it would cost me to purchase one so I decided to get a bit creative. I bought the coffee table for $5 at goodwill, the fabric cost me $9 at a fabric store. The rest of the supplies I had lying around the house. I hope you enjoy the tutorial!
-
 GabriELLE favorited Ottoman Coffee Table
04 Nov 03:22
GabriELLE favorited Ottoman Coffee Table
04 Nov 03:22
-
 silentband favorited Ottoman Coffee Table
05 Aug 10:59
silentband favorited Ottoman Coffee Table
05 Aug 10:59
-
 Audette commented on Ottoman Coffee Table
14 May 22:22
Audette commented on Ottoman Coffee Table
14 May 22:22
-
Audette favorited Ottoman Coffee Table
14 May 22:19
-
 Step 1
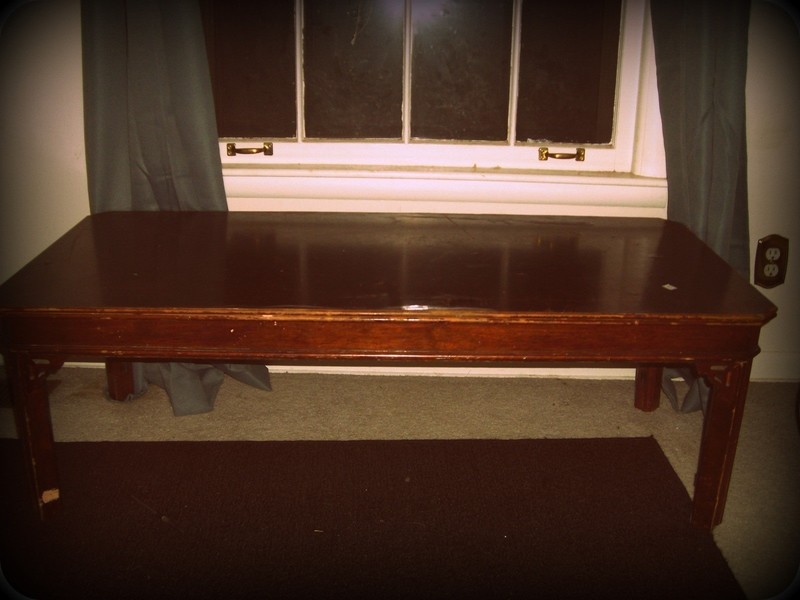
Get a hold of a coffee table. I bought this one at goodwill for only $5!
-
 Step 2
Measure the table by length and width. Plan where you want your buttons to go. For a 2 X 4 table I decided to put my buttons 6 inches apart in length and 5.5 inches apart in depth.
-
 Step 3
Mark your button holes where you will drill.
-
 Step 4
Drill holes. Follow the safety instructions on your drill!!
-
 Step 5
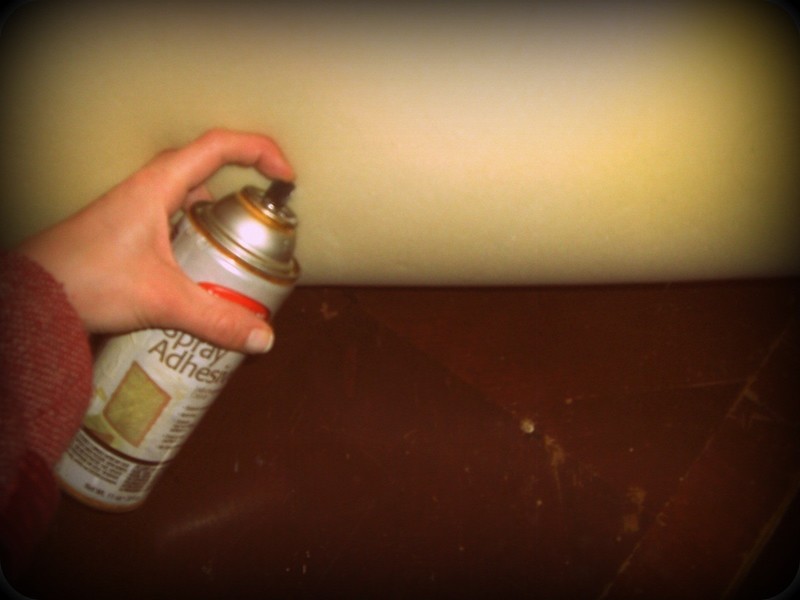
Now it's time to put your foam top on. You can buy 2 inch thick foam at your local craft store. Use a spray adhesive to secure the foam to the table.
-
 Step 6
I ended up using an old egg-shell foam mattress cover I had lying around.
-
 Step 7
Pull your pre-measured fabric over your table. For a 2 X 4 table, I used 2 yards of fabric and had PLENTY of extra to work with.
-
 Step 8
Make sure the fabric hangs evenly on all sides.
-
 Step 9
Flip table upside down. Pull fabric tight. Use your staple gun to secure the fabric. Use plenty of staples. Make sure you use safety precautions!!
-
 Step 10
Fold corners. This is the tricky part. Fold the excess fabric in and fold the corners as if you were swaddling a baby. I used tacks to secure the fabric. There are many ways you can finish your corners. Just figure out which way works best for you.
-
 Step 11
Here is what you should look like now. Next we want to put the tuft buttons in!
-
 Step 12
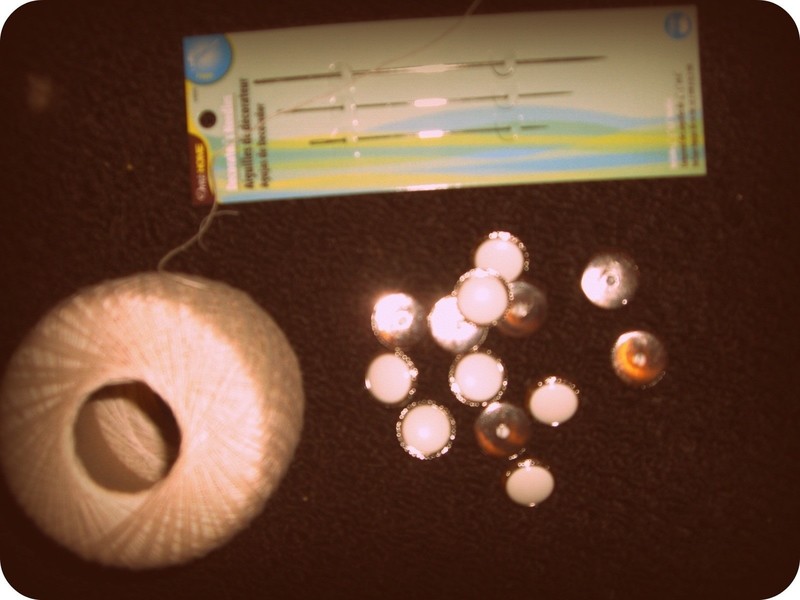
Gather your supplies of buttons, twine, and a long needle.
-
 Step 13
Thread the twine through your needle.
-
 Step 14
Thread the needle through a piece of fabric. This will be your security on the bottom of the table when you tie the buttons on.
-
 Step 15
Put your threaded needle with fabric through the bottom of the table.
-
 Step 16
Pull the needle through. You may find that using pliers makes this easier. Put your button through the needle
-
 Step 17
Push the needle back through the hole, through the fabric piece.
-
 Step 18
This it what your button/tuft will look like. Continue doing this for the rest of the holes you have drilled.
-
 Step 19
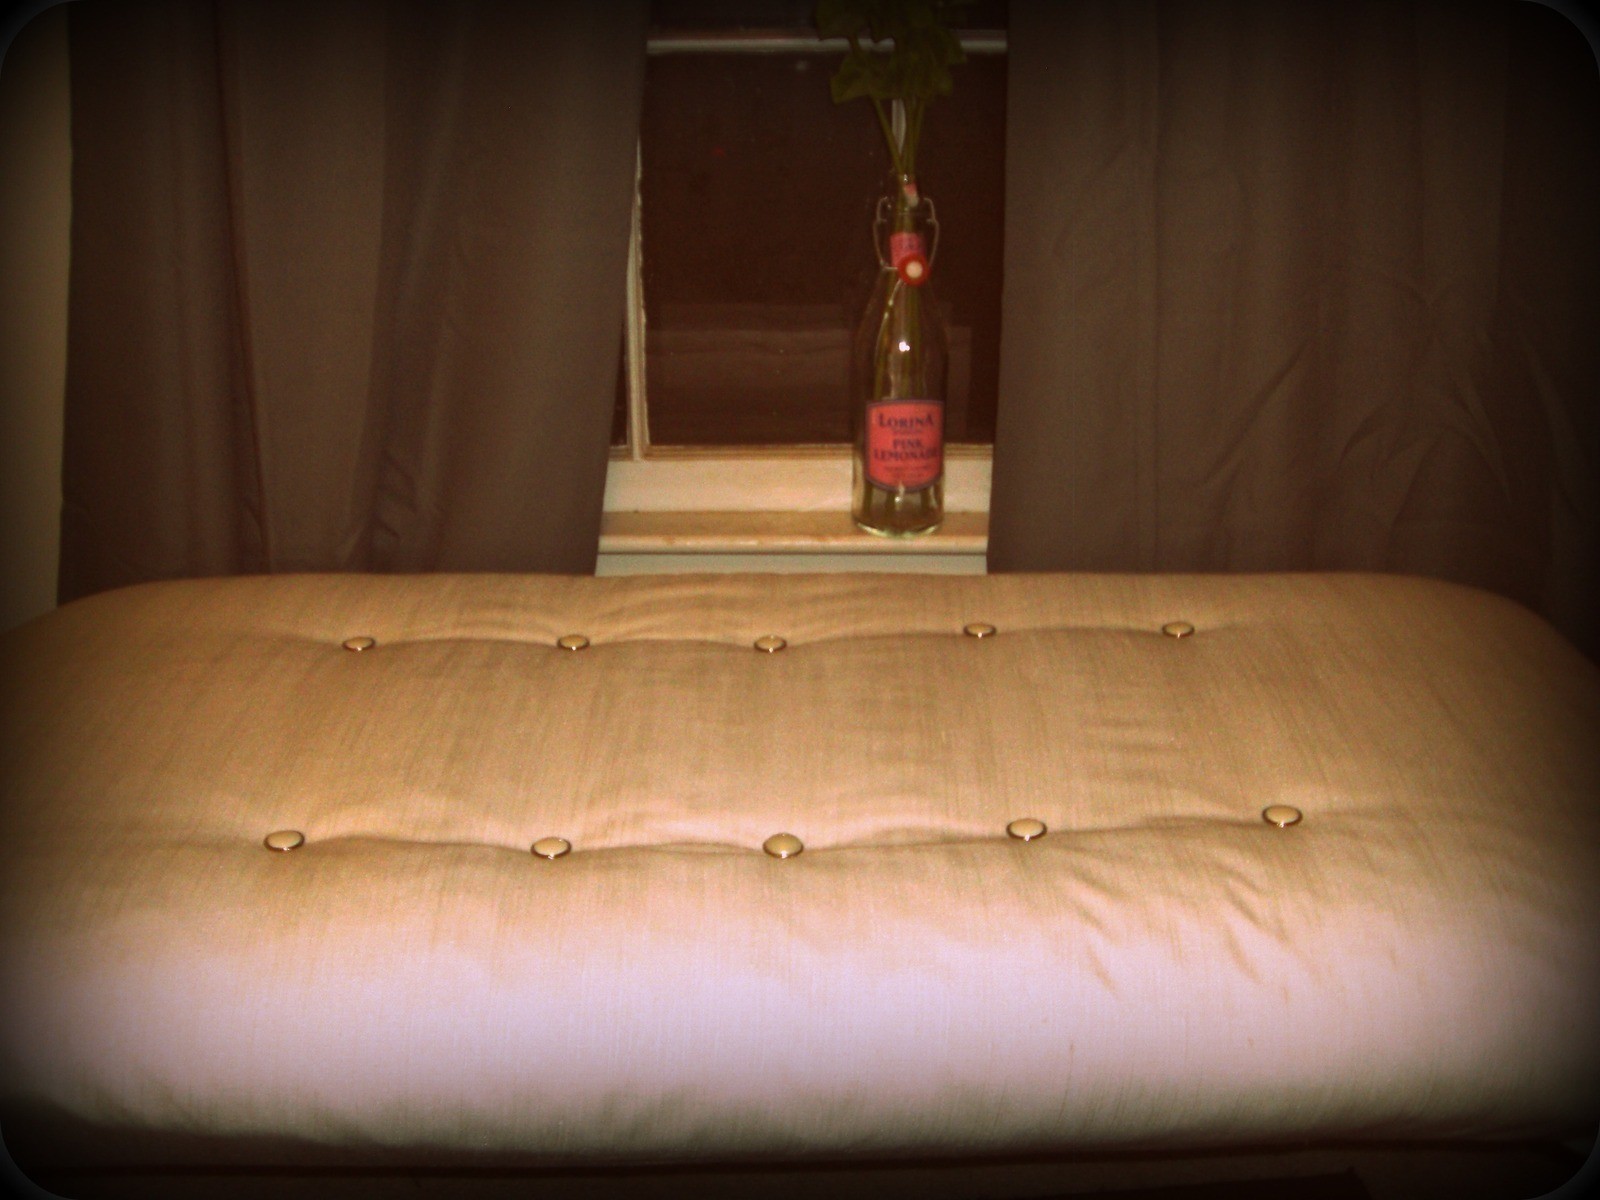
You have now completed your ottoman!
-
 Step 20
Sit back and enjoy your new piece of work!!


Comments


