

About
The all-time favourite, the origami rose
The origami rose is an all-time favourite and it's creation is truly ingenious. But one thing I didn't like about the origami rose is it's hollowness. So I tried modifying it and added a stalk to it.
Make a single stalk or an entire bouquet!
Tags
-
 Rhiannon R. favorited Origami Rose In A Stalk
09 Apr 05:03
Rhiannon R. favorited Origami Rose In A Stalk
09 Apr 05:03
-
 victoria.joneskeeling added Origami Rose In A Stalk to Origami
09 Jun 19:52
victoria.joneskeeling added Origami Rose In A Stalk to Origami
09 Jun 19:52
You Will Need
-
 Step 1
Create the origami rose from the instructions available here:
http://www.origami-fun.com/origami-rose.htmlIt can be quite difficult to follow initially, but with more practise it will turn out better.
-
 Step 2
Get a short length of green wire or any wire wrapped with green floral tape.
Make a loop at one end using a pair of pliers.
-
 Step 3
Wrap some Blue Tack around the loop. The amount of Blue Tack should be just enough to fit into the rose to make a sturdy rose.
-
 Step 4
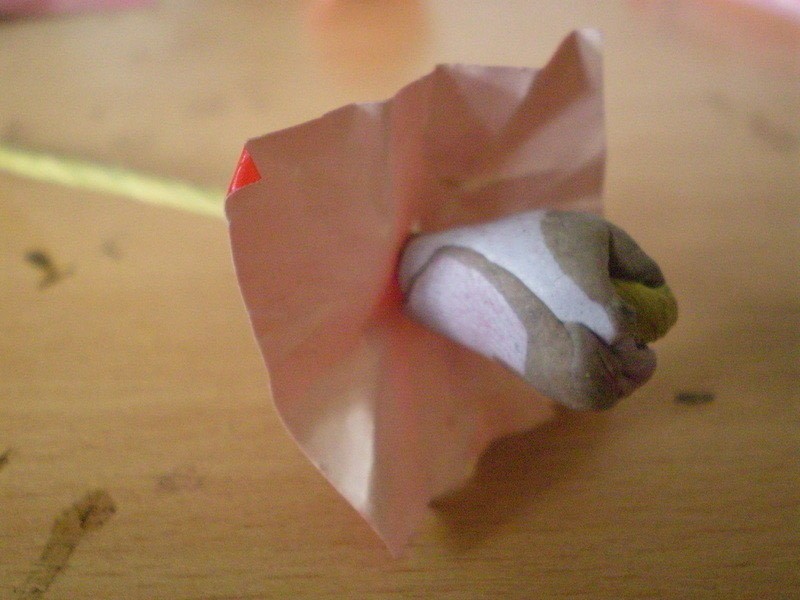
Cut a smaller square piece of origami paper (with the same colour as the rose) and poke through the centre with the wire.
Wrap the paper around the Blue Tack.
-
 Step 5
Then fit the top of the wire into the hollow rose. Adjust the amount of Blue Tack until desired result.
Apply some glue to secure the wire and Blue Tack with the hollow insides of the origami rose.
-
 Step 6
And a sturdy origami rose is done!