About
...just dont hit people, okay? >_<
not a healthy obsession -_-' I'm addicted to making these now. they litter my room and school bag just because making them helps me think :P
so I noticed that there was no straight-forward how-to on making them (unless you wanted to use money)...so here's one! :D
I strongly advise if you're throwing them, that you're very careful >_< they can actually be dangerous. other than that, have fun
Tags
-
 hannah g. entered her project Origami Shuriken to TokyoTreat
20 Mar 17:40
hannah g. entered her project Origami Shuriken to TokyoTreat
20 Mar 17:40
-
hannah g. entered her project Origami Shuriken to Japan Crate
24 Apr 20:06
-
hannah g. entered her project Origami Shuriken to Doxie Flip Contest
03 Jun 21:17
-
 B* added Origami Shuriken to Papercraft
02 Jun 08:07
B* added Origami Shuriken to Papercraft
02 Jun 08:07
-
B* favorited Origami Shuriken
02 Jun 08:06
-
 Jessica H. added Origami Shuriken to paper
24 Nov 15:46
Jessica H. added Origami Shuriken to paper
24 Nov 15:46
-
 Rain R. favorited Origami Shuriken
03 Jul 03:17
Rain R. favorited Origami Shuriken
03 Jul 03:17
-
hannah g. entered her project Origami Shuriken to Fabulous Flowers
06 Aug 20:15
You Will Need
-
 Step 1
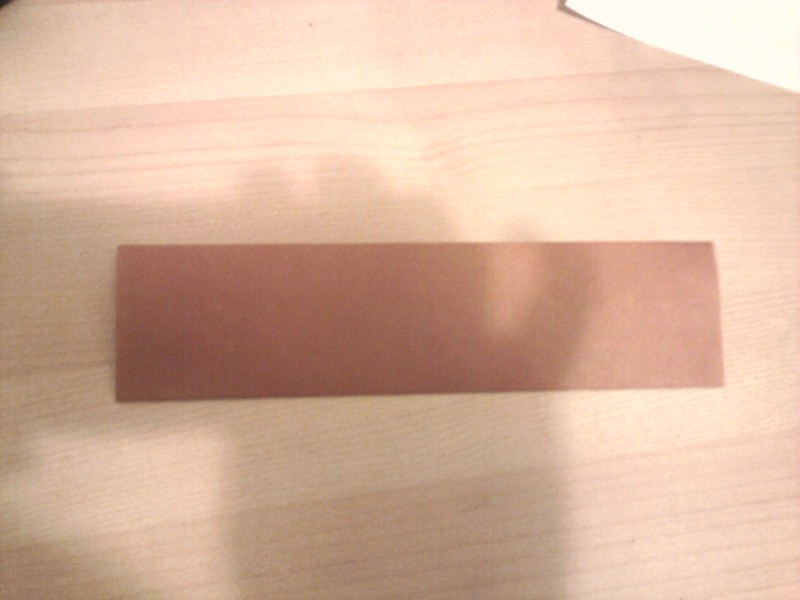
start with your paper. it can be any colour and you can use standard square shaped origami paper (advised) or even normal A4.
using A4 means that your shuriken will be much thicker and the points will be sharper (so be careful). it also means that it can be harder to fold. -
 Step 2
fold the paper in half horizontally, ensuring that the corners meet. if youre using paper that is coloured on one side, the colour side must be outward facing/facing up.
-
 Step 3
fold the paper horizontally once more, still making sure that the corners meet
-
 Step 4
now fold it vertically, then unfold it. you only need to be able to see the vertical crease for the next step
-
 Step 5
take the right side of youre paper and fold it downward along the vertical crease
-
 Step 6
take the left side of the paper and fold it upward along the vertical crease. you should end up with a shape like this
-
 Step 7
turn the shape 90 degrees clockwise and flip it over. you should see 2 squares either side of a parallelogram (if youre using A4, you will have rectangles. fold these into sqaures before moving on).
-
 Step 8
we shall fold these squares into triangles, foliding the right square diagonally upward, and the left square diagonally downward (the creases can be seen in the picture above)
-
 Step 9
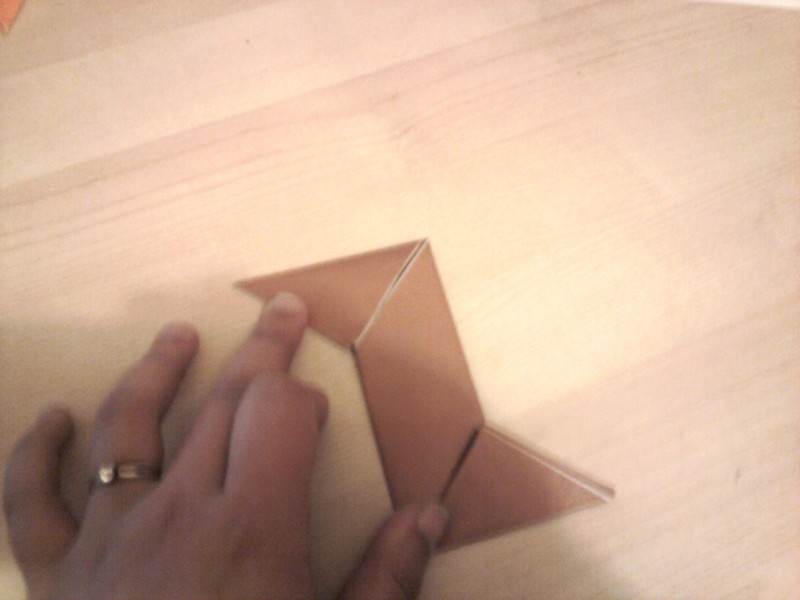
you should be able to fold these triangles inward to create this shape. you'll need two of these.
-
 Step 10
follow all the steps again to make a second part. if you like, this one can be a different colour ^^
-
 Step 11
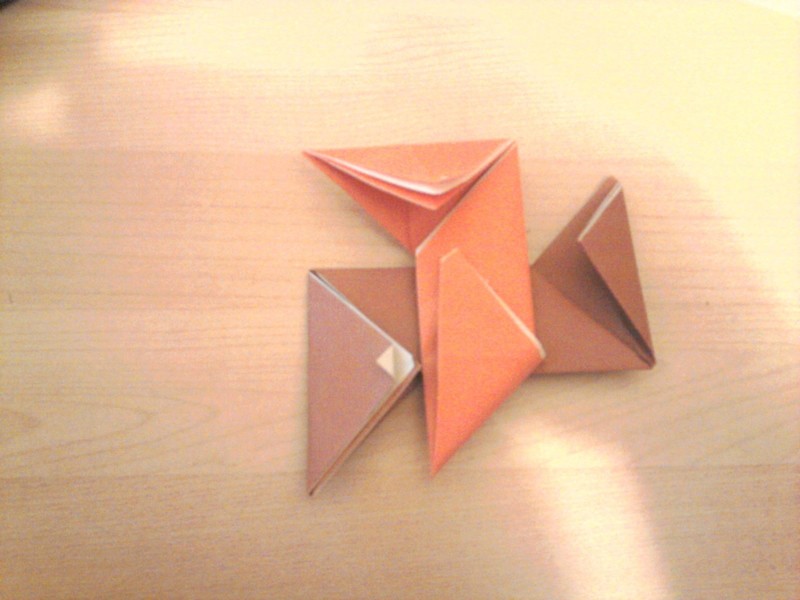
you will need to fold the triangles out and lay the two parts over eachother as seen in the picture
-
 Step 12
you will begin to fold all the triangles into the middle one by one clockwise beginning with the bottom one. (dont be so slap-dash with your folds like me >_<)
-
 Step 13
the left one
-
 Step 14
the top one
-
 Step 15
this step is the most tricky. simply fold the right flap (my brown one) and fold it over the top flap (my orange one) and push it under the first one you folded, the bottom one (my other orange one)
-
 Step 16
it may be the most tricky step but just remember, over and under. for those who use A4, this is can be extremely difficult with youre thicker shuriken points.
-
 Step 17
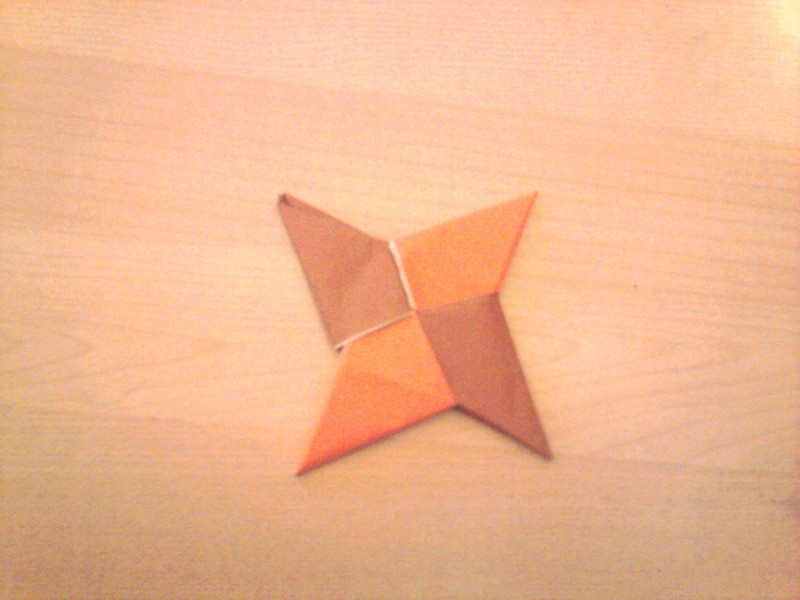
once you push it in all the way, and flatten it out, you have a shuriken ^^ enjoy responsibly


Versions


Comments