About
Onigiri Necklace
I Made this today.
As you see it didn't came out too well.
But hey we all have to learn
I really hope you'll understand my How To. Because I believe it must be confusing because of my bad Englisch
Love ×o
Tags
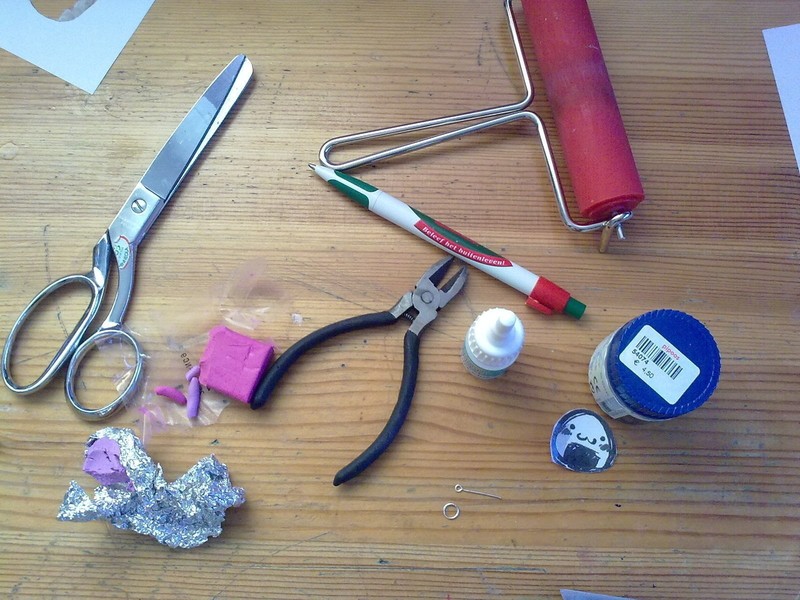
You Will Need
-
 Step 1
First things first.
Im from Holland so please don't blame me for my bad englisch or words i don't know the englisch word for itWhat do ya need
Scissors, pen, glaze, super glue, a print, 2 differend colors of polymer clay, a pin with goes in the work. And a roller (that red thing xD)
-
 Step 2
Second,
you find a cute picture, print it an cut is out.Then with the roller you role out some polymer clay, Choose any kind of colour you like ^^.
Like here leave some space around the picture, you will know soon why
-
 Step 3
Than to protect the picture from water or any thing else.
You can use ductape (one who shines trough)
I realized I didn't had one at home so I just used adhesive tape with is NOT recommendable. But I was just to lazy to go to the shop (:
-
 Step 4
With a another colour of the polymer clay you make two strings and roll it op en twist it into this.
Than you lay this to try out on STEP 2. If it fits you must remove it and DONT bake it on the other part yet!
-
 Step 5
So you bake everything (accept the picture afcourse) Separately and you bake them on 150 degrees for 15 minutes. Let it cool down.
And when it did you use the super glue to attach the picture to the pink back ground.
En the you glue the thing of STEP 4 on it and tadaa =D
Than go over the work with some glaze (not over de picture)
(this was my first How To Do, I) really hope it is useful