About
A simple way to add a skirt to any onesie!
When my second child was born, a little girl, we had lots of boy clothing I wanted to use for her. I added these wrap skirts to some of her big brother's wardrobe! I love how easy the wrap skirts make taking the onesie on and off.
Tags
-
 Kimberly published their project Onesie Wrap Skirt Tutorial
04 Oct 06:00
Kimberly published their project Onesie Wrap Skirt Tutorial
04 Oct 06:00
You Will Need
-
 Step 1
First, gather your supplies. You will need:
- The onesie you plan on adding a skirt to
- Cotton jersey fabric (each skirt took me a little over 1/4 yard)
- Double fold bias tape
- Velcro
- Thread
- Pins, Needles, ruler, and scissors -
 Step 2
Hem the jersey fabric. Hem the entire width of your cotton jersey fabric. I did this by folding the edge under 1/4" and then another 1/4". Sew using a slight zig zag and try not to stretch the fabric while sewing. Iron hem from the wrong side of the fabric. Again, be careful not to stretch your fabric while ironing.
My skirt was 7.5" long so I measured up 7.5" from the finished hem and cut. I finished off the two sides the same way I did the hem, by folding under 1/4", then another 1/4", and then sewing with a slight zig zag.
-
 Step 3
Cut bias tape to use for the waistband. To figure out how long your waistband should be, lay your onesie out flat and lay your bias tape under the onesie. You will need enough for one side to overlap a couple of inches in the front. Don't forget to leave an extra inch on either end of the bias tape for finishing the ends.
-
 Step 4
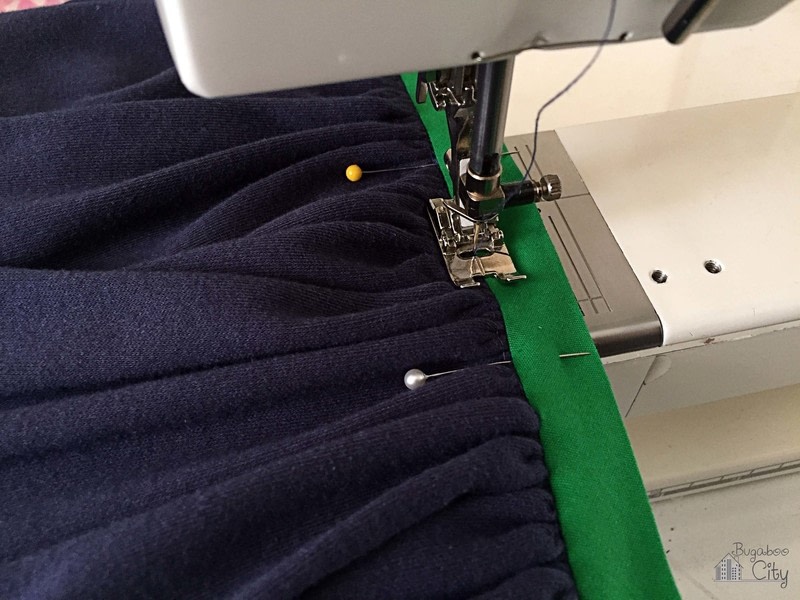
Gather the top of your cotton jersey. Sew a gather stitch (longest width stitch on your machine) along the top of the jersey skirt. Pin the gathered skirt to the bias tape waistband, right sides together, leaving 1" of bias tape free on either end.
Sew the skirt along the top fold of the bias tape. This way you can then fold the bias tape over ,completely concealing all seam allowance. After you have sewn the skirt to the waistband, you can pull out the gathering thread in case it is showing on the right side.
-
 Step 5
To finish the waistband, fold the bias tape over and pin in place. You can fold under the ends of the bias tape now, before stitching, or do it after.
-
 Step 6
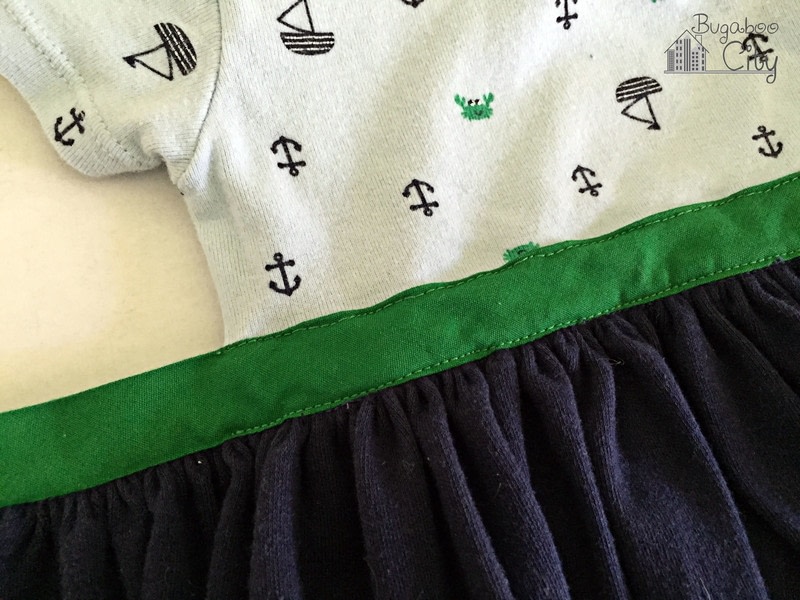
Sew from the front side, stitching in the ditch.
-
 Step 7
Fold the end of the bias tape over and hand sew in place. OR (see next picture)
-
 Step 8
OR you could turn under the ends of the bias tape prior to stitching, which is neater.
-
 Step 9
Mark on your onesie where you want the skirt to attach. I chose to attach mine 1.5" below the armpit so I marked a line all the way around the onesie with pins. I marked with pins so I wouldn't have any permanent markings.
-
 Step 10
You are attaching the skirt just along the back of the onesie in-between the two side seams. Position the skirt where you want it it.
-
 Step 11
Pin the skirt to the back of the onesie in-between the two side seams. The top of the bias tape waistband will line up with the horizontal pin line. Remove the horizontal pins once your skirt it pinned on.
-
 Step 12
Top stitch the skirt onto the onesie along the top and bottom of the waistband.
-
 Step 13
Hand sew velcro onto either end of the waistband. I always put the soft side of the velcro on the flap facing the body so it is softer if it touches baby. To determine where to put the rough side of the velcro on the under flap, I put the onesie on my baby and carefully marked where the skirt should close with a tiny safety pin. The oneies stretch so it's hard to know how tight the skirt should be without trying it on.
-
 Step 14
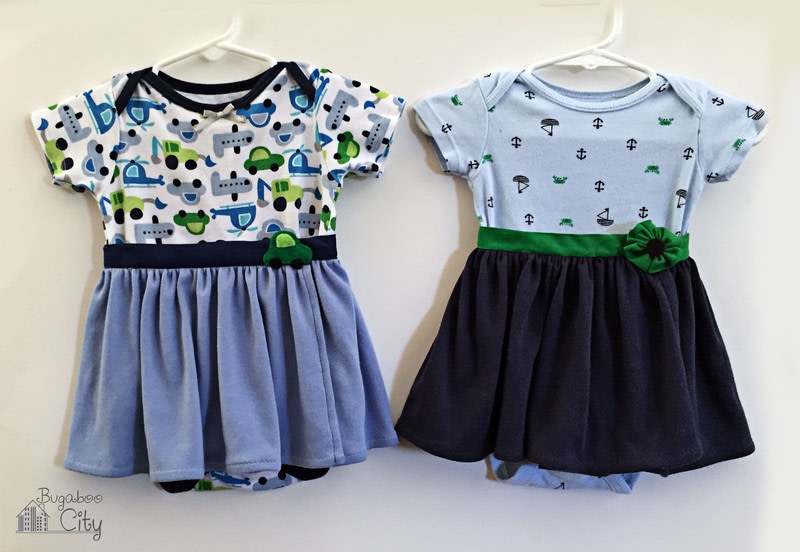
You can add a fun embellishment to the outer side of the skirt to cover up where they overlap. I added a rosette made from the bias tape and stitched a button in the middle. If using a button, make sure to really secure it so it doesn't come off and become a choking hazard. It would also a good idea to inspect the button after every wash before the baby wears the garment.
-
 Step 15
On one of the onesie wrap skirts I made a felt truck that matched the pattern on the onesie.
-
 Step 16
Your onesie wrap skirt should be finished! I love the wrap skirt because it makes taking the onesie on and off really easy. Also, since the skirt is only attached along the back of the onesie, you can easily remove the skirt.