


About
Recycle an old pair of jeans into 4 new aprons!
This is part 2 of my jeans-to-4 aprons tutorials--hope you enjoy it!
-
 Geneviève M. favorited One Pair Of "Mommy Jeans" 4 Aprons: Part 2
16 Apr 17:29
Geneviève M. favorited One Pair Of "Mommy Jeans" 4 Aprons: Part 2
16 Apr 17:29
-
 meanebaby favorited One Pair Of "Mommy Jeans" 4 Aprons: Part 2
28 Mar 22:26
meanebaby favorited One Pair Of "Mommy Jeans" 4 Aprons: Part 2
28 Mar 22:26
You Will Need
-
 Step 1
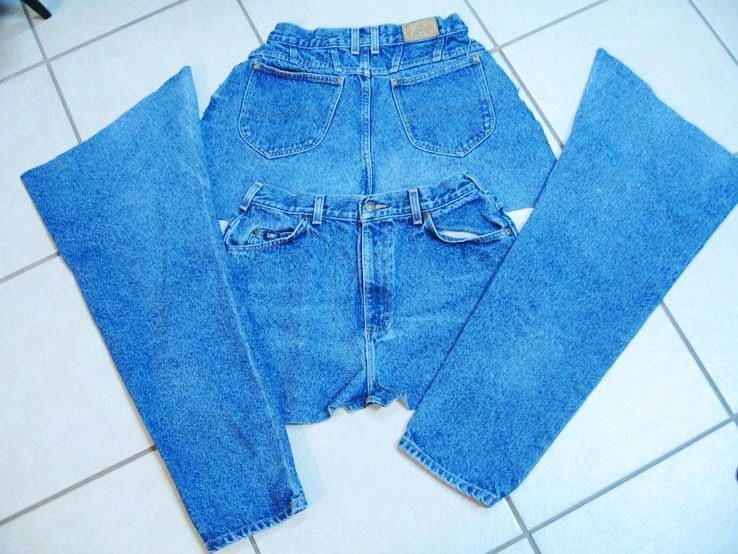
Cut the jeans into 4 sections: Front, Back, and 2 Legs
Save the leg portions for PART 1 and the back for Apron #2 -
 Step 2
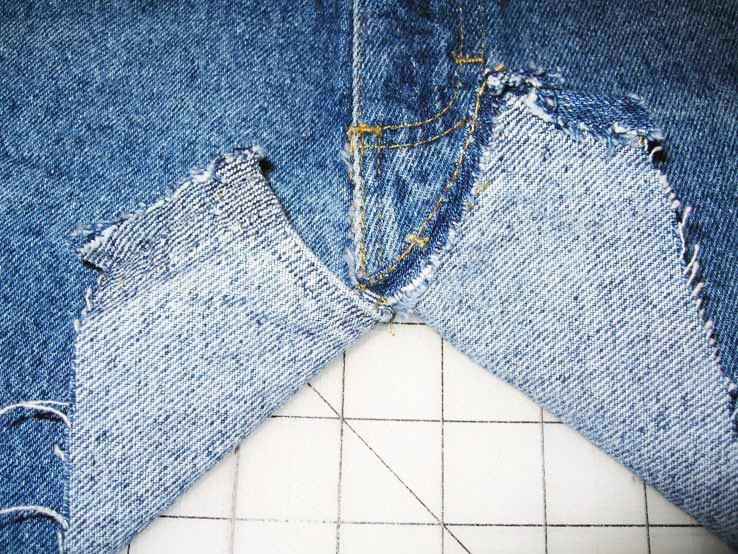
In this example, I am using the front portion of the jeans. If you notice, the front
seam does not lie flat near the crotch area. In order to alleviate this issue, open the
front seam 1.5”‐2”, so that you can “flap” one side over the other, making the front flat. -
 Step 3
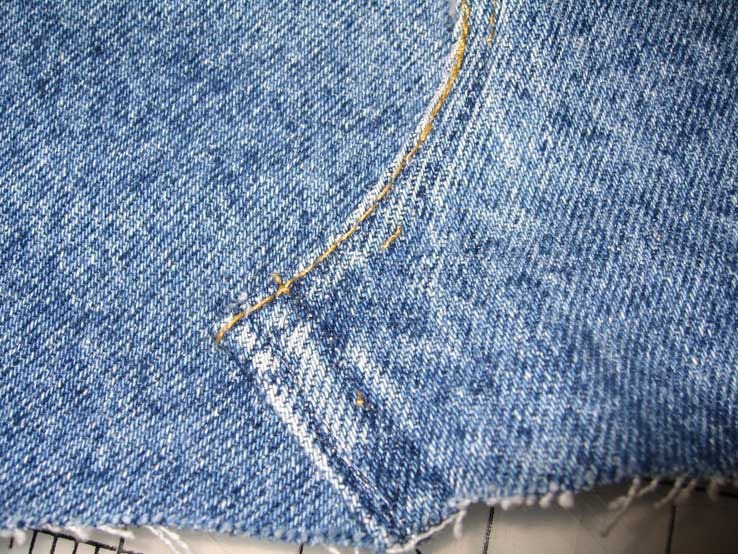
Sew the “flap” in place.
-
 Step 4
Take time to trim off the excess denim underneath.
-
 Step 5
If the bottom of the front is uneven, using care, cut across the front making it as
straight as possible. I went ahead and curved both lower corners, my personal
preference for this project. -
 Step 6
Cover the raw edges with the bias tape. I actually made my own in Part 1 and had enough left over to use for this apron. Optional: detach the lower part of the side
belt loops, attach the bias tape, and reattach the belt loops. This allows for a more
finished appearance. -
 Step 7
Optional: detach the lower part of the side belt loops, attach the bias tape, and reattach the belt loops. This allows for a more finished appearance.
-
 Step 8
Decide what you would like to use for the tie/waistband and how long you need it to
be. I used the same fabric as the bias tape, cutting a piece 9” X 72”. With right sides
together fold it in half and sew across one end and along the length of the piece.
Turn the “tube” inside out and stitch the open end closed. Press and insert it through the belt loops. You just made the tie/waistband! -
 Step 9
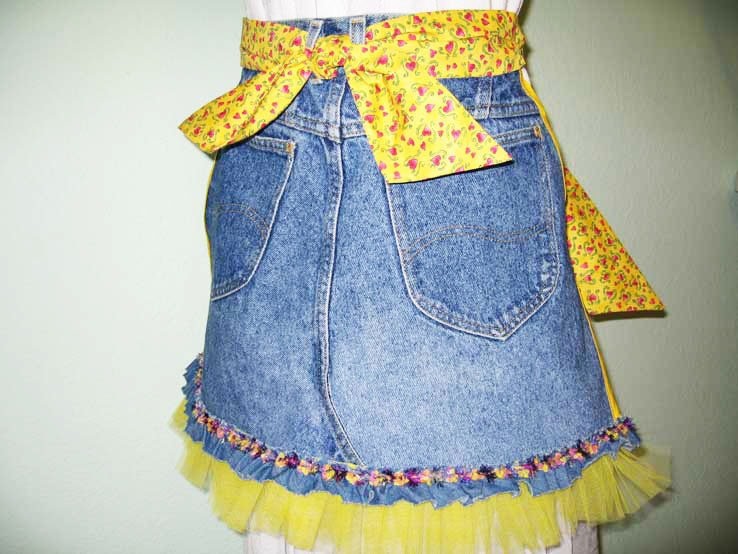
I felt like my new apron
needed a “little more” so I cut out a floral shape from a scrap of denim and my printed fabric , attaching them to the apron with a fancy zigzag stitch. -
 Step 10
My apron is
complete—what do you think? -
 Step 11
Here’s the apron I fashioned from the back portion of the jeans:


Comments


