


About
Music for the ears now available for the nose!
Thank you Pixii for the reminder. This should only be used in a well healed piercing. I practiced first on a heavier gauge of wire. This way I could figure out the easiest way to make this. How-to was photographed with the heavy gauge for demonstration purposes only. This idea can also be used to make earrings. Follow all of the steps but use longer pieces of wire to make bigger also skip the L shape bend and use earring backs instead to hold earrings in place.
-
 Carla B. favorited Note Icable (Noticeable) Nose Jewelry
24 Jun 01:38
Carla B. favorited Note Icable (Noticeable) Nose Jewelry
24 Jun 01:38
-
 Billie F. favorited Note Icable (Noticeable) Nose Jewelry
16 Aug 16:29
Billie F. favorited Note Icable (Noticeable) Nose Jewelry
16 Aug 16:29
-
 Monkey_McGee favorited Note Icable (Noticeable) Nose Jewelry
10 Oct 07:17
Monkey_McGee favorited Note Icable (Noticeable) Nose Jewelry
10 Oct 07:17
-
 Rain R. favorited Note Icable (Noticeable) Nose Jewelry
12 Jul 18:15
Rain R. favorited Note Icable (Noticeable) Nose Jewelry
12 Jul 18:15
-
 justlori entered her project Note Icable (Noticeable) Nose Jewelry to Daisy Rock
05 Nov 16:53
justlori entered her project Note Icable (Noticeable) Nose Jewelry to Daisy Rock
05 Nov 16:53
-
 Step 1
Gather your materials. I used 20 gauge half-hard sterling wire. Needle nose pliers, wire cutters, a small screwdriver to make a circle and a nail buffer block for finishing the rough edges.
-
 Step 2
Using the wire cutters cut a long piece of wire. leaving the wire longer in the beginning makes it easier to bend. At the end you will trim off the excess wire. I am using a heavier gauge wire for demonstration purposes. Using your fingers smooth out any bends in the wire. Take your needle nose pliers and place the wire in about 1/8th inch and bend the wire around to form the flag.
-
 Step 3
Bend the wire to make a triangle.
-
 Step 4
On to the next step ﺕ
-
 Step 5
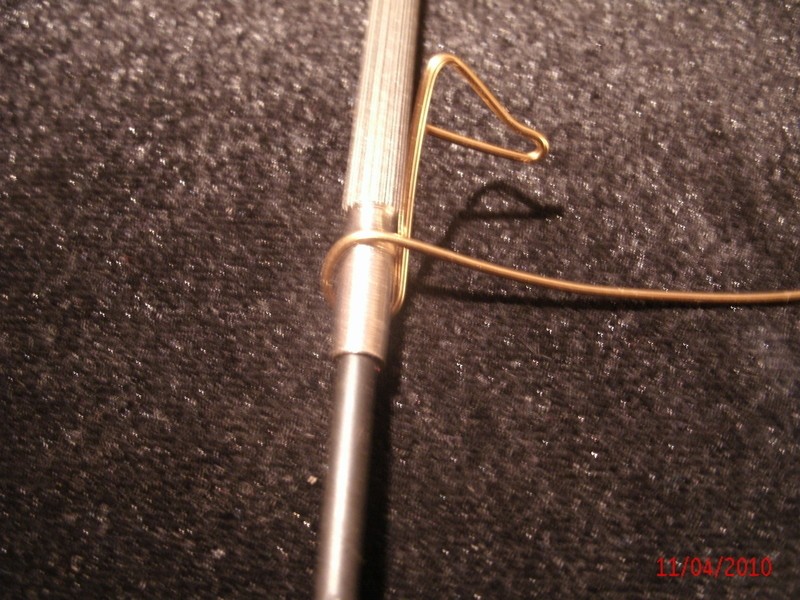
Using a small screwdriver or anything that is round, wrap your wire around to make the bottom of the note.
-
 Step 6
Take your pliers and make a 90 degree bend by the bottom of the note. This is the part of the jewelry that will go into the piercing.
-
 Step 7
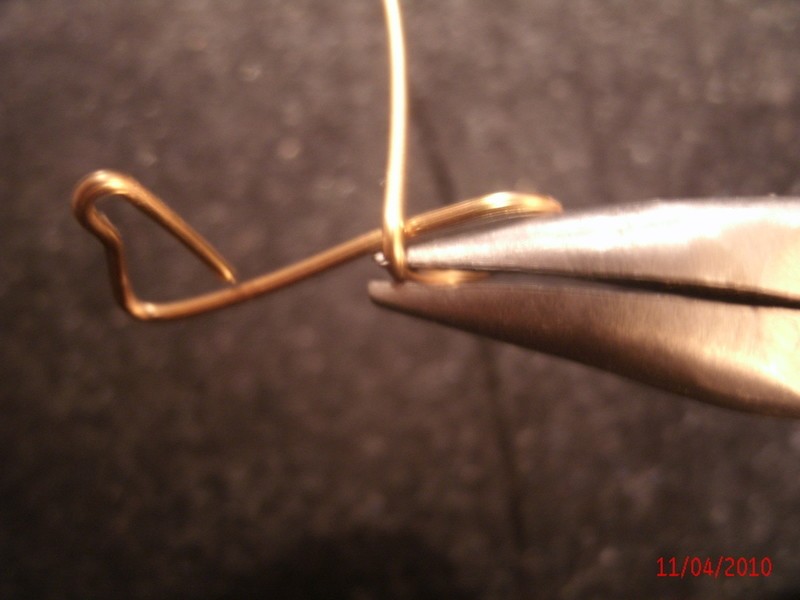
Using the wire cutters cut the excess of the wire to a length plus a little extra so that you have enough length to make the L shape piece.
-
 Step 8
ﺕ
-
 Step 9
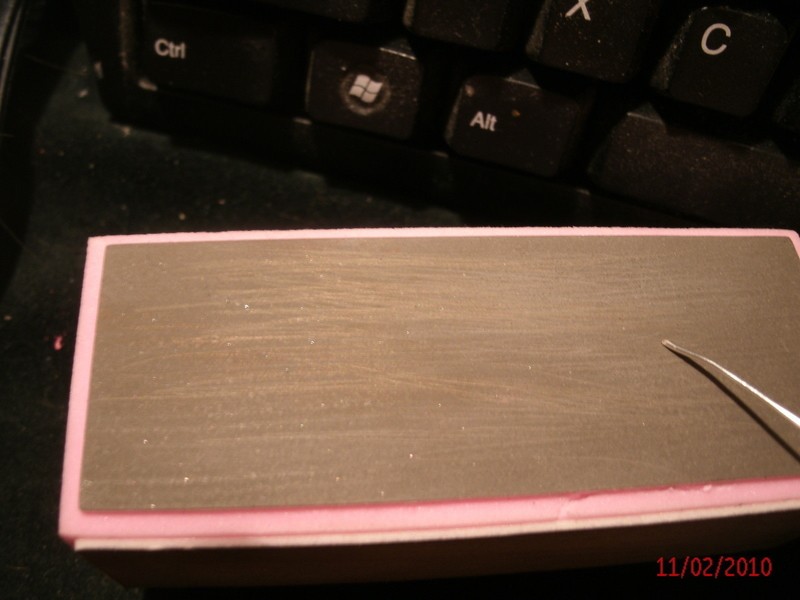
Using the buffer or fine sandpaper buff the end of the post until smooth. Use your finger to check the end for any sharp spots. Keep buffing until completely smooth.
-
 Step 10
Using your pliers again bend a 90 degree bend to form the L shape. This is what holds the stud in place.
-
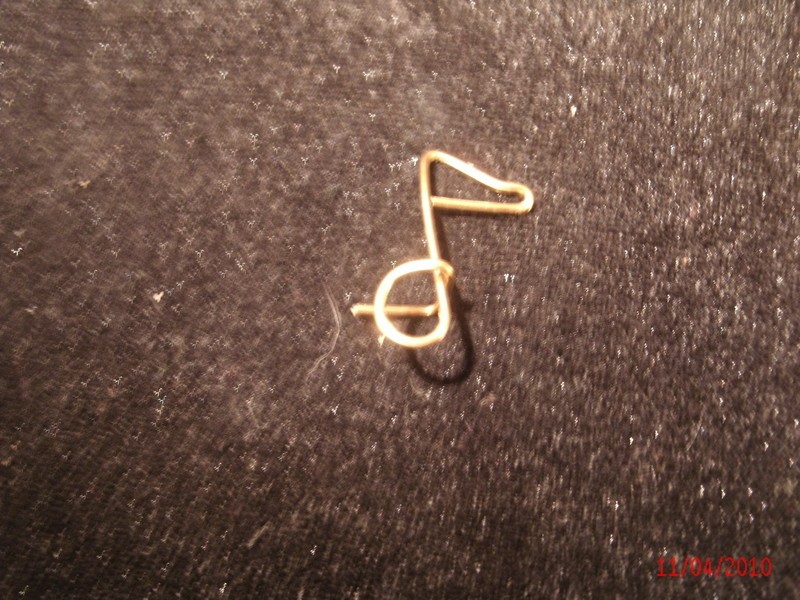
 Step 11
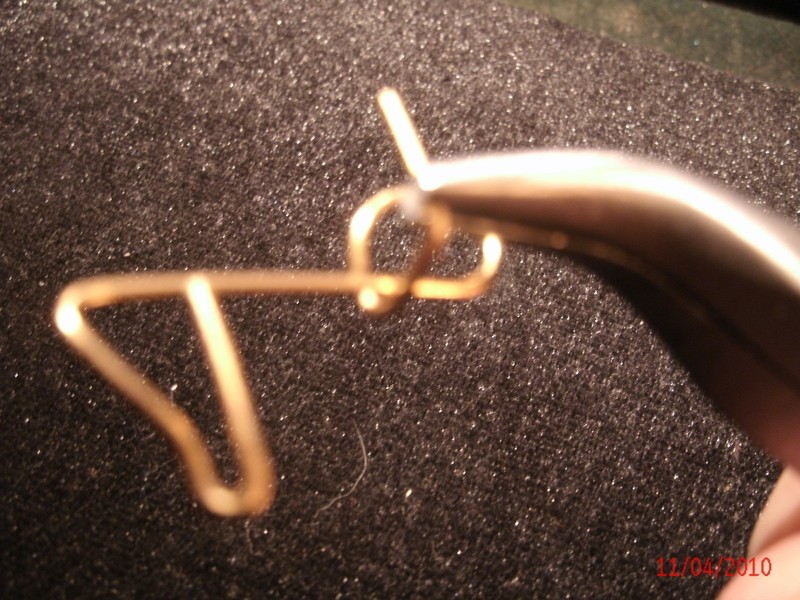
This is what your final piece of jewelry will look like. From the front.
-
 Step 12
In the nose. ﺕ


But oh my goodness this is so adorable. I can't wait to get my nostril repierced. <3