


About
Take a t-shirt from ill-fitting to a cuter cinched top.
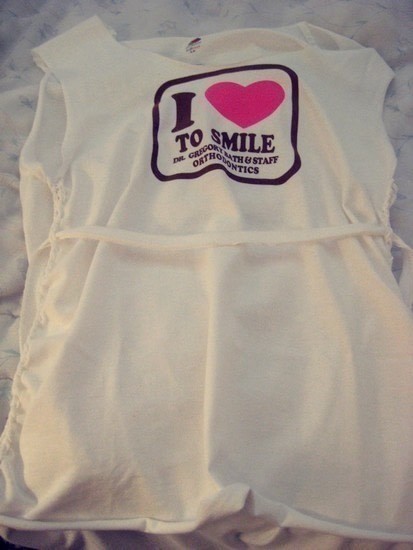
I always have trouble finding shirts that fit my bust and waist nicely at the same time.
And getting a (sorta cute) t-shirt from the dentist made me want it to fit.
It has braiding along the sides and a strap across the upper waist to cinch it in a bit.
-
 laurie b. added No Sew, Braid & Bow. T Shirt Reconstruction! to Cut up T-shirts
08 May 12:03
laurie b. added No Sew, Braid & Bow. T Shirt Reconstruction! to Cut up T-shirts
08 May 12:03
-
 Shelly S. added No Sew, Braid & Bow. T Shirt Reconstruction! to refashion
05 Aug 02:07
Shelly S. added No Sew, Braid & Bow. T Shirt Reconstruction! to refashion
05 Aug 02:07
-
Shelly S. favorited No Sew, Braid & Bow. T Shirt Reconstruction!
05 Aug 02:07
-
 txtia favorited No Sew, Braid & Bow. T Shirt Reconstruction!
08 Dec 03:59
txtia favorited No Sew, Braid & Bow. T Shirt Reconstruction!
08 Dec 03:59
-
Susan G. favorited No Sew, Braid & Bow. T Shirt Reconstruction!
23 May 15:27
-
anne w. added No Sew, Braid & Bow. T Shirt Reconstruction! to cut t shirts
15 Jan 04:10
-
 cristinakilljoyway favorited No Sew, Braid & Bow. T Shirt Reconstruction!
31 Dec 21:21
cristinakilljoyway favorited No Sew, Braid & Bow. T Shirt Reconstruction!
31 Dec 21:21
-
hannah l. favorited No Sew, Braid & Bow. T Shirt Reconstruction!
24 Nov 12:01
-
 Cupcake C. favorited No Sew, Braid & Bow. T Shirt Reconstruction!
10 Nov 02:13
Cupcake C. favorited No Sew, Braid & Bow. T Shirt Reconstruction!
10 Nov 02:13
-
 stephanie1704 favorited No Sew, Braid & Bow. T Shirt Reconstruction!
27 Jul 02:43
stephanie1704 favorited No Sew, Braid & Bow. T Shirt Reconstruction!
27 Jul 02:43
You Will Need
-
 Step 1
Cut off the seam of the t-shirt. Save this piece for later.
Also, stretch out the bottom. It's not absolutely necessary, but it gives a little more room. -
 Step 2
Next, cut off the neck. If you want to, you can make a v-neck or a scoop neck. Stretch it out a bit.
If you're going to do this, only do it in the front. If you cut the back along with it, it'll fall off your shoulders. -
 Step 3
Now cut off the sleeves! Stretch 'em out, too.
-
Step 4
With the shirt facing up, flatten it out. Along the sides below the arms, cut about 1 centimeter in, all the way down to the bottom of the shirt. You can make it larger if you want to show more skin.
No picture, sorry!
-
 Step 5
This one takes the most time.
Braid it all the way down on both sides of the shirt using this technique:
http://www.youtube.com/watch?v=O6SWN4_IhAA -
 Step 6
At the end, where you have two loops, take a piece of ribbon and tie them together.
I double-knotted to make sure.You don't necessarily need ribbon for this step. You can use t-shirt scraps.
Or if you really want to, you can sew it together, but then it wouldn't be a nosewbraid&bow! -
 Step 7
Remember the seam we cut from the bottom of the shirt? Time to use it!
Stretch it a bit to give it more length. Then cut it somewhere so you have one long piece.
-
 Step 8
Thread the seam through a braid on the side about 2 inches below the bottom of the arm holes.
Sorry, can't think of a better word for "arm holes." D:
-
 Step 9
It'll look something like this now.
Just tie it in the back when you put it on and... voila!


CO + K User
CO + K User