

About
A classy border that wont make you feel like you stole it from a 10 year old!
This is step by step, its really not hard, just wanted to make sure y'all understood it :)
SO SO SO SO SO SO!!!!!!!
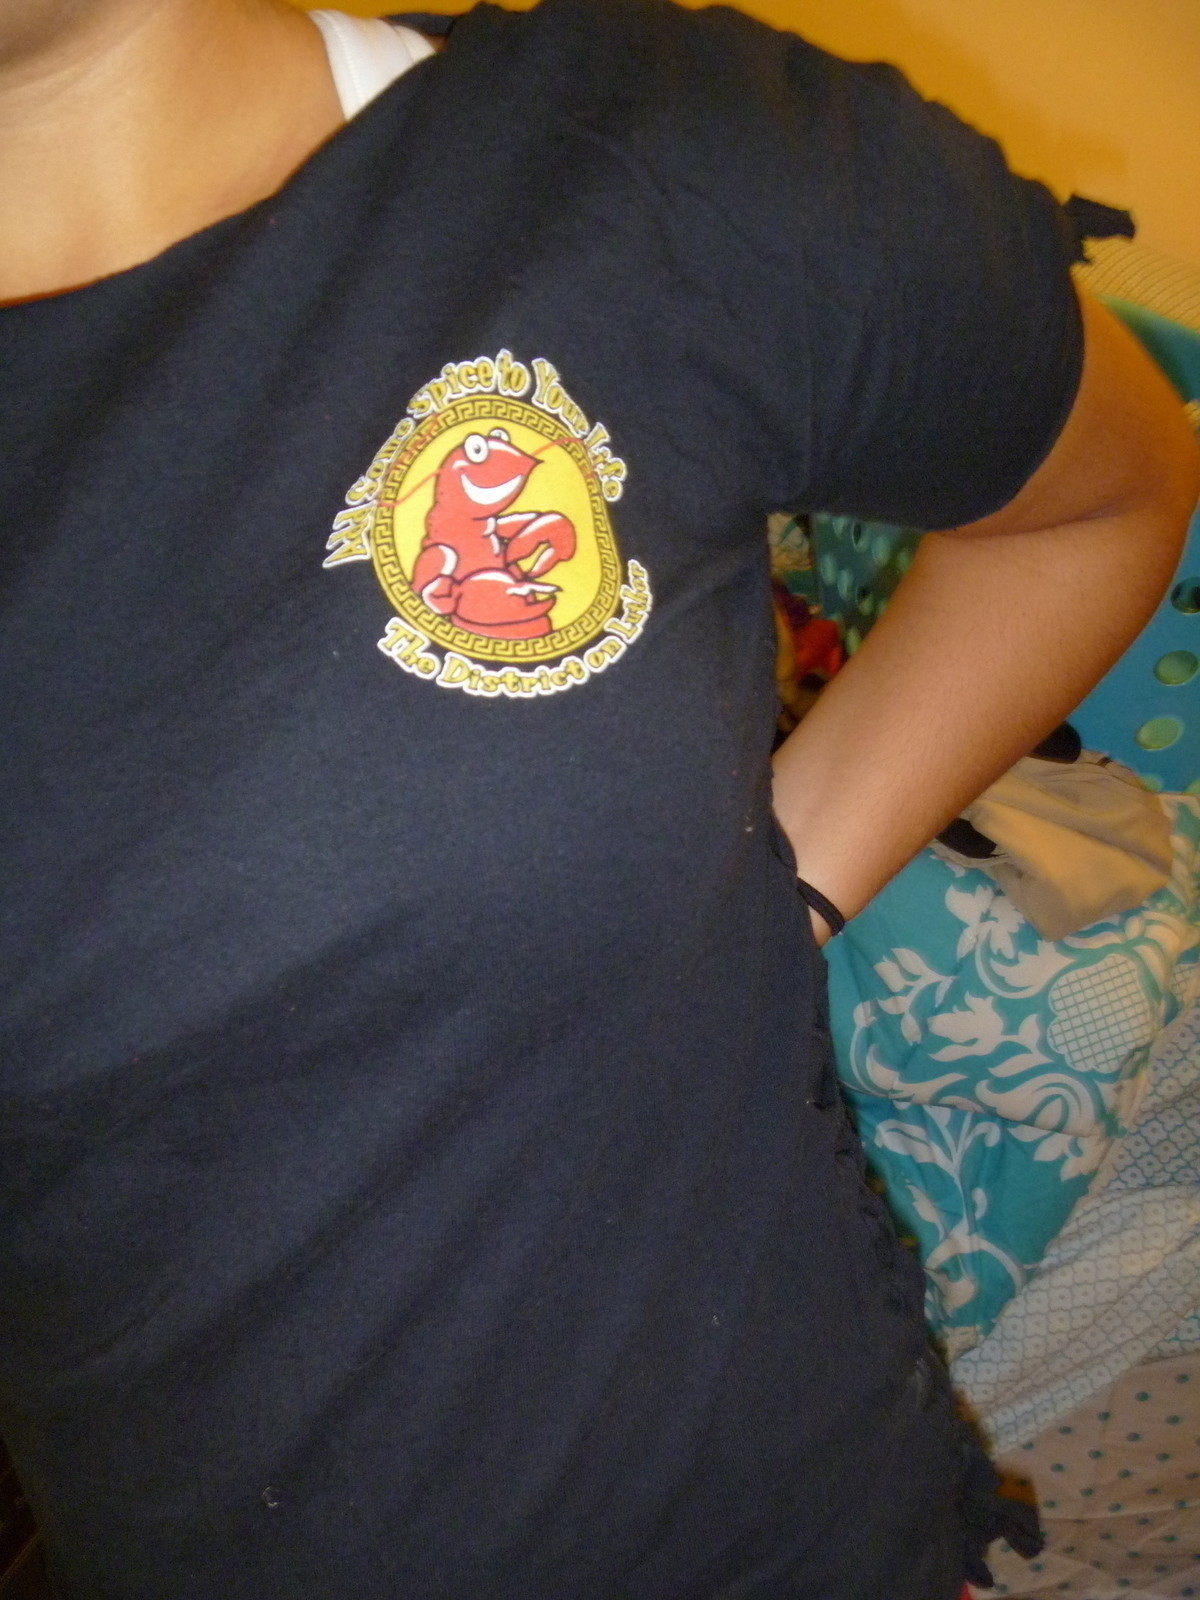
I noticed how some kids make their shirts fit better by cutting and knotting up the sides...... however... I think it looks raggedy and that's not my style.
PLUS!!! They only knot up the sides... and if the shirt is two sizes to big, the whole top part is sagging on me.
So so so.... I found this knotting style on accident when I was making a college pillow for someone, and I had did the knots on the wrong side and turned it inside out.... and hey! It looked really nice and grown up :)
This shirt was given to me by my apartment complex and I really wanted to wear it.. but it was a large and I wear a small, so this is what happened!
-
 erica.newell1 favorited No Sew Knotty T
08 Jan 15:55
erica.newell1 favorited No Sew Knotty T
08 Jan 15:55
-
 Megan O. added No Sew Knotty T to DIY fashion
04 Jan 22:25
Megan O. added No Sew Knotty T to DIY fashion
04 Jan 22:25
You Will Need
-
 Step 1
First thing is first! MUST MUST MUST
--> Turn shirt inside out. <---
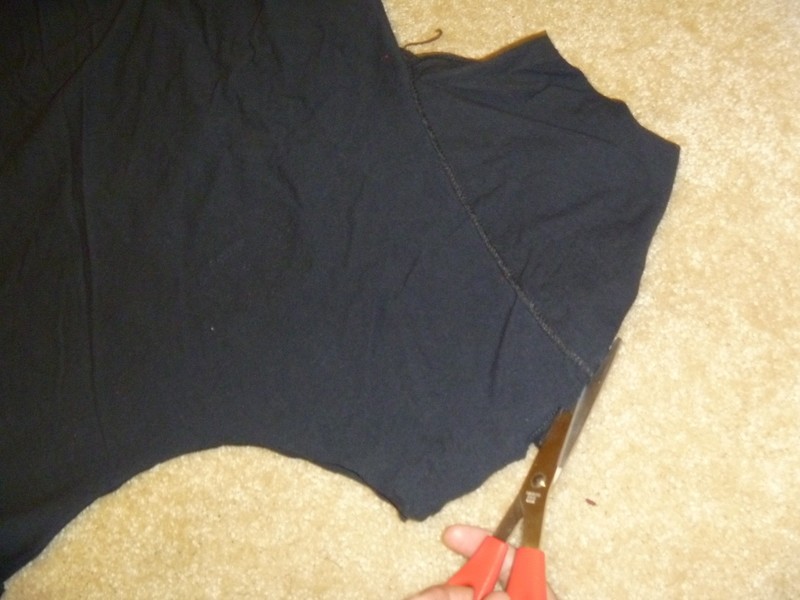
I cut around the collar about half an inch a way and took off that rimming, and did the same to the sleeves.Now just do the shoulders first!!! (It'll keep the shirt lined up better.)
Cut the back and front from each other! From shoulder to sleeve!
-
 Step 2
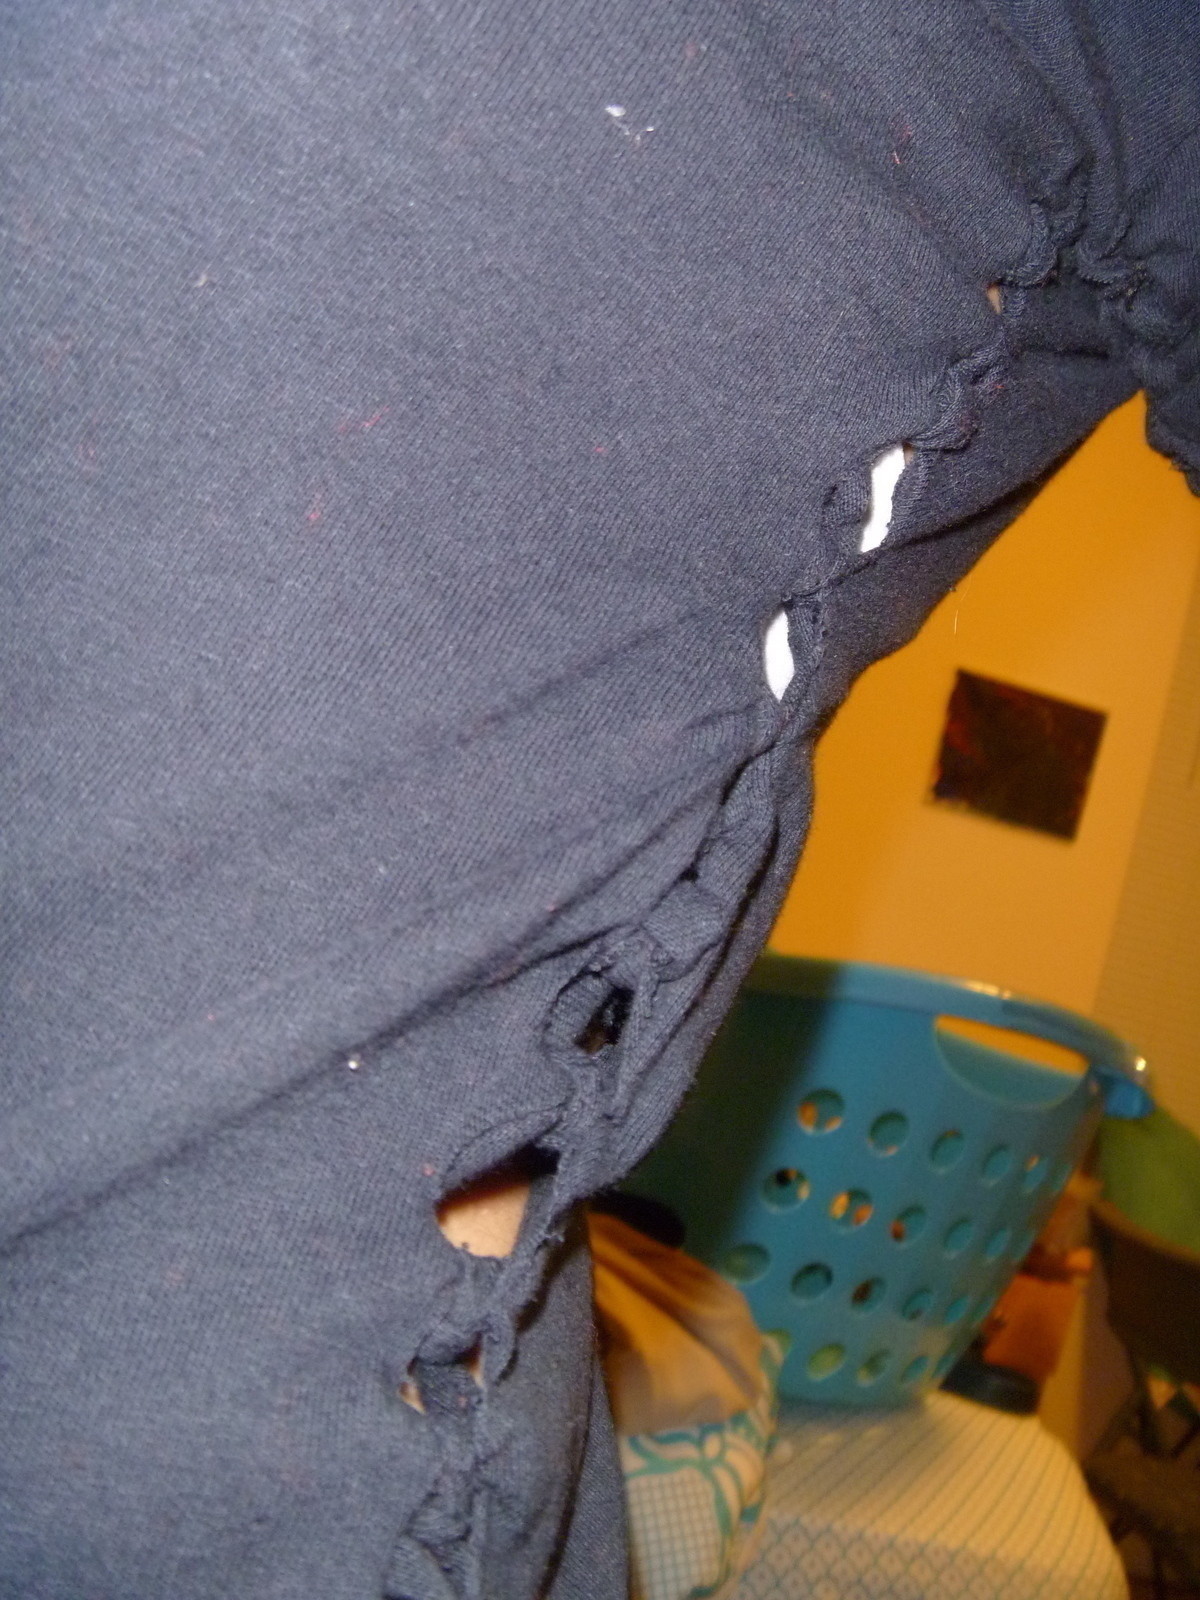
Now start cutting strips at a short length as thick as your finger down to the end of the sleeve
Confused? Look at step 3 -
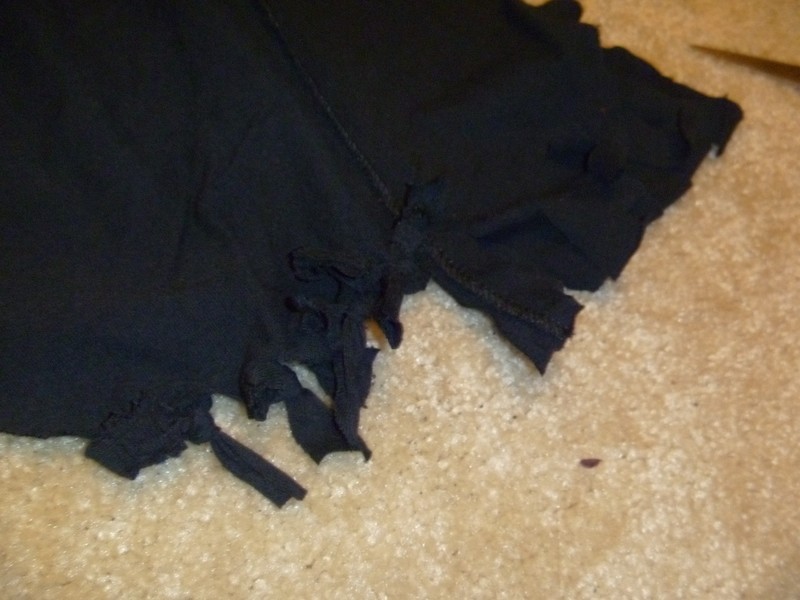
 Step 3
Should look like this all frayed and BOTH the back and front cut MATCHING each other
<--- -
 Step 4
Now grab the very first strips of the back and front next to the neckline and make a double knot!
-
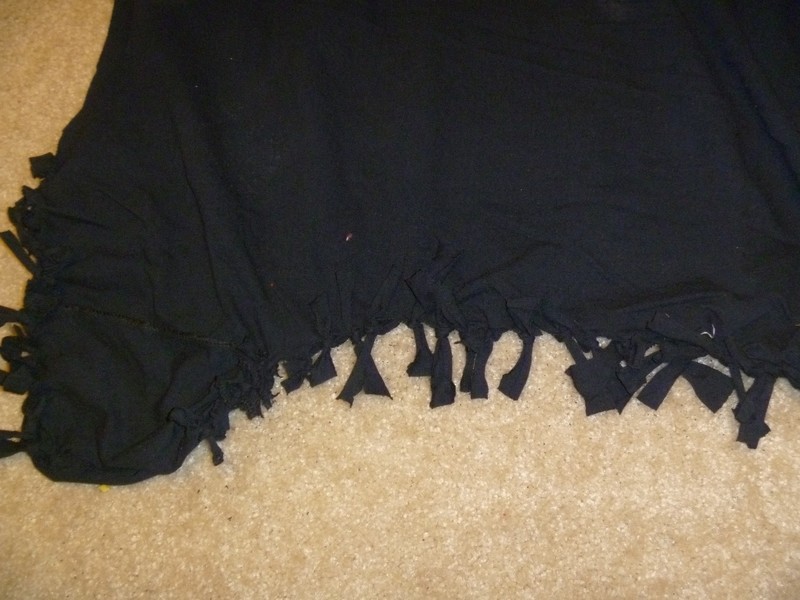
 Step 5
Continue these double knots all the way down to the sleeve
-
 Step 6
If it doesn't look sort of like this.... you might have messed up! But it is ok! They are just knots. Unknot them and redo!
-
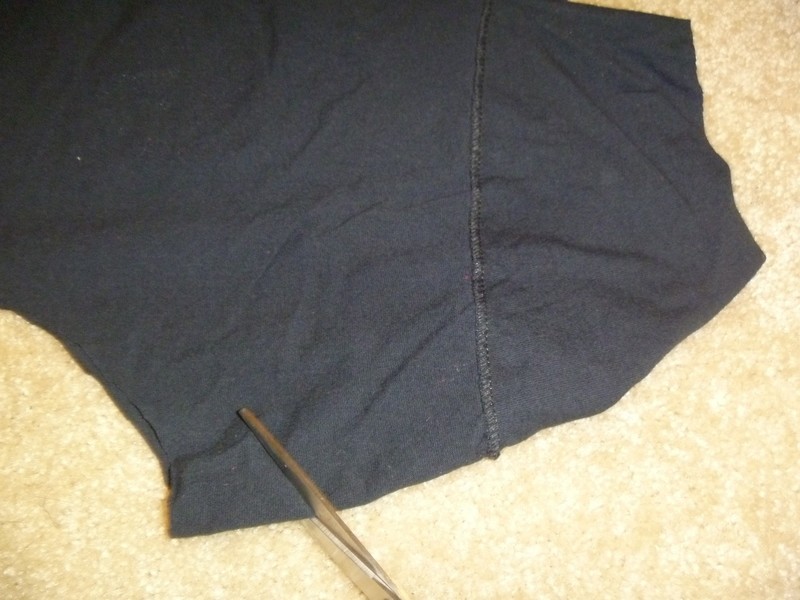
 Step 7
Now that BOTH shoulders have been done.......
It's time for the sides!
Cut those to be separated from the back and front!
-
 Step 8
Now start cutting the slits in again, but REMEMBER on the sleeves keep the slits short.... you want to still feel your arms when to try it on.
When you start cutting the slits in the sides, if you have a LARGE t-shirt and cutting it to fit a SMALL then open your scissors all the way and cut down to make the length of the slit. (ALL SLITS SHOULD BE CUTTING BOTH THE BACK AND FRONT OF SHIRT AT THE SAME TIME)
Slits width should be about finger width.... doesn't really matter if they are not.
-
 Step 9
Ok start double knotting from the sleeve down
When you get to the pit, (tricky sort of... but keeps the armpit covered)
take one of the strips from the top of the shirt and then take the bottom strip thats NEXT to the one the top one is lined up to. Do that to the strip next to it. They should be crossing each other when you knot them...
(Sorry really confusing to type and hard to get a picture of...)
-
 Step 10
Knot all the way and do both sides
-
 Step 11
If the strips are WAY to long for your comfort after they are knotted, feel free to trim them a bit (I actually just left mine).
Turn shirt inside out... and SHALA! You have it :)