


About
These guys are cheap and a great gift for family and friends
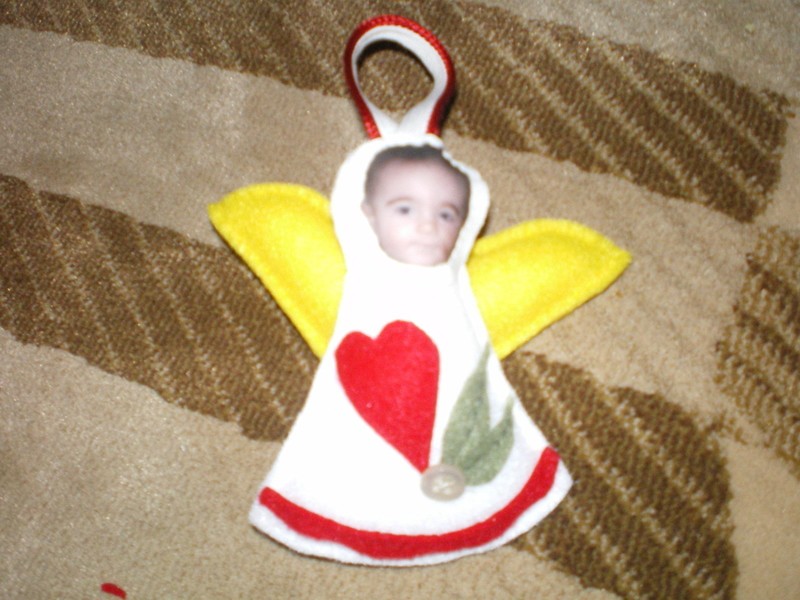
This last Christmas I wanted a way to send all of our family a picture of its newest member, but just a photo seemed cheap and frames can be expensive. That is when I got my wacky idea. Why not put the picture on a tiny stuffy ornament? They were well liked and well received so I think I will be doing something similar again next year!
This year I made snow women, gingerbread girls and angels.
Tags
-
 Agika1235 favorited Nifty Cheap Personalized Christmas Ornaments
15 Oct 12:12
Agika1235 favorited Nifty Cheap Personalized Christmas Ornaments
15 Oct 12:12
-
Step 1
Pick a photo with a head shot you like. You could use the recipients face or your own!
Crop the photo so that only the face is visible. And size it so that when you print it will be under two inches by two inches, otherwise your ornaments will be too large.
-
Step 2
Print the faces onto Iron on Transfer paper (Walmart, Target, your local office supply or craft store will all carry this).
If you format things correctly you should be able to print many heads on one page. (the paper is not cheap, but if you do it right you may only need a single sheet. I used two for around 40 ornaments)
-
Step 3
Cut out shapes. I used cookie cutters to help with the shapes.
A main body x 2
and any embellishments you can think of... aprons, buttons, eyes, hair, hats that sort of thing. -
Step 4
Cut out and iron on your faces. Follow your transfer paper's instructions for this.
-
Step 5
Stitch front and back of the main body most of the way and stuff with polyfill leaving a space at the top for the ribbon loop.
-
 Step 6
Sew in the ribbon loop as you sew the ornament closed.
A peice of ribbon about 6 to 8 inches long should be long enough. Fold it in half and tuck both ends into the ornament's "head". Pin down and sew closed. -
 Step 7
Add your embellishments. And make your ornaments really sizzle.


but i like it sooooo much, great idea , so lovely and adorable!!!
But nontheless a god idea