


About
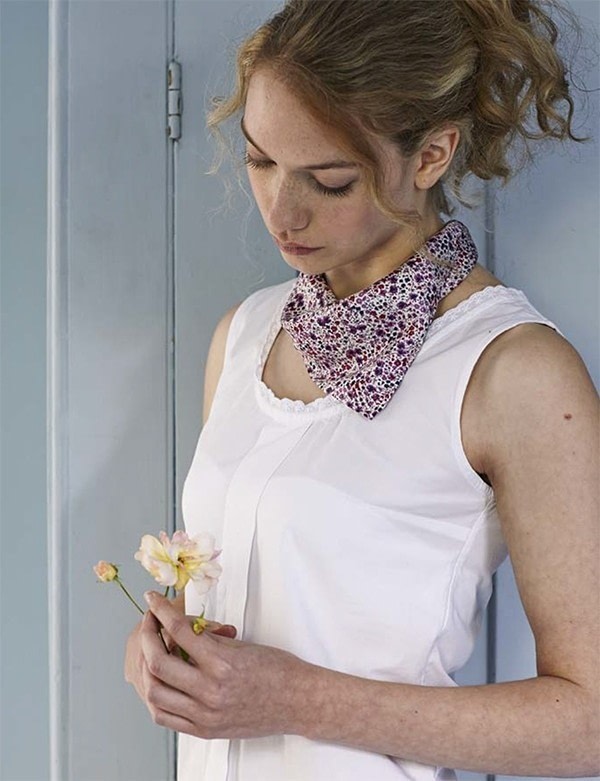
Make a luxurious silk scarf with a simple hand sewn hem
I first started making these little neckerchief scarves when I found I really wanted to make something with some gorgeous silks that I had in my fabric stash, but didn’t want to cut into them too much. They are a really simple way to wear your favourite fabrics in a subtle way. Wear it around your neck to add contrast to a solid colour top or, wrap it around your wrist as a sort of bracelet.
-
 Emma H. favorited The Versatile Silk Neckerchief Scarf Tutorial
01 Aug 16:33
Emma H. favorited The Versatile Silk Neckerchief Scarf Tutorial
01 Aug 16:33
-
 tyler t. favorited The Versatile Silk Neckerchief Scarf Tutorial
15 Jan 16:52
tyler t. favorited The Versatile Silk Neckerchief Scarf Tutorial
15 Jan 16:52
-
 Lauren G. published her project The Versatile Silk Neckerchief Scarf Tutorial
01 Jan 09:00
Lauren G. published her project The Versatile Silk Neckerchief Scarf Tutorial
01 Jan 09:00
You Will Need
-
Step 1
Cut out your fabric
Cut a 49x49cm square out of dressmakers tracing paper then use this to cut out a square of fabric the same size, ensuring that you line the side of the square up with the selvedge so that you cut it out on the straight grain.TOP TIP – If using silk, or another slippery fabric, ensure that you use lots of pins to hold the pattern piece onto the fabric. This will make the cutting out much more accurate.
-
 Step 2
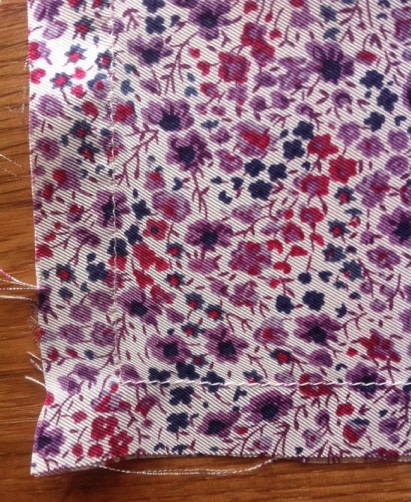
Stay stitch all the way around the edge of the square and trim down
Stay stitch, with a normal stitch length, 1cm from the raw edge, all the way around the square. If you sew too close to the edge with a really light-weight fabric it can snarl up under the presser foot of the sewing machine.
This stay-stitching will prevent the edges of the scarf from stretching out of shape as you stitch the hem.
Trim the raw edge to 0.5cm away from your line of stitching. -
 Step 3
Hand rolled hem
Work at your ironing board to do this as you need to use a pin to anchor down the end of you hem.
Thread a sharp needle with one strand of thread and tie a knot in the end. Lay the scarf wrong side facing up. Start in one corner of the scarf and carefully fold the raw edge towards the wrong side of the fabric a few times until your line of stay stitching is folded underneath and you can’t see it.Insert a pin through the fold and into the ironing board, this helps to anchor things in place.
-
 Step 4
Insert the needle into this folded section and secure it with a little stitch.
Work from right to left along the edge of the scarf, folding and rolling the raw edge so that the stay stitching is hidden.Sew a 1cm stitch along the rolled section and then a tiny stitch, of just a few threads of the fabric, into the main scarf section so that on the right side of the scarf you can only see a very little stitch.
-
 Step 5
Work your way along the edge, using the stay stitching to create tension to help you fold and roll the raw edge. Move the pin along as needed to provide resistance and anchor the hem.
-
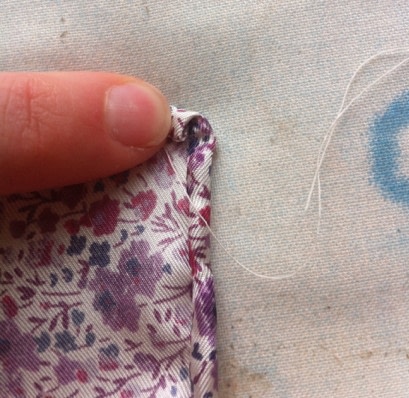
 Step 6
When you get to the next corner, repeat the process again, carefully folding down the raw edge to get the rolled hem started and put and extra couple of stitches in the corner to hold it in place, then inset the pin as an anchor to provide resistance so you can tension the next raw edge. Then just keep going until you are back to where you started. This hem is supposed to have a rounded finish so don’t press it flat!