


About
A little shelf unit, recycled of course
My sister was getting rid of this small set of shelves, and I wanted to save them, so decided to recycle them.
I think it's lucky I did really, I later found out that my Grandad had built them for one of my uncles. They've been in the family for more than thirty years :P. I think it's nice to save them.
-
 kiki w. added My Red And Gold Shelves to Things I need to make for myself
29 Jan 20:10
kiki w. added My Red And Gold Shelves to Things I need to make for myself
29 Jan 20:10
-
Rachel F. favorited My Red And Gold Shelves
28 Sep 22:20
-
 cynthia.rodriguez.3532507 favorited My Red And Gold Shelves
01 Feb 00:52
cynthia.rodriguez.3532507 favorited My Red And Gold Shelves
01 Feb 00:52
-
Step 1
Sorry I don't have any pictures of this part, but we all know what shelves are like.
The ones I had were black to begin with so, because the colour I wanted to paint them was lighter, I sanded them down and gave them a base coat of cream emulsion.
-
 Step 2
After painting the shelves cream I gave them the first coat of gloss in the colour I wanted. I chose red to go with the scheme I wanted. I used emulsion as a base coat, so I didn't feel the need to sand before painting the gloss on.
-
 Step 3
I think it's always good to give a second coat of gloss, or even a third sometimes. I found that two was enough to cover it.
-
 Step 4
This is the bit I found a tad tricky, I didn't actually think it through before applying the gloss :P.
The paint almost ran off the gloss in a few places (I know, silly me!), and I though I was going to have to give up on the whole think. In reality after a few coats the gold stuck :).
I painted the rim round the shelves in gold. Sorry the picture quality isn't brilliant, I took this one inside.
-
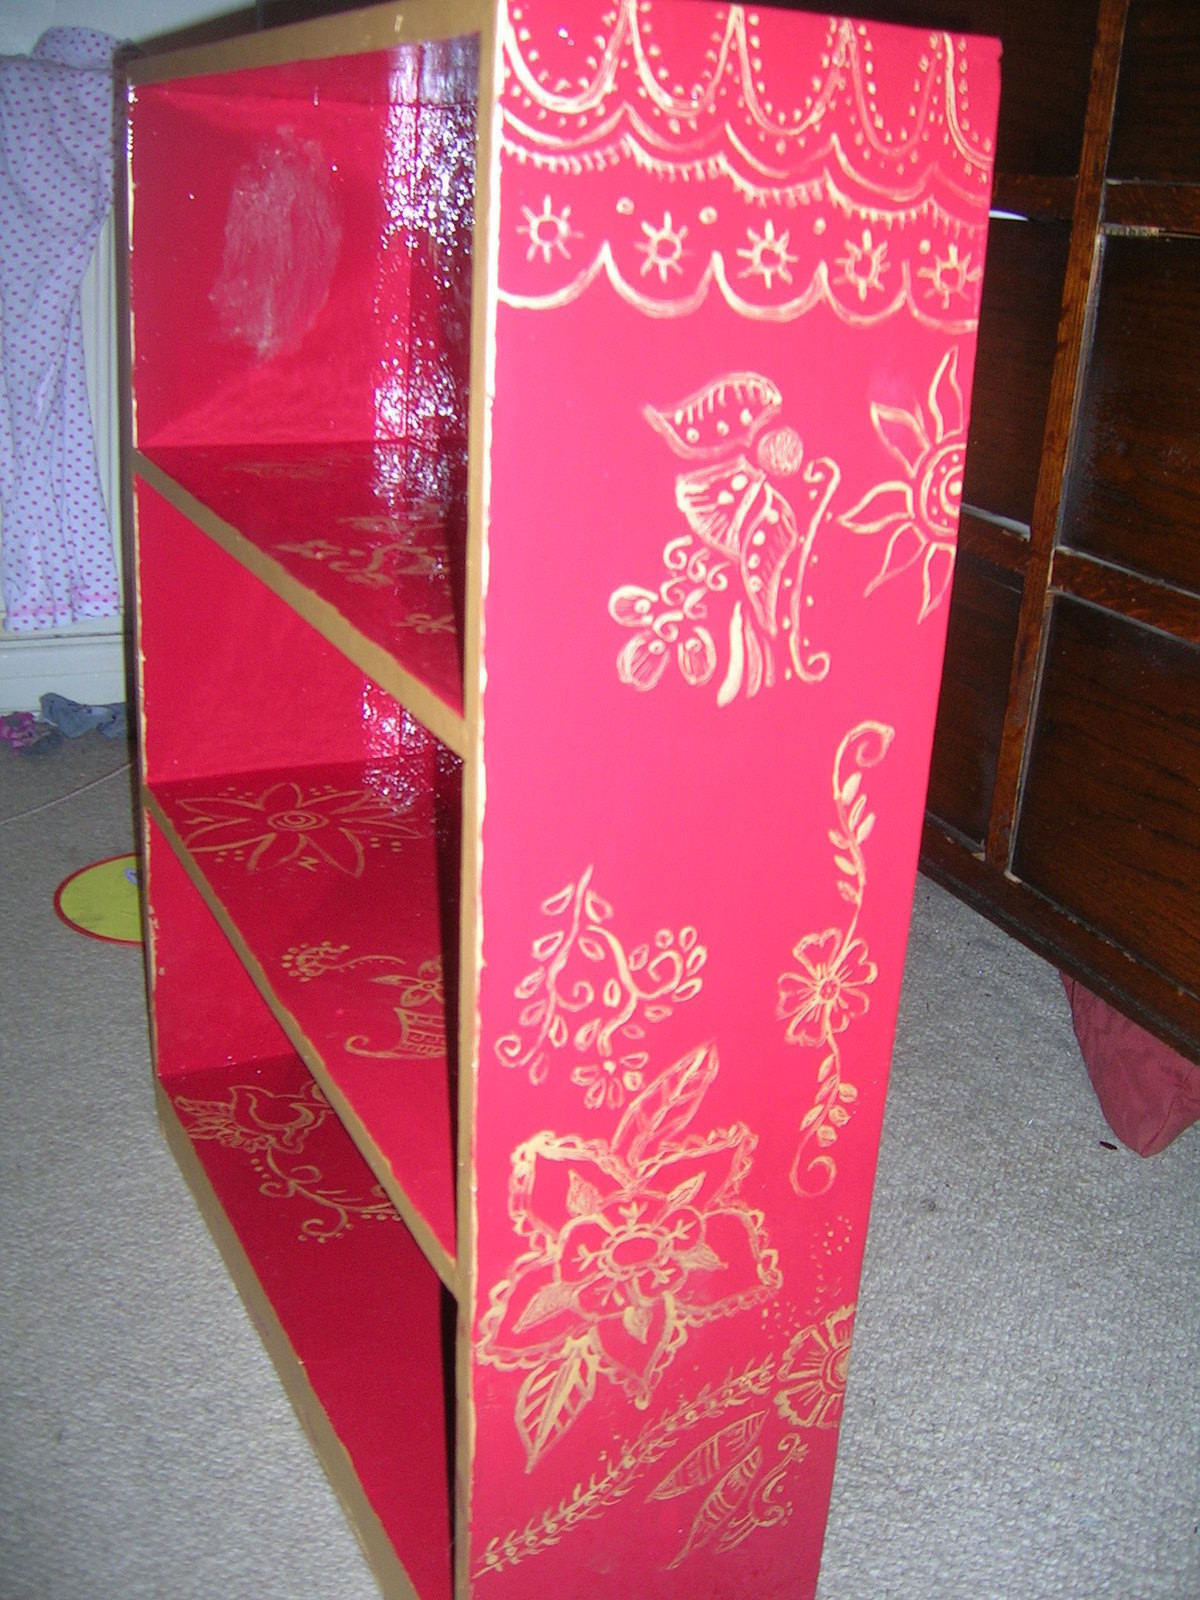
 Step 5
I then began free-handing my desings. Obviously, if you like, you can use stencils, I just couldn't be fussed with the extra work tbh!
The designs I was using were also a bit too complicated to do stencils of really.
I painted the outer bits of the shelves, such as the top and outer sides first.
-
 Step 6
I then painted the inside of the shelves and slowly built up my design. I have to say I made no real plan on the design of this, I just found images I liked then went wild.
-
 Step 7
Once you have your design finished wait for it to sry then, voila! You have a lovely new set of shelves!


Comments

