


About
An easy to follow guide on how to create the ultimate laid back curls
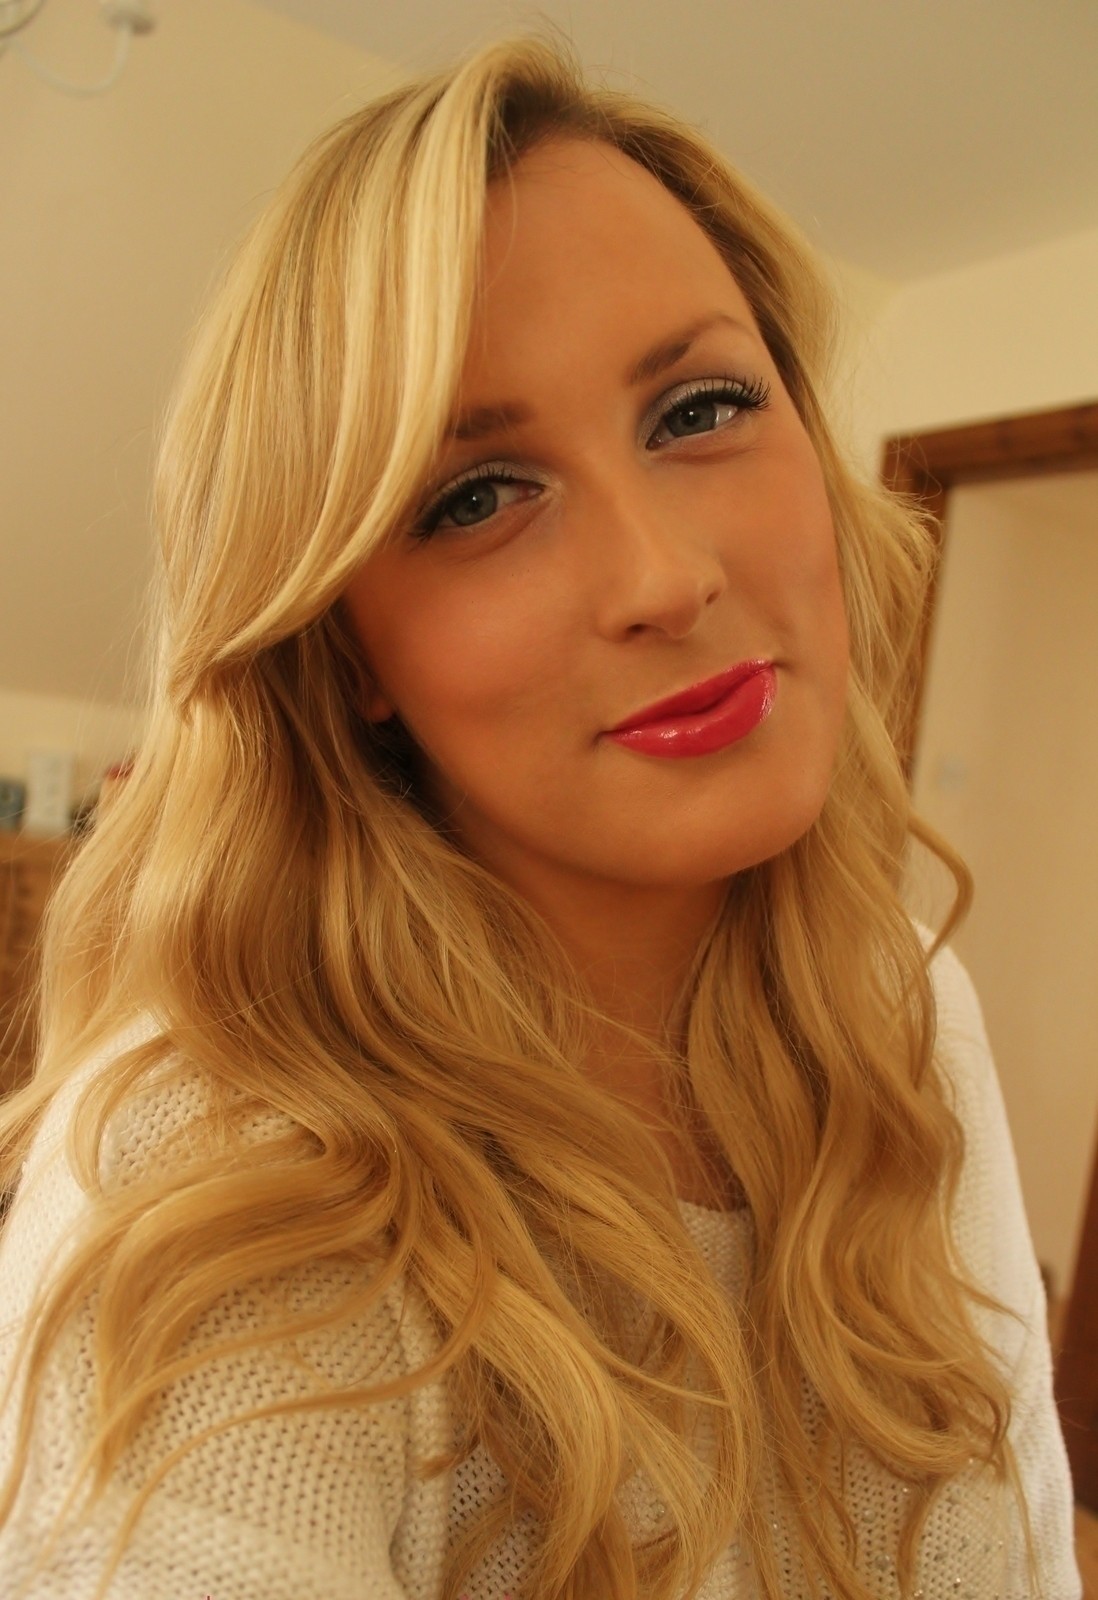
I got a lot of emails asking if I could do a post on how I curl my hair from beginning to end. When I first started to curl my hair, it took me quite a while to get used to it. My first few attempts weren't great but with time and practice, I've finally got the hang of it! So if you're struggling with yours, just keep practising and it will come to you. Don't feel bad that you haven't mastered it because I don't always get things right first time (or second or third!) round and the great thing about the blogging community is that there's so many different places to read and watch and learn. Hopefully this post will be of some use and show that everyone has to start somewhere.
-
 Agnes W added My Guide To Relaxed Curls to SJP
23 Mar 00:59
Agnes W added My Guide To Relaxed Curls to SJP
23 Mar 00:59
-
 Ami added My Guide To Relaxed Curls to Stevie Nicks
14 Mar 18:03
Ami added My Guide To Relaxed Curls to Stevie Nicks
14 Mar 18:03
-
 Lea Bee added My Guide To Relaxed Curls to Doctor Who
27 Aug 11:50
Lea Bee added My Guide To Relaxed Curls to Doctor Who
27 Aug 11:50
-
 Jess W. favorited My Guide To Relaxed Curls
24 Jan 17:01
Jess W. favorited My Guide To Relaxed Curls
24 Jan 17:01
-
 Munnazah C. added My Guide To Relaxed Curls to Fab hair dos and styles!
08 Nov 21:03
Munnazah C. added My Guide To Relaxed Curls to Fab hair dos and styles!
08 Nov 21:03
-
Munnazah C. favorited My Guide To Relaxed Curls
08 Nov 21:03
-
 bree c. added My Guide To Relaxed Curls to stuff
16 Feb 11:26
bree c. added My Guide To Relaxed Curls to stuff
16 Feb 11:26
-
 11lizzie :) favorited My Guide To Relaxed Curls
02 Feb 21:12
11lizzie :) favorited My Guide To Relaxed Curls
02 Feb 21:12
-
 Alezita G. favorited My Guide To Relaxed Curls
31 Jan 06:26
Alezita G. favorited My Guide To Relaxed Curls
31 Jan 06:26
You Will Need
-
Step 1
So here goes...
Firstly, I have tried curling my hair in many ways:
Straighteners - I attempted this and ceremoniously failed (my arms just cen't bend that way!)
Wide Barrel Curling tongs - The curls lasted about 2 hours before falling out
Heated Rollers - Created nice bouncy hair but not enough curl for my liking
Braids - I often do this on holiday to avoid applying too much heat to my hair but it creates more of a relaxed wave.
However, now I have found the perfect appliances and products, it all seems so easy to me. I will go through which products I use and the do's and don'ts I have learned through experience.
These are my tried and tested perfect products for creating voluminous, bouncy curls that last all day:
1) Aussie Aussome Volume Shampoo
2) Aussie Lusciously Light Mega Instant Conditioner
3) Kerastase Elixir Ultime or Paul Mitchell Super Skinny Serum
4) Loreal Elnette Heat Protect Spray Volume
5) Loreal Elnette Hairspray
6) Tigi Catwalk Volume Collection Your Highness Weightless Shine SprayBecause I have fine hair that needs a helping hand when it comes to creating volume, I try to always use the most lightweight formulas when it comes to shampoo and conditioner. I find the Aussie ones are great, easy to get hold of and very good value for money. I use the Kerastase Elixir Ultime or Paul Mitchell Super Skinny Serum to make sure my hair stays silky, smooth and soft. I apply it whilst my hair is damp, followed by the Loreal Elnett Heat Protect Volume Spray which I apply directly to the roots. I then spray some in my hands and comb my fingers through my hair to lightly coat all my hair.
I find it's always best to dry your hair upside down for maximum volume, especially when you're wearing your hair wavy or curly. Once it's 80% dry, I then section my hair and dry it by always gently pulling the hair upwards with my brush and concentrating the hair dryer nozzle into the hair to create a smooth and shiny finish. You could also add an extra step if you have time by putting rollers in at the roots to further lift and volumise the hair.
It's really important to make sure your hair is completely dry before you even think of trying to curl it. Otherwise the curls will just drop out within a couple of hours.
Once I have finished drying my hair, I spray it with the Tigi Shine Spray and I section it off using metal clips that you can get from any supermarket. As you already know, my weapon of choice is either the Babyliss Conical Wand or the Enrapture Totem Styler. The Babyliss Wand creates beachy waves whilst the Enrapture tool gives more a a relaxed, fuller appearance.
It's important that you don't try to curl too much hair at one time. The sections you wind around the wand should only be about an inch in size. I always use the maximum heat setting and I hold the hair in place for 10 seconds for the lower half of my hair and once I get to the top sections around my face, I only hold it for 5 seconds as I don't want those bits to be REALLY curly. I always curl my hair away from my face.
To create maximum volume at the roots, once you have curled most of your hair, you should bring the wand as close to your scalp as you can to create uplift at the roots.
I like to get a small mirror, stand with my back to a full length mirror and just check that I haven't missed any pieces at the back.
Now this is one step that I only started doing recently and it's made a massive difference to the finished look of my hair. Once I have finished curling my hair, I brush it with a sparse vent brush. I had heard lots of people talking about brushing the hair after curling it but I had always thought "noooo, I've spent so long curling it...why would I want to brush all the curls out!?". However, this has proved to be the missing step in my routine that took my hair from looking too styled to extremely bouncy, full and natural- looking. When you brush the curls, it doesn't brush them OUT of your hair, it simply blends everything together more so you don't get ratty ends or 'piecey bits'.
It's exactly how the hair is styled for the Victoria's Secret models so who am I to argue?! I then turn my head upside down and spritz my hair from underneath with hairspray. I give it another spritz on top just to hold everything in place. It's important not to go overboard with the hairspray though because the last thing you want is to weigh your hair down or make it look too solid and crispy! This look is all about natural waves, curls and bounciness.
My usually limp, flat hair lasts all day when I go through these steps and it makes my hair appear twice as thick!
You could backcomb the under-sections of your hair but I choose not to most of the time because I prefer to be able to run my fingers through my hair. You could also curl hair extensions and add them in for more impact and a fuller look. I would only do that for special occasions though. The pictures of my hair above were styled using only my own hair.

