

About
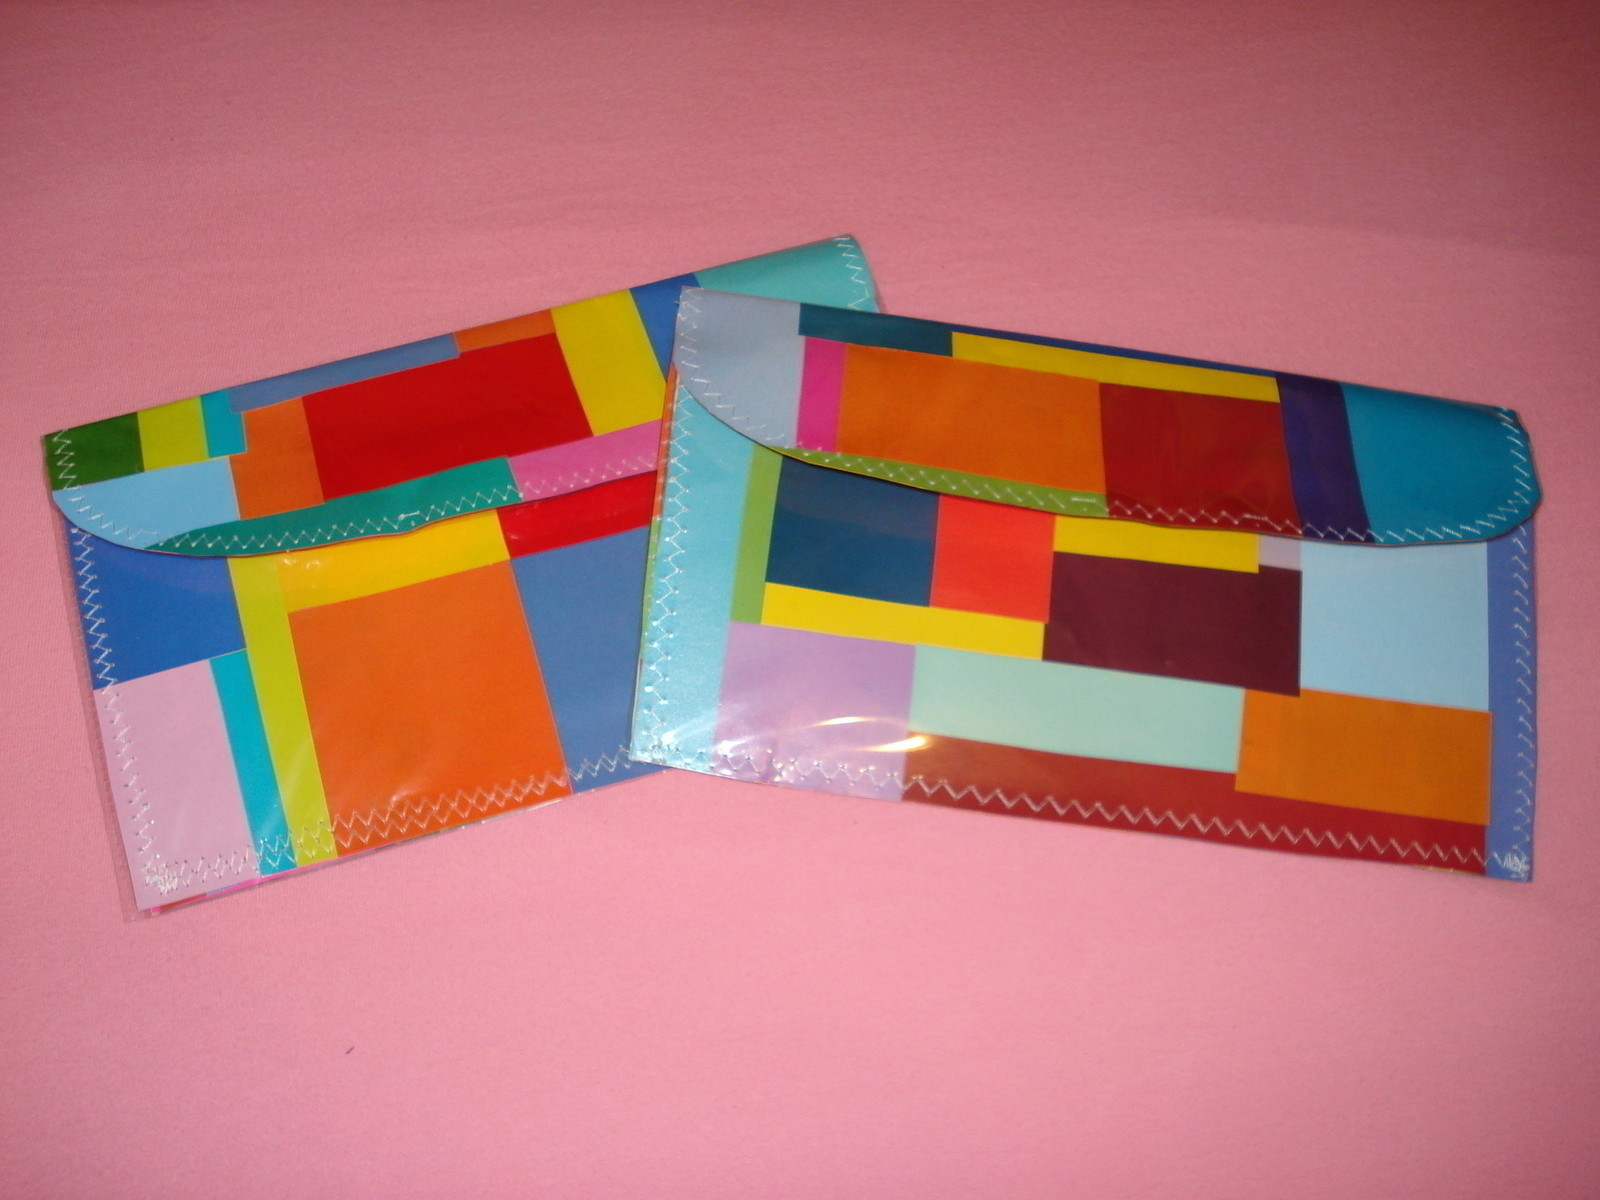
Cute and Functional Handbag!
This collage handbag is based on the tutorial given by Cdyney W. I made it bigger but for the most part it is pretty close to her tutorial.
-
 maham k. favorited Multicolored Collage Handbag
15 Jun 05:23
maham k. favorited Multicolored Collage Handbag
15 Jun 05:23
-
 Netra H. favorited Multicolored Collage Handbag
27 Feb 21:50
Netra H. favorited Multicolored Collage Handbag
27 Feb 21:50
-
 CrazyCatCouple added Multicolored Collage Handbag to up-cycle
16 Jul 01:51
CrazyCatCouple added Multicolored Collage Handbag to up-cycle
16 Jul 01:51
-
Kathy S. favorited Multicolored Collage Handbag
13 Jul 04:26
-
 eFenuska added Multicolored Collage Handbag to Jewelry and Accessories
05 May 17:46
eFenuska added Multicolored Collage Handbag to Jewelry and Accessories
05 May 17:46
-
 A.Alnuaimi favorited Multicolored Collage Handbag
02 Mar 11:19
A.Alnuaimi favorited Multicolored Collage Handbag
02 Mar 11:19
-
jacqueline p. favorited Multicolored Collage Handbag
25 Nov 23:33
-
 LottaAurora favorited Multicolored Collage Handbag
05 Oct 22:45
LottaAurora favorited Multicolored Collage Handbag
05 Oct 22:45
-
Franchesca Angelou d. favorited Multicolored Collage Handbag
02 Aug 10:37
-
Nyssa P. favorited Multicolored Collage Handbag
24 Jul 16:16
-
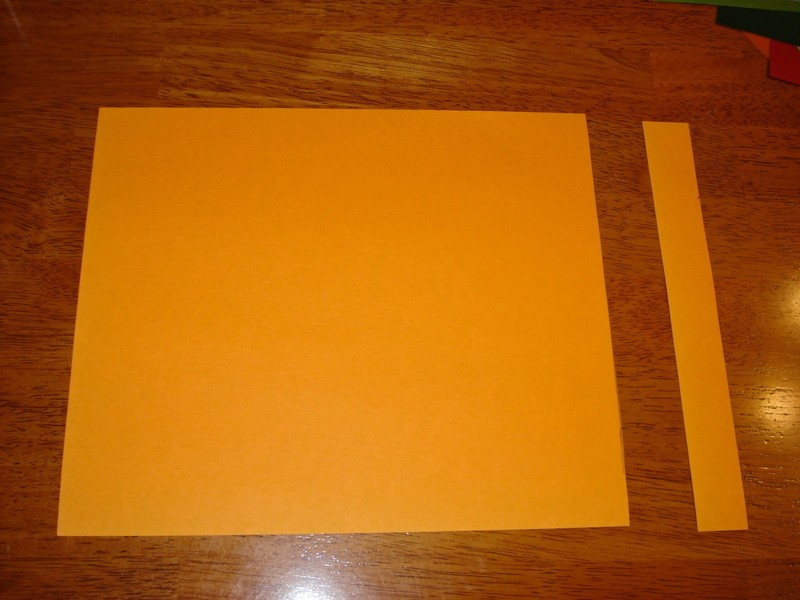
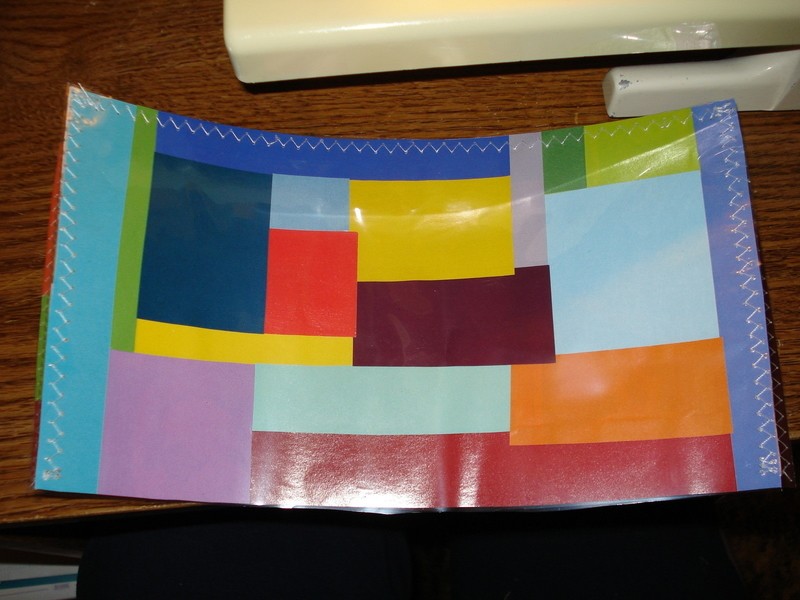
 Step 1
Take an 8 1/2" X 11" piece of colored paper.
-
 Step 2
Cut off an inch from one side, making the paper 8 1/2" by 10".
-
 Step 3
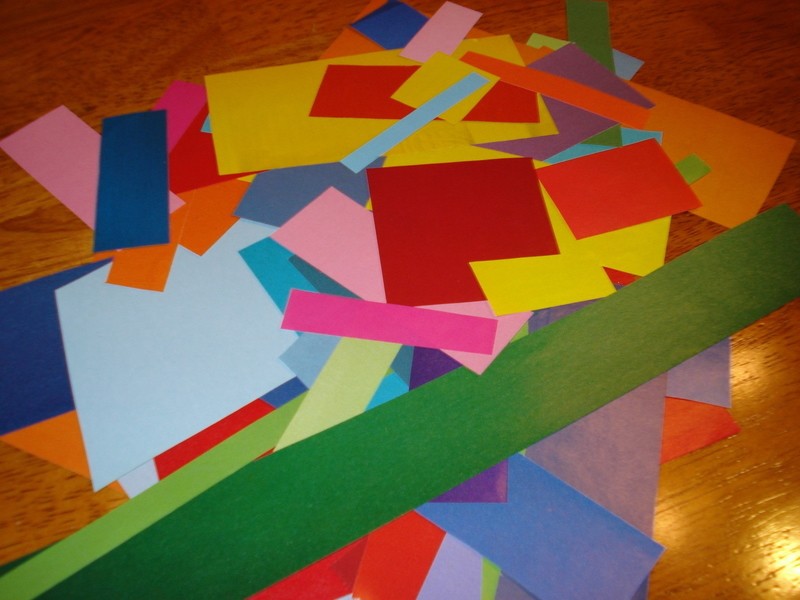
Gather a ton of colored magazine paper (cut in squares and rectangles) and place in a big pile.
-
 Step 4
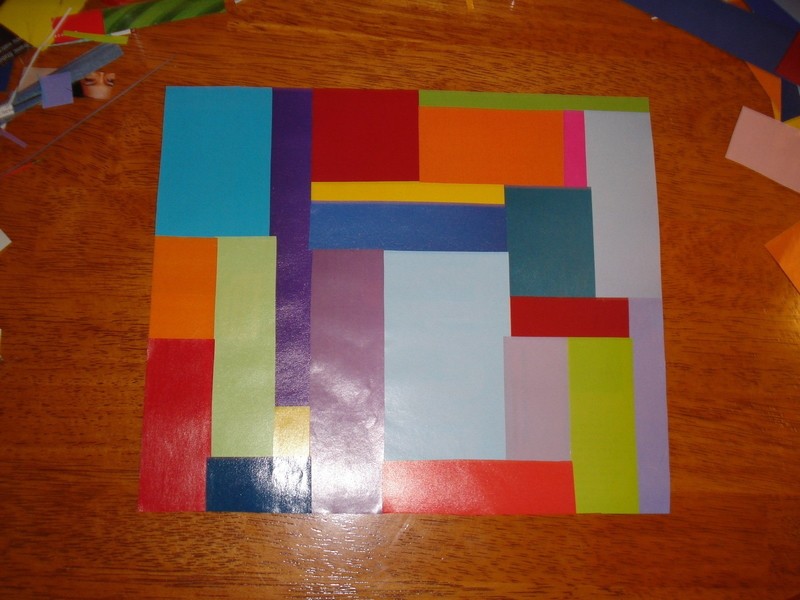
Start glueing your magazine pieces to your paper, to form a collage. Cut off any excess magazine papers hanging off the edges. Once finished it should look like this.
-
 Step 5
Now, fold the paper about 3 inches, like so. This will be the flap.
-
 Step 6
Cut a new piece of paper 5 1/2" by 10". And do the same as you did in step 4, making this a collage too.
-
 Step 7
Once finished it will fit perfectly inside your first collaged page.
-
 Step 8
Now time to add expanders. This will make the bag be able to open larger so you can fit more things inside. Cut two pieces of colored paper 5 1/2" X 3". Collage these papers as well.
-
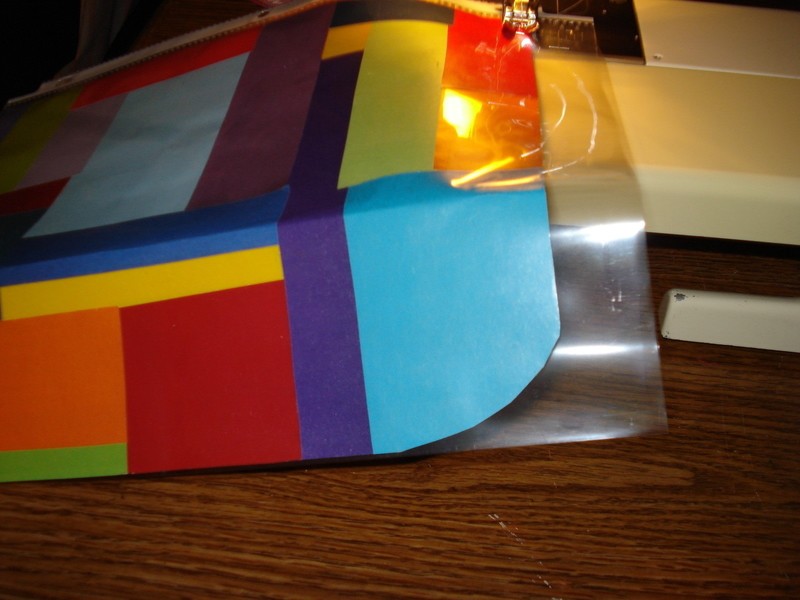
 Step 9
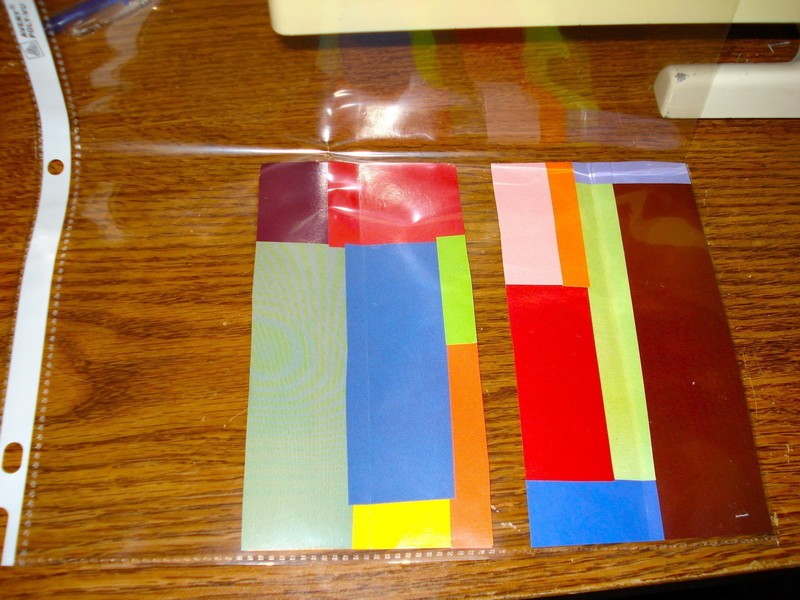
Now time to start sewing! Place the expanders in a clear plastic sheet protector.
-
 Step 10
Cut out the plastic around the paper and sew around the edges. I used white thread with a zigzag stitch but feel free to pick whatever thread or stitch you prefer.
-
 Step 11
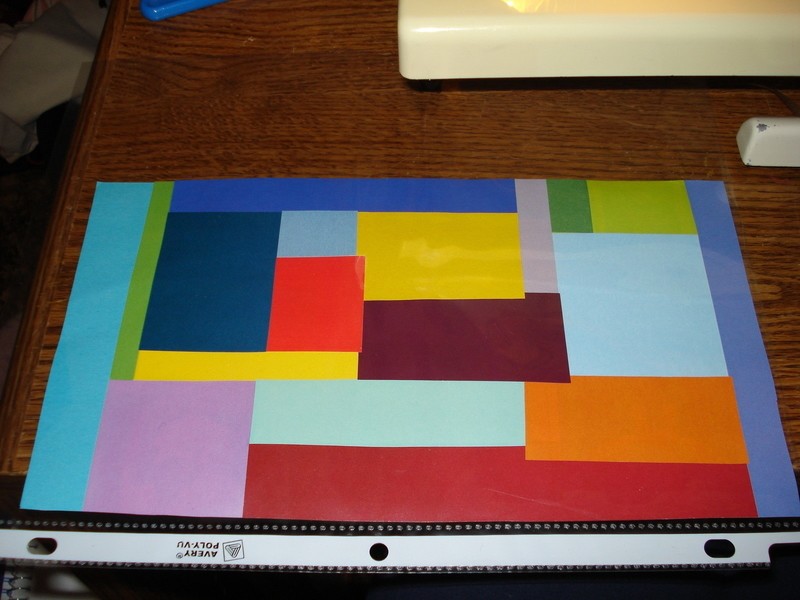
Put the smaller collaged paper the one that is 5 1/2" by 10" in a new clear plastic sheet.
-
 Step 12
Now take one of the expanders and place wrong sides together and sew along the edge.
-
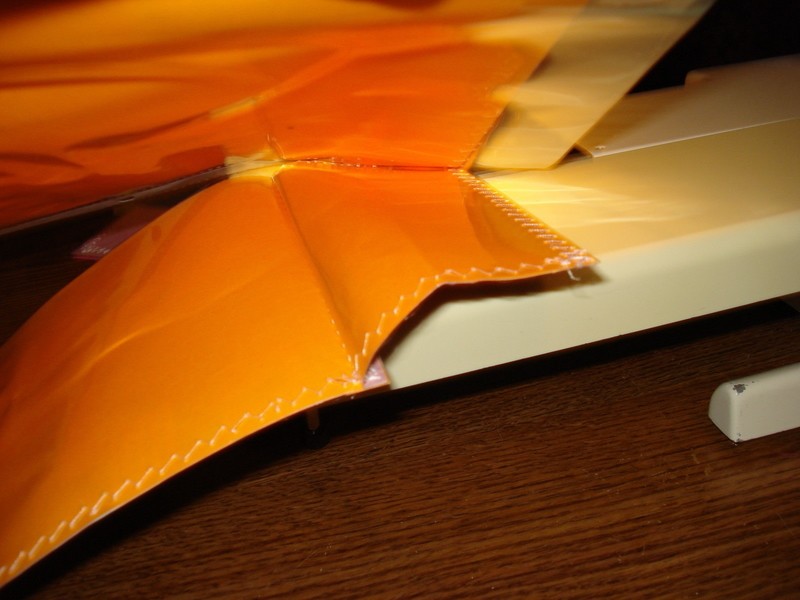
 Step 13
Sew the other expander to the other side and fold the expanders in half, also cut off the excess plastic, and it should now look like this.
-
 Step 14
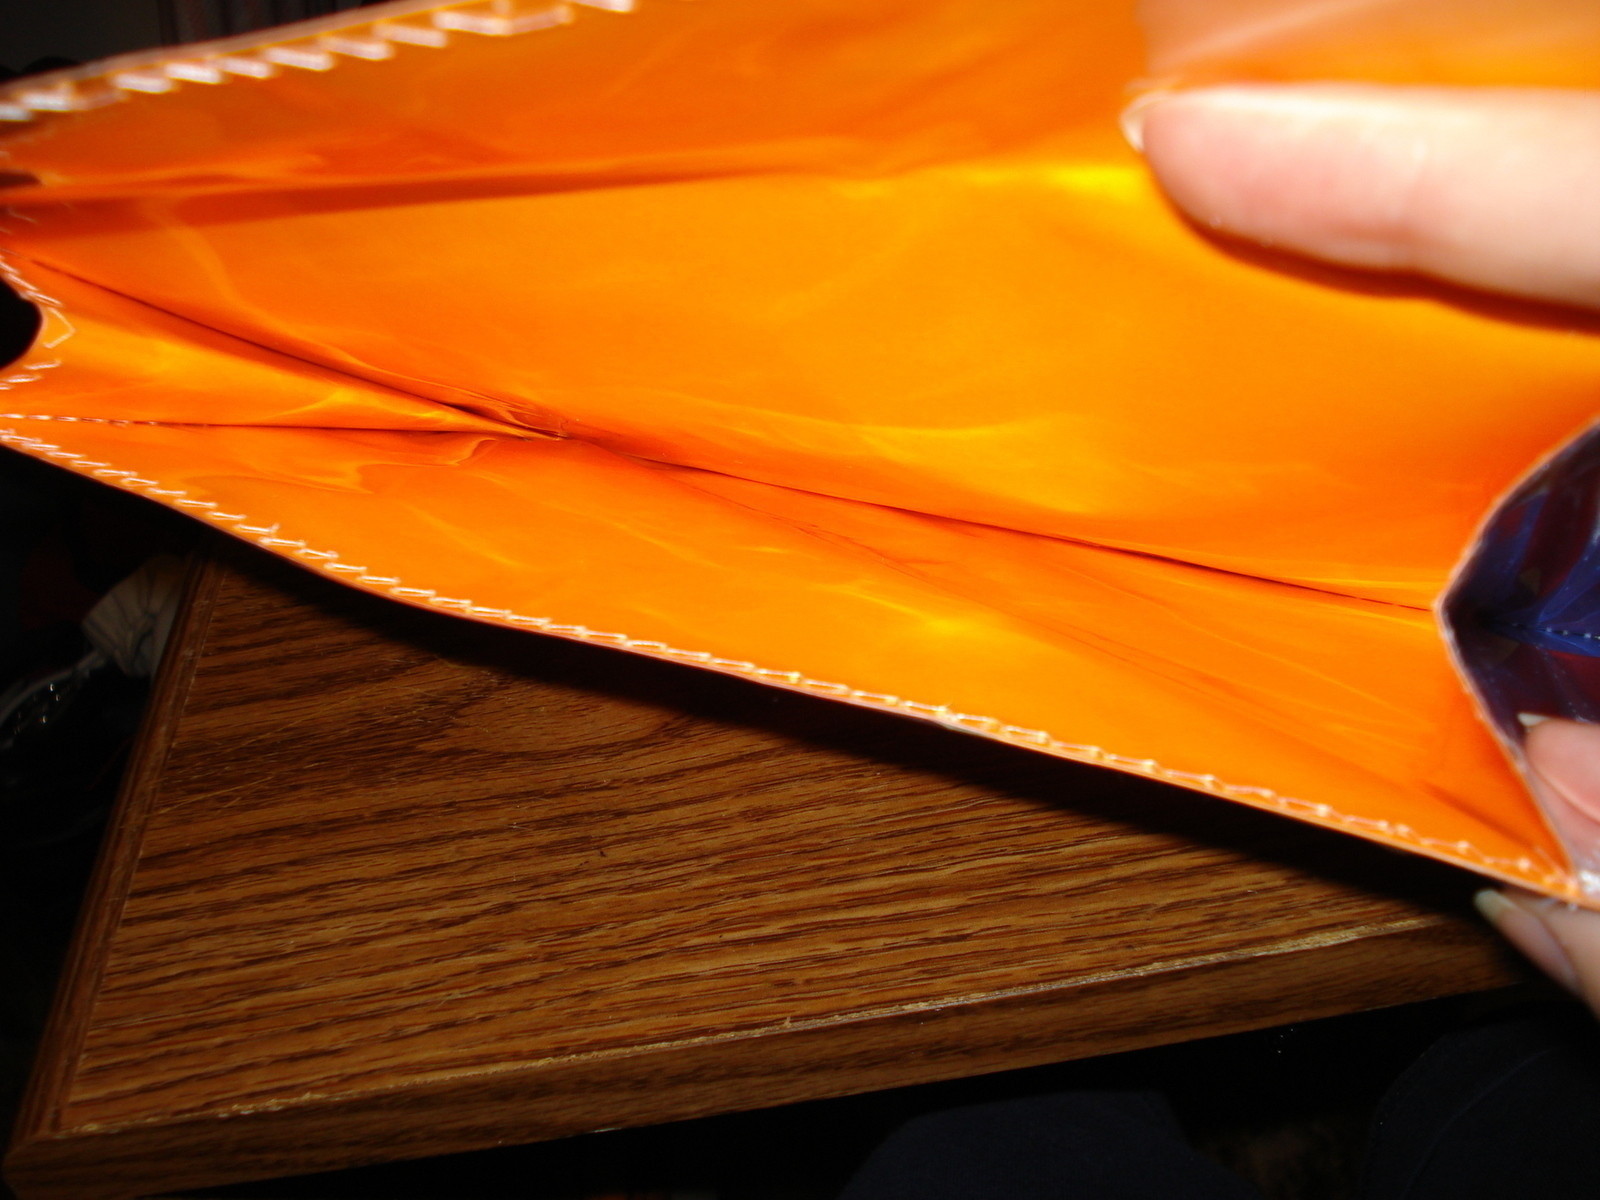
Sew one side as pictured you can sew both if you please but it is not necessary.
This picture is of the backside of the photo in step 13. -
 Step 15
Now, pick up the biggest collage paper and make rounded edges on the folded side. I would recommend practicing on an extra piece of paper before actually cutting the collage. Place in clear plastic bag.
-
 Step 16
Now this is the hard part. Place the piece you just sewn with the expanders attached and place with the wrong sides together, under your larger collage piece. make sure that the long edge that you had sewn is facing you. Also make sure that you only get the one side of the expander while sewing and not both.
-
 Step 17
Sew all around the edges and dont forget the other expander on the other side. And cut off excess plastic.
-
 Step 18
The last thing to sew is the bottom. Just sew it straight across.
-
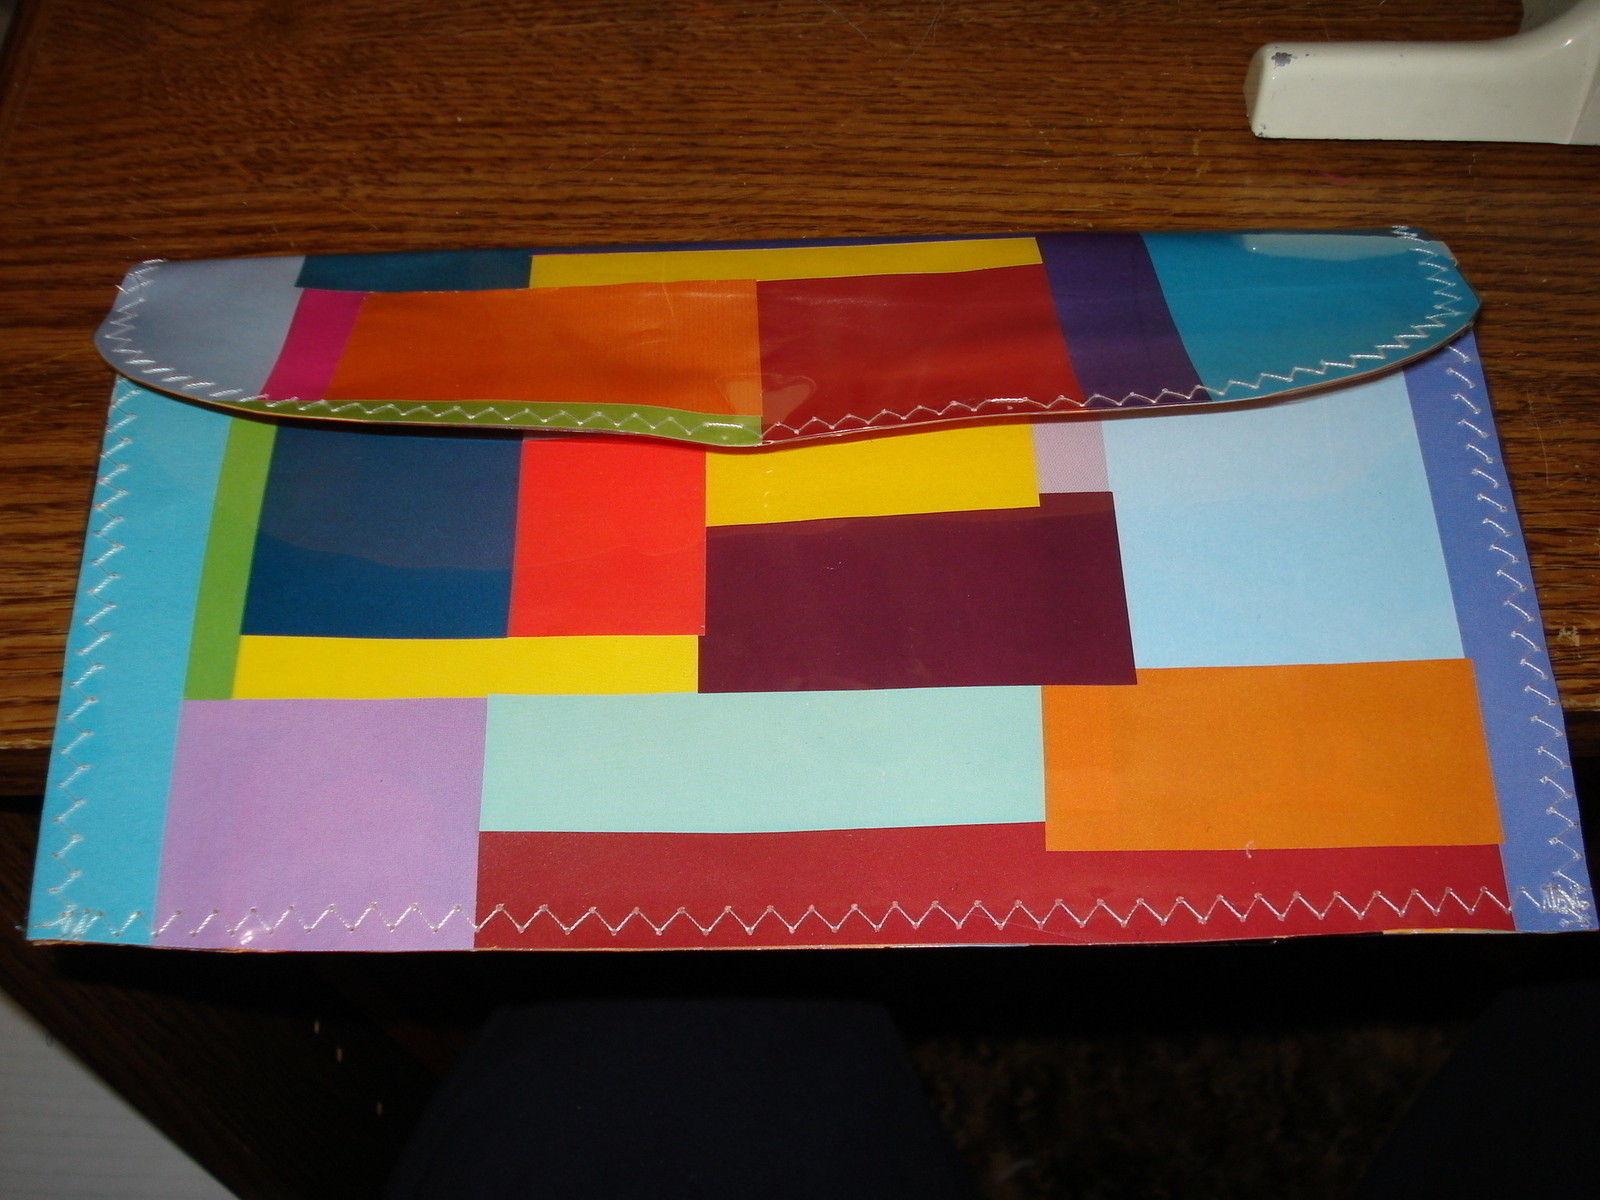
 Step 19
You are now done sewing! One step left, place velcro on the flap, this keeps the handbag closed. Yay!!! It is finished!
Feel free to leave comments and questions!


and great job on the tutorial