About
These are probably the worst pies in London...
Are you as excited as me for halloween? No? Shoo.
Anyways, I am hosting a Burton themed Party this weekend and decided to do Mrs. Lovett as my costume. Gathering the outfit is super easy for a little goth kid like me, her props are easy to get and I found 12 plastic roaches for just 2 bucks... ;)
These "Pies" are FOR DECORATION ONLY! THS IS NOT A FOOD RECIPE. Just to make sure...
As I publish this tutorial, the pies are NOT done. They still need to dry and be painted a bit, but I decided to show you anyways so you'd get them done in time if you wanted to.
I promise to later add pictures of the finished pieces - and party pics with the costume to go with them of course :D
Tags
-
 Zombie Babe added Mrs. Lovetts Meat Pies to All Hallow's Eve
12 Nov 07:22
Zombie Babe added Mrs. Lovetts Meat Pies to All Hallow's Eve
12 Nov 07:22
-
 Anna J. favorited Mrs. Lovetts Meat Pies
29 Oct 20:57
Anna J. favorited Mrs. Lovetts Meat Pies
29 Oct 20:57
-
 Mi.ezekatze published their project Mrs. Lovetts Meat Pies
29 Oct 08:29
Mi.ezekatze published their project Mrs. Lovetts Meat Pies
29 Oct 08:29
You Will Need
-
 Step 1
First, make a simple salt dough. Mix 2 units of flour, 1 unit of salt and small sips of water, first stirring with a fork and later working with your hands untill you get a nice dough.
It might feel very rough and sandy at first due to the salt but it will go away.I used a measuring type of spoon for this and used 4 spoons flour and 2 spoons salt. It's enough to make two small pies.
-
 Step 2
Make a pie dummy from aluminum foil. It makes the pies lighter, dry quicker and saves a lot of material when you don't make the whole pie from dough. Also I guess the dough would never actually dry through and might go bad.
-
 Step 3
Roll out a piece of your dough and cut a strip that is a bit wider than your aluminum dummys height.
-
 Step 4
Wrap the strip around the dummy and carefully push on it so the ball wont fall out. Also, Push the bottom down a bit, folding under whatever dough is left.
-
 Step 5
Cover the topside of your "pie" with a rolled out piece of dough and trimm the edges. Push the dough together at the 'seam'. You do not have to be neat, Mrs. Lovett sure aint!
-
 Step 6
I ripped a hole in the "crust" and placed one of my plastic roaches inside. I removed its back legs to make it easier and later pushed them into the side seam of this pie too.
-
 Step 7
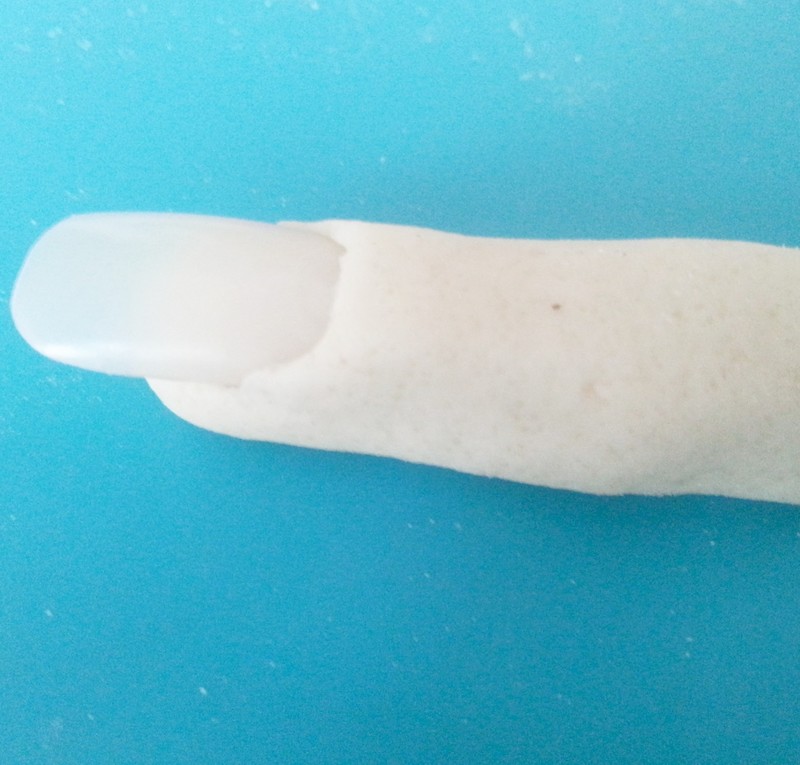
For the second pie, create a stub from some leftover dough and shape it like a finger (smaller between the knuckles).
-
 Step 8
Cut your fake nail tip to a more or less natural nail shape and carefully (!) push it into the 'finger', staying as close to the surface as possible.
Try shorter nails, "bitten" nails, claw like red nails, the possibilities are endless with this. -
 Step 9
For this dummy, push a little space into the aluminum to allow your 'finger' to fit in nicely. Apart from that, continue as above.
-
 Step 10
voilá!
Let them dry, for at least a day!
You COULD bake salt dough, but I decided against it due to the plastic involved and to be honest because I didnt really know if the aluminum would be a problem. Also, I didn't want the dough to crack which to my experience it seems to do more often when baked.
-
 Step 11
When dry, you can decorate them further. I intend on painting the nail, creating browned and burned areas with acrylics and adding clear varnish to give them some shine.