About
Wearable moving cat ears that you can control!
A how-to on how to make your own moving cat ears. I really wanted to make my own but after searching the internets, I couldn't find a tutorial on how to make them without a headband. So I just decided to make my own tutorial. They work very well and I even tricked my sister with them!
Tags
-
 Hannah C. favorited Moving Cat Ears
24 Oct 16:50
Hannah C. favorited Moving Cat Ears
24 Oct 16:50
-
 Tierra T. favorited Moving Cat Ears
26 Oct 19:07
Tierra T. favorited Moving Cat Ears
26 Oct 19:07
-
 CK Garred favorited Moving Cat Ears
05 May 16:54
CK Garred favorited Moving Cat Ears
05 May 16:54
-
 Brittany F. favorited Moving Cat Ears
31 Mar 11:29
Brittany F. favorited Moving Cat Ears
31 Mar 11:29
-
 Aurelie L. added Moving Cat Ears to Accessoires Déguisement
14 Mar 21:19
Aurelie L. added Moving Cat Ears to Accessoires Déguisement
14 Mar 21:19
-
 KirbyBella added Moving Cat Ears to To-make list
03 Oct 01:58
KirbyBella added Moving Cat Ears to To-make list
03 Oct 01:58
-
Versora H. favorited Moving Cat Ears
28 Jul 06:06
-
 Pandora Salvotone added Moving Cat Ears to Favorite Projects ><
23 Jul 02:35
Pandora Salvotone added Moving Cat Ears to Favorite Projects ><
23 Jul 02:35
-
Alana B. favorited Moving Cat Ears
04 Nov 04:34
-
 Broken Bownes favorited Moving Cat Ears
25 Oct 23:39
Broken Bownes favorited Moving Cat Ears
25 Oct 23:39
-
 Step 1
Bend your wire hanger into a headband shape, cut off any excess, and twist any openings closed. You may need to use the wire benders for this. Don't forget to make sure it fits well.
-
 Step 2
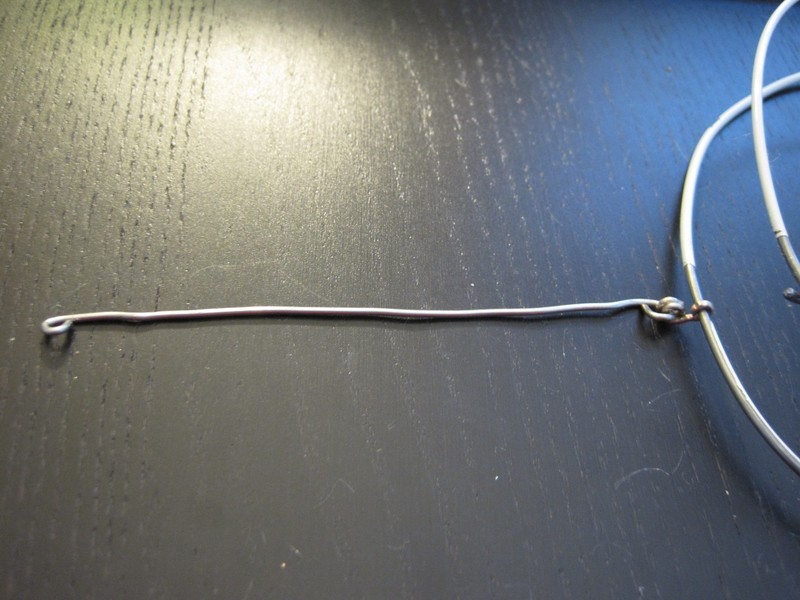
Cut a piece of the 16 gauge wire that is about 2 cm long. Bend the wire around the front side of the headband so that it doesn't fall off and curl the excess into a ring. Do this TWICE at the top of the headband. It's ok if they slide around right now because they will be fixed later. In this picture, I hot glued them to stay in place but that is optional because the glue eventually fell off.
-
 Step 3
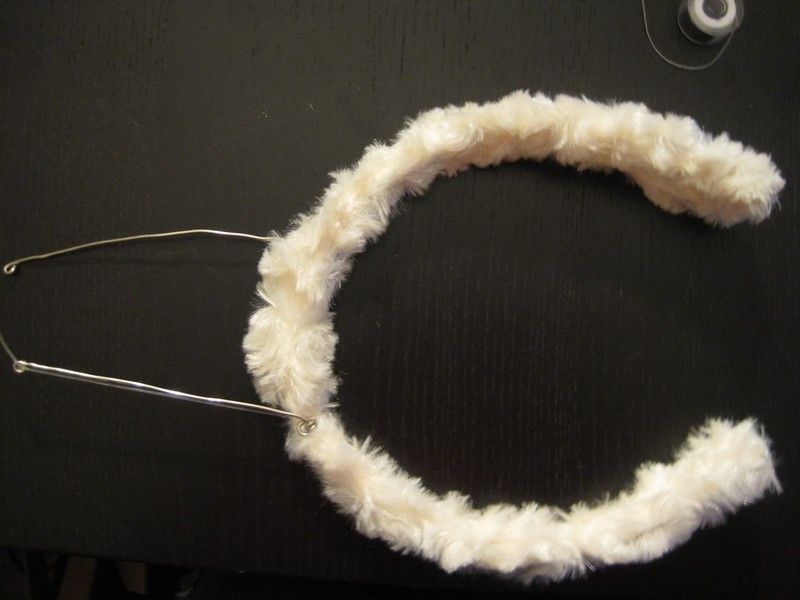
Take two pieces of wire about 5 inches long and curl the ends into rings(using the wire benders) like in the picture. Attach the rings at the ends of the two long wires to the two rings attached to the headband. Only one side of each 5 inch wire should be attached. Make sure that the wire won't fall off but can still move from side to side.
-
 Step 4
Cut a strip of your desired fabric and sew it over the headband. DON'T FORGET TO CUT HOLES FOR THE WIRES TO GO THROUGH! The wires and the rings attached to the headband should come out through holes in the fabric. This is when you should fix the rings. It can easily be fixed by sewing the rings down so they don't move but make sure you didn't sew the 5 inch wires down. They need to be able to move around.
-
Step 5
Cut your rubber band in half so you have two pieces and attach one end of each to the ends of the 5 inch wires and the other end should be tied down to the headband next to the ring holding the wire. The rubber band should be pulled tight so that when you pull the wire to the side, it snaps back into place.
-
 Step 6
Take your desired fabric and cut two triangle shapes. These will be the ears. The bad side will be the inside of the ears. I highly recommend fabric that requires hardly any force to bend it down. For example, the fabric should flop down if while holding one side, a point of it is held in the air and let go.
-
 Step 7
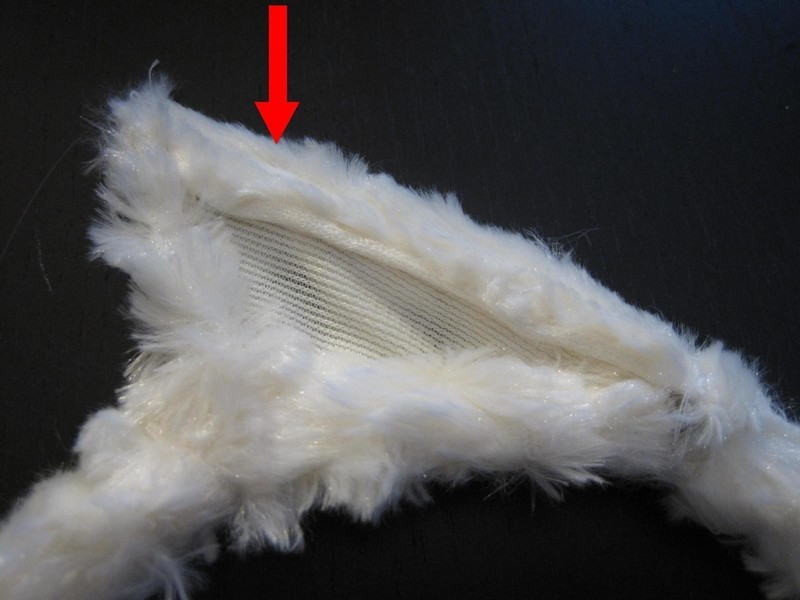
Sew the sides of the ear pieces down like so but one of the sides should form a pocket that the wires can fit into.
-
 Step 8
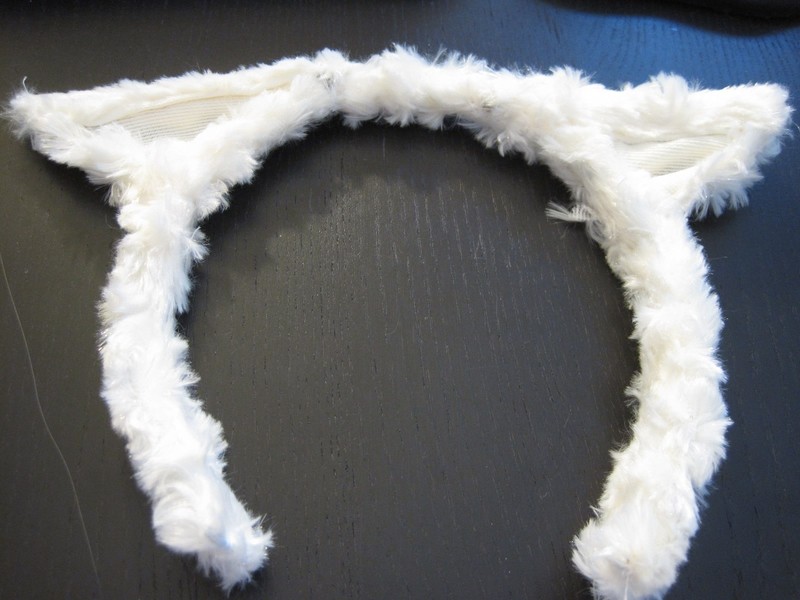
Slide the wires into the side pockets you made and sew the ears down. The wires should be in the side that the arrow is pointing at. Test the ears to see if they still snap back after bending them.
-
 Step 9
Attach a long strand of invisible string to the ends of each ear. Now when you pull on the string, the ears will pull down and snap back up when let go of.
-
 Step 10
Now you have your own adorable cat ears! If you tie the the invisible string to a belt around your stomach or to your pants, the ears will go up and down when you move your head or you could just control them with your hands by pulling the strings.