About
Truly Elegant Ornaments On The Cheap!
This is a type of modular origami kusudama made into an ornament....called a star sea, I am not sure who the original author of this particular fold is. I hope you enjoy this tutorial. This modular origami is put together with both glue and tape (on the inside of module) for stability as they will be used as ornaments, which will be "handled" from time to time.
-
 Jenn favorited Modular Origami Seasonal Ornament
07 Jul 01:09
Jenn favorited Modular Origami Seasonal Ornament
07 Jul 01:09
-
 teresa.moorman.12 favorited Modular Origami Seasonal Ornament
26 Jan 14:02
teresa.moorman.12 favorited Modular Origami Seasonal Ornament
26 Jan 14:02
-
 buttercup303 added Modular Origami Seasonal Ornament to origami / papercraft
03 Jul 13:24
buttercup303 added Modular Origami Seasonal Ornament to origami / papercraft
03 Jul 13:24
-
 ida h. favorited Modular Origami Seasonal Ornament
05 Jun 16:07
ida h. favorited Modular Origami Seasonal Ornament
05 Jun 16:07
-
Alex L. favorited Modular Origami Seasonal Ornament
03 Dec 12:07
-
 SemperJay favorited Modular Origami Seasonal Ornament
03 Dec 10:56
SemperJay favorited Modular Origami Seasonal Ornament
03 Dec 10:56
You Will Need
-
 Step 1
You will need 12 pieces of square paper measuring 3 inches by 3 inches each.
-
 Step 2
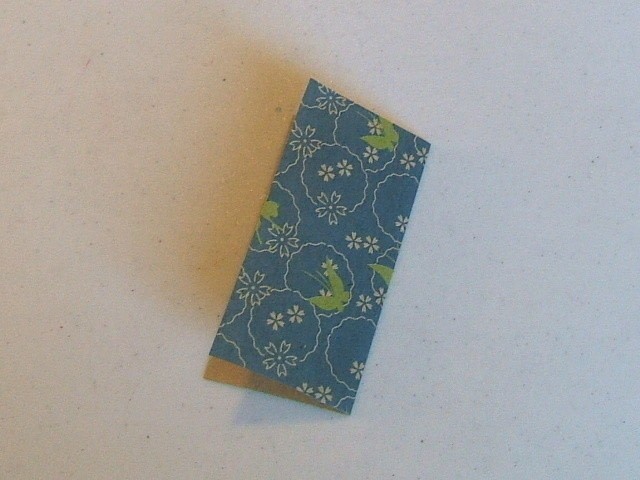
Take the first piece of paper and fold it in half....then unfold.
-
 Step 3
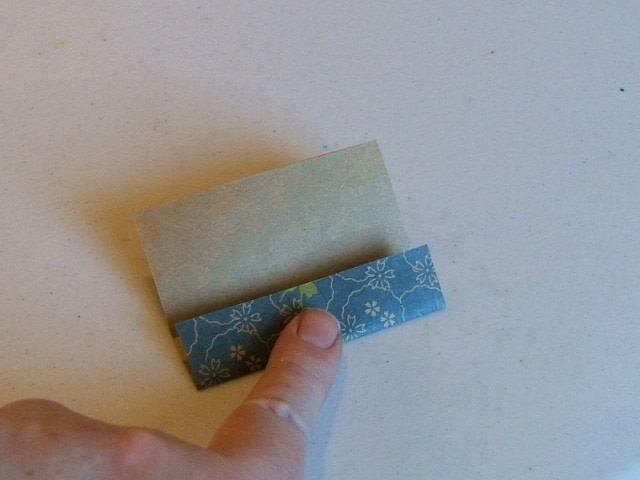
Take one side of the paper, and fold up to the center crease that you just made in step 1 (shown here). Repeat this step on the other side.
-
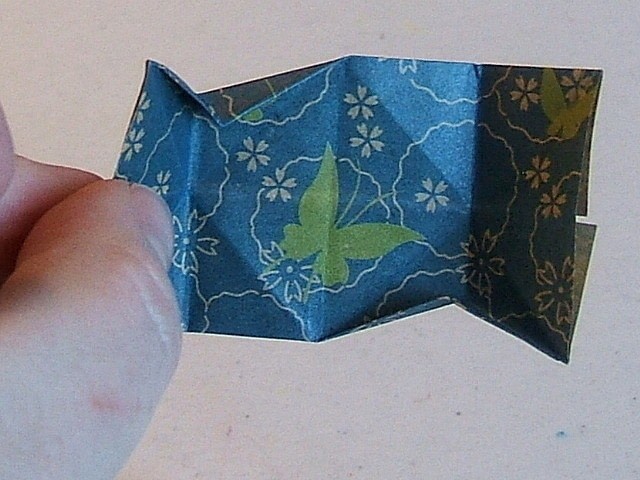
 Step 4
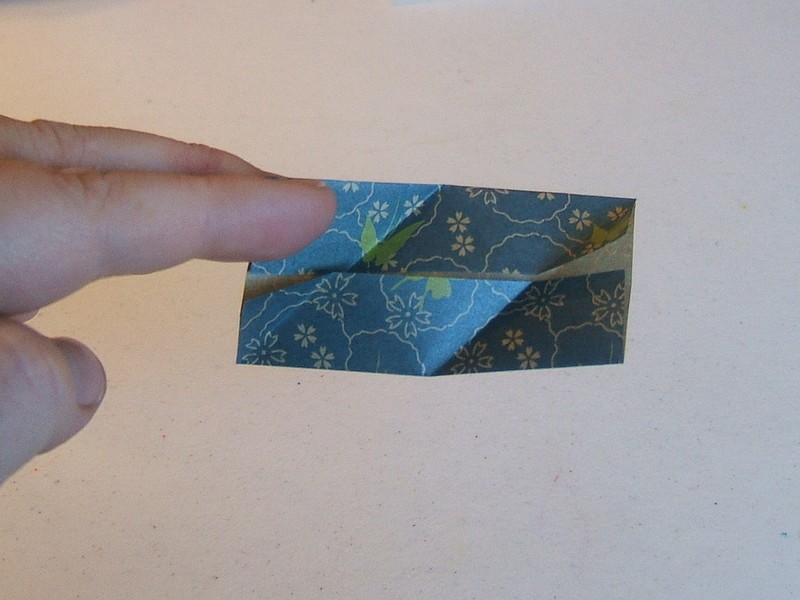
This is what you should have so far....
-
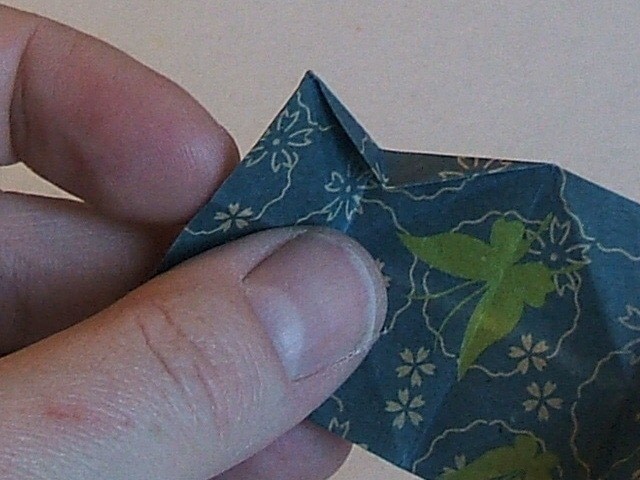
 Step 5
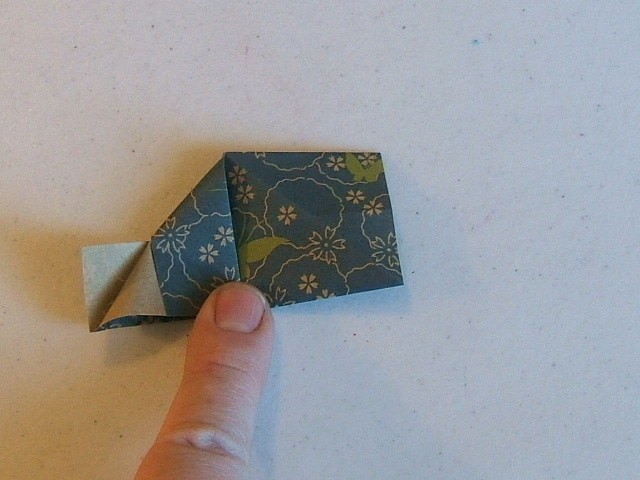
Take the top left hand corner of the module and fold down until it's flush (shown here). Crease.
-
 Step 6
Take the bottom right corner (shown in step 5), and bring the corner up to meet the triangle shape created in step 5....shown here. Crease. This is what your module should look like now.
-
 Step 7
Now...unfold....This is what the crease marks look like. Turn the module over.....
-
 Step 8
This is the back of the module. Repeat steps 5 and 6 on this side....
-
 Step 9
....First corner...fold down as before...
-
 Step 10
...bring the other corner up, just as before, and crease.
-
 Step 11
When you unfold the two triangle folds, you will see two (x) patterns shown here....Fold the module back on itself...in half...(shown in next step)
-
 Step 12
Like...this...Crease.
-
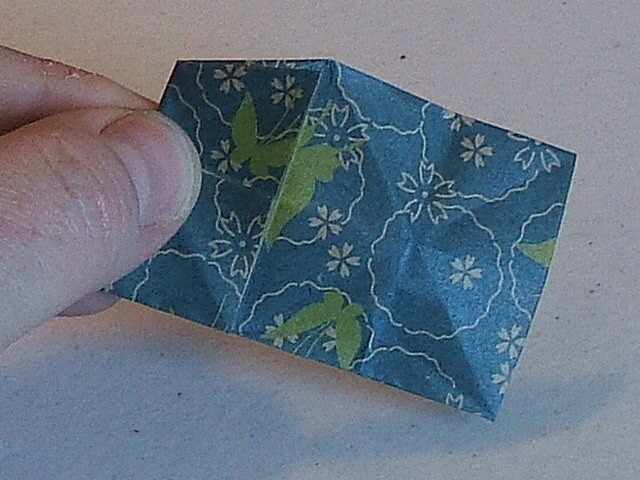
 Step 13
The crease just made creates a separation line between the two (x's) shown here.
-
 Step 14
Take the left side of the module, and bring toward the center line....then crease it. Do the same for the right hand side. This will place vertical line down the center of each (x).
-
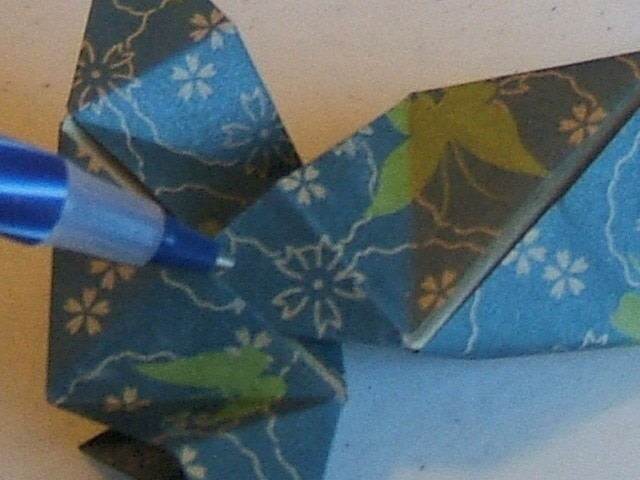
 Step 15
Look closely at this picture. We are going to make a small (v) crease in the top part of the first "x" shown here.
-
 Step 16
Once you've made the small "v" crease, we are slowly going to fold the left side towards the center line of the module....You will notice how the "v" fold is tucking in....
-
 Step 17
....keep closing...
-
 Step 18
...and it's closed.....repeat the process on the other side EXCEPT, create that small "v" crease on the opposite end of the module. Then fold in as before. Look at step 19.
-
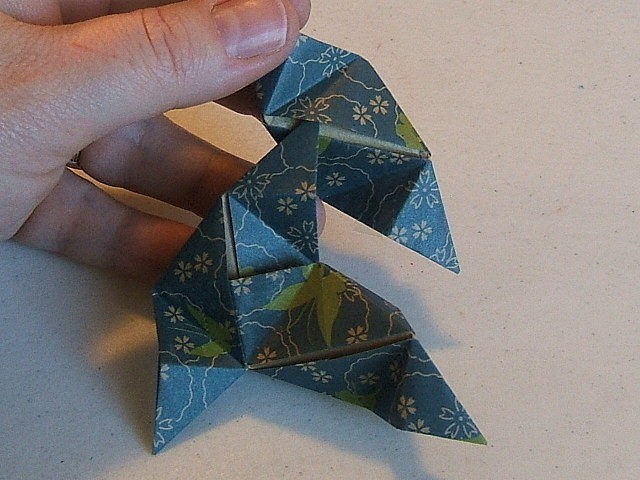
 Step 19
Ok! This is what your module looks like now! Unfold the two flaps gently....
-
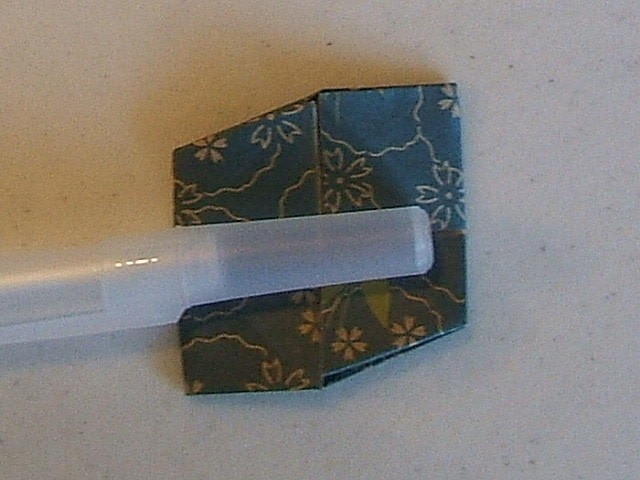
 Step 20
Now, bring the top left corner down to the bottom-center of the module...shown here. Then bring the bottom right corner up to the top-center. See next step.
-
 Step 21
Wonderful! You have completed the module. You must have a total of 12 modules to make the ornament.
-
 Step 22
You can create more sparkle to your module by inserting and glueing a piece of square foil to the framed center of the module. (optional)
-
 Step 23
As you can see here, I've just glued the insert in....
-
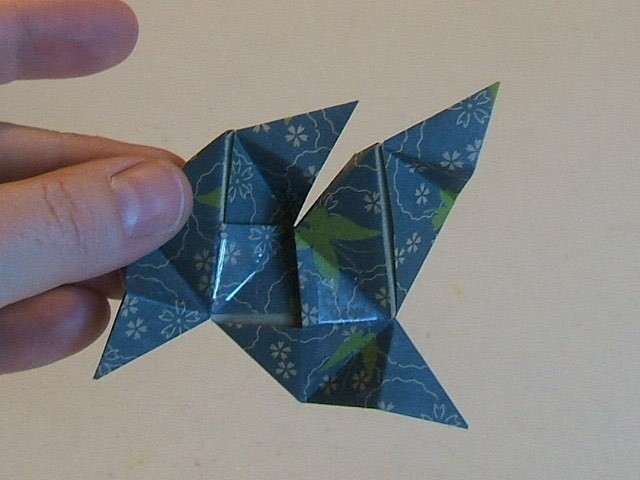
 Step 24
This is what the finished module looks like. Make 12 of them, and then we will put the whole thing together.
-
 Step 25
Ok...lets put together....
-
 Step 26
If you look at the modules here, you will notice that there are "tabs" on either side of each module, and on the back of it, there are "pockets".
-
 Step 27
Turn two pieces over on their backsides....insert "tab" of one module into one of the "pockets" in the other module...shown here. Add a tiny piece of tape for stability.
-
 Step 28
When you turn the two modules over, they should look like this so far.
-
 Step 29
So far, you have taken module 2 "tab", and placed into module 1 pocket. Now place module 1 "tab" into a module 3 pocket shown here. Add a wee bit of tape to stabalize.
-
 Step 30
This is what you should have so far...now we are going to join all three together as a starting unit for the completed ornament....view next step.
-
 Step 31
Join the three modules together by tucking module 3 "tab" into module 1 pocket. We want to create a "hollow" triangle effect on the inside. View below.
-
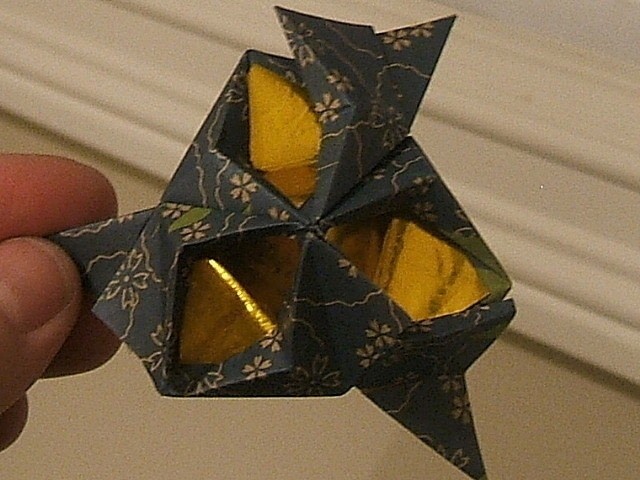
 Step 32
This is what the inside starting ring looks like! Here is what it looks like on the outside....next step please!
-
 Step 33
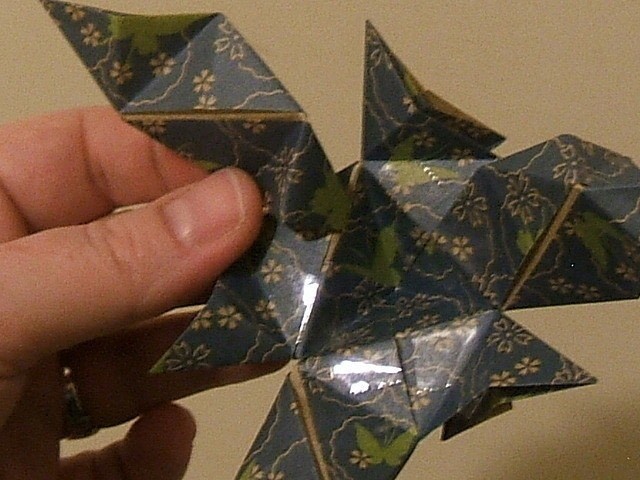
This is how it looks on the outside. AND this is the 3 ring unit that we build upon. Only 9 more modules to attach! This module is made up of 3 unit "TRIANGLES" seen here surrounded by a 4 piece "DIAMONDS" or "STARS" pattern. Look at the next step.
-
 Step 34
This is the "STAR" or "DIAMOND" pattern that surrounds the "TRIANGLE" units. This will help you create the ornament....
-
 Step 35
Turn module over to the back again....grab another module, (module four), and insert "tab" into the side pocket of the triangle shown here. Add a bit of tape. Now...grab another module (module 5), and insert "tab" into another inside pocket of the hollow triangle. Grab another module, (module 6), and insert "tab" into another open pocket of the hollow triangle....
-
 Step 36
This is what it looks like now from the front. The modules that you just added (4,5,6) are the longest points of the module shown here. Turn back over....
-
 Step 37
When you turn model over you will see the 3 longer points (just created by adding modules 4,5,6)and three short "tab" points. The short points are where you will insert modules 7,8 and 9 onto. Secure with a bit of tape.
-
 Step 38
Okay, this is what your modules look like from the back so far. Now you have the means to create 3 more "hollow triangles" by tucking in the shorter "tabs" into the nearby pockets. Again, secure with a bit of tape.
-
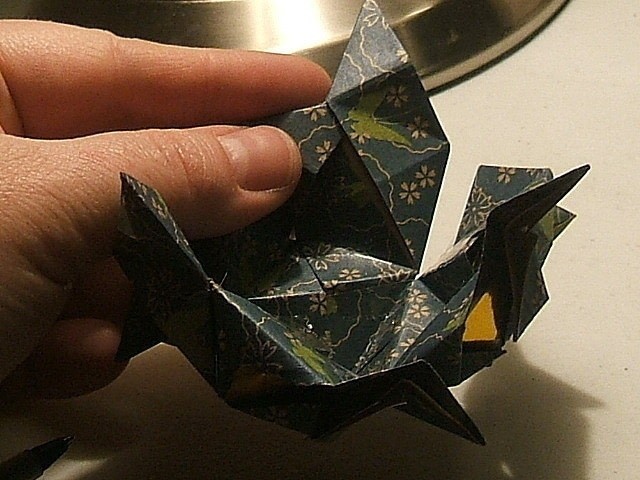
 Step 39
Here, we are creating the second "hollow triangle.....continue around the model in this manner....
-
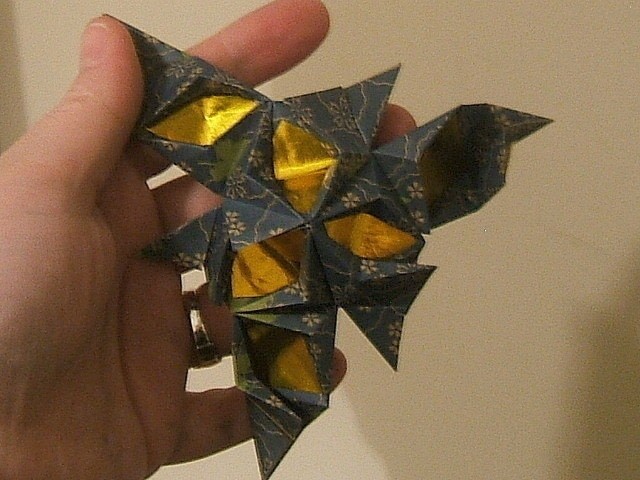
 Step 40
This is what your model looks like now. It has a total of 4 hallow triangles. Add modules 10,11,12 into the open side pockets of the surrounding hallow triangles. Insert the shorter surrounding "tabs" into 10,11,12 pockets, and secure with a bit of tape. Continue in this manner until the ball is closed, and your done!
-
 Step 41
The best way to understand this tutorial is to follow along with your modules as you read the tutorial. If you just scan the directions without the modules in hand, then you will find this quite difficult....so make the modules first, and then proceed....